
Simple Home Brewing Water Treatment
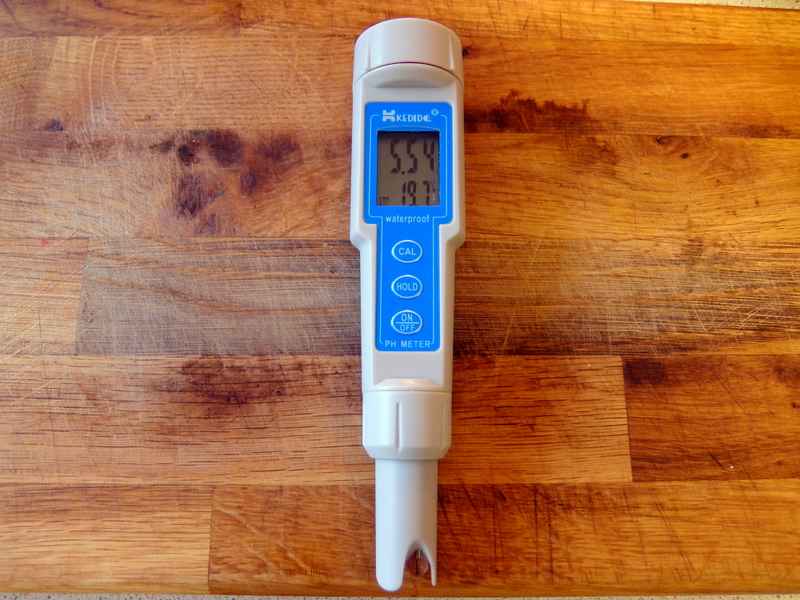
I was recently sent this pH meter by Meterics.com (thanks guys) so what better time to talk about water chemistry.
Any article about water chemistry usually starts with the line, “Water chemistry is a complex subject”. So how does the home brewer deal with such a complex subject? What affect does it have on a beer?
Well let’s try and make it simpler.
To the outsider brewing can be complex and hard to understand and no aspect of brewing more so than water chemistry.
If you brew with extract or beer kits then all you really need to do is remove the chlorine from your water supply. Take the steps in this post and you are done. No need to read any further.
If you brew all grain though read on.
Depending on where you live the water that you use will be different. The composition of water in Cornwall for example is different to that of water in London just a few hours up the road. The same ingredients will produce a different beer depending on the water source, so what can the all grain brewer do to make sure they are making the best beer?
Table of Contents
Blinded By Science
Water chemistry is a difficult subject to tackle and let’s face it a boring one to read about. I am certainly not motivated enough to learn all the technicalities of it as a home brewer all I want to know is how to make great beer.
If you do want to learn the technicalities of water chemistry (good for you) then start with something like Water by John Palmer. It’s a great book and contains everything you need to know and progress from there.
Some people like getting into the technical aspects of home brewing. The scientific part of brewing is complex but still accessible and it’s a worthwhile endeavour.
Many people however may just want to make the best beer they can. Not having to get too involved with technical information, chemistry and analysis. A basic understanding of water is all that’s needed.
Finding Out What’s In Your Water
If you brew with extract or kits you don’t need to worry too much about your water. Just make sure you remove the chlorine that’s present and you’re good to go.
All grain brewers though, should be concerned with what their water composition looks like. The minerals and alkalinity of your water supply affect the mash pH and the flavour of your beer.
pH is important in the mash because the enzymes that convert starches to fermentable sugars work in a range between 5.2 to 5.6. The minerals of your water supply will help determine where the pH falls when you mash in your grain.
Take a look at this article on testing you water supplies alkalinity using a Salifert Test.
The type of grain you use in the recipe will also affect the pH. Dark and roasted grains will lower the pH of the mash making it more acidic. This is why some water is good for brewing pale beers and other for dark beers.
Fortunately we can adjust the composition of the water to suit most beer styles.
The main components we are interested in are calcium, magnesium, sodium, carbonate, sulphate and chloride. As well as these the Alkalinity of the water has an effect.
Getting A Water Quality Report
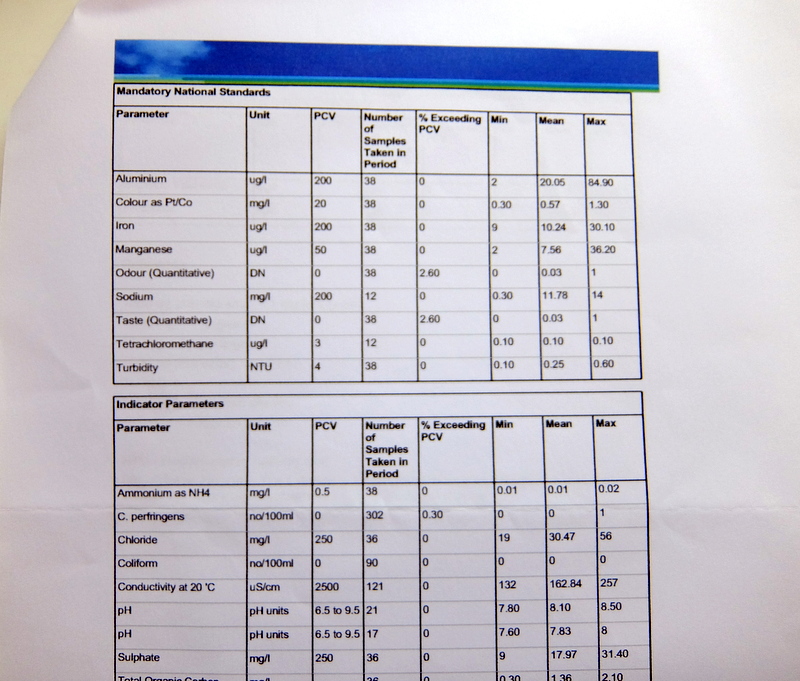
To find out what your water composition looks like you will need to obtain a water report. All you need to do is call your water company and ask them for a water quality report. They will send out to you for free and it will contain all the information you need.
I did this and the report came the next day. I then couldn’t find the calcium content of my water on the report so I phoned them back and they told me over the phone. If in doubt ask!
Getting A Lab Report
If you cannot get a report from your water supplier you can send a water sample off to a brewing lab and for a small price they will analyse the composition of your water supply.
One such lab here in the UK is Murphys & Sons and they will even recommend the mineral additions you need to add for certain styles of beer so this really is a no fuss method. I believe Ward Labs in the US is another option for water analysis.
What To Do With The Figures
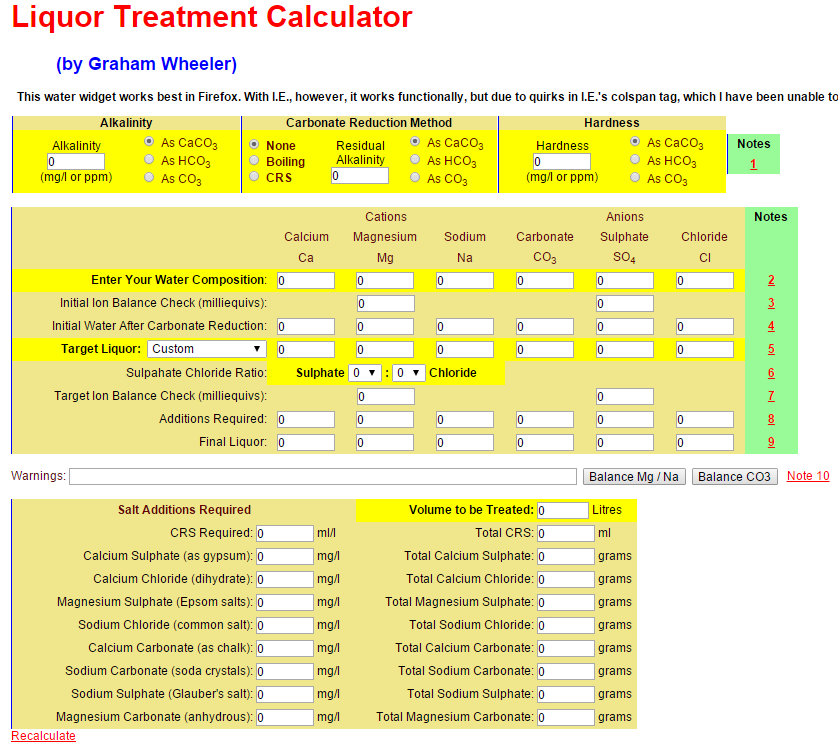
There are various calculators online some simpler than others. I’m recommending this one at Jims Beer Kit. I found it the simplest, the one I use most often and it has produced me some excellent beers.
Take the figures from your report and plug them into the calculator. That is all there is to it, select what style of beer you are producing and it will give you the salt and mineral additions to get into the recommended range for that beer.
There are various other calculators available, popular options currently are Bru’n Water or EZ Water Calculator. Both options a far more detailed than the above and great alternatives when you get to grips with them.
Adjusting Your Water
Once you’ve go your figures it’s time to do the water treatment. If your water source has a fairly high alkalinity then you may need to reduce the carbonate (CO3) content with CRS (Carbonate Reduction Solution) which is a blend of acids. Target levels of alkalinity are between 30-50mg/l for pale beers and below 100mg/l for Stouts and Porters. The CRS is mixed in with water before you brew.
The mineral additions are added to the grain before mashing. As the minerals aren’t soluble in water they need to be mashed to be dissolved. Mixing up the brewing salts when you weigh out the grain will ensure the are equally spread throughout the mash.
As you can see on the calculator the salt additions are listed so you know exactly what you need to add.
The main salts are:
- Calcium Sulphate (gypsum)
- Calcium Chloride (dihydrate)
- Magnesium Sulphate (Epsom Salts)
- Sodium Chloride (common salt)
- Calcium Carbonate (chalk)
All of these should be available at your home brew shop.
Measuring the pH of the Mash
It’s not strictly necessary but it gives you a good idea of whether your calculations are beneficial. Once you have done the calculations and added your brewing salts the pH should be on or pretty near the 5.2 – 5.6 range.
If you want to double check you can buy a pH meter, mine was supplied by Meterics.com or use pH test strips. pH meters need calibrating frequently so you will need buffer solutions to do this.
10 minutes after mashing in take a small sample and cool to room temperature. Take a measurement of the sample to confirm the pH.
If all is well the pH of the mash should fall within the ideal range, if it is a few points either side don’t worry the beer will be fine. At the end of the day home brewing is supposed to be a fun hobby. Don’t obsess over small details and you will find your brew days much more enjoyable.
If the pH of the mash is too far out you can still adjust it. If the mash is too low (acidic) add a small amount of calcium carbonate (chalk) to raise it. Do this in small steps (1/4 teaspoon) and stir thoroughly, you shouldn’t need more than 1-2 teaspoons for a 20 litre batch.
If the pH is to high, calcium sulphate (gypsum) will lower it. Again adding incremental additions, stirring and measuring should bring the pH back to an acceptable range.


Leave a Reply
Want to join the discussion?Feel free to contribute!