
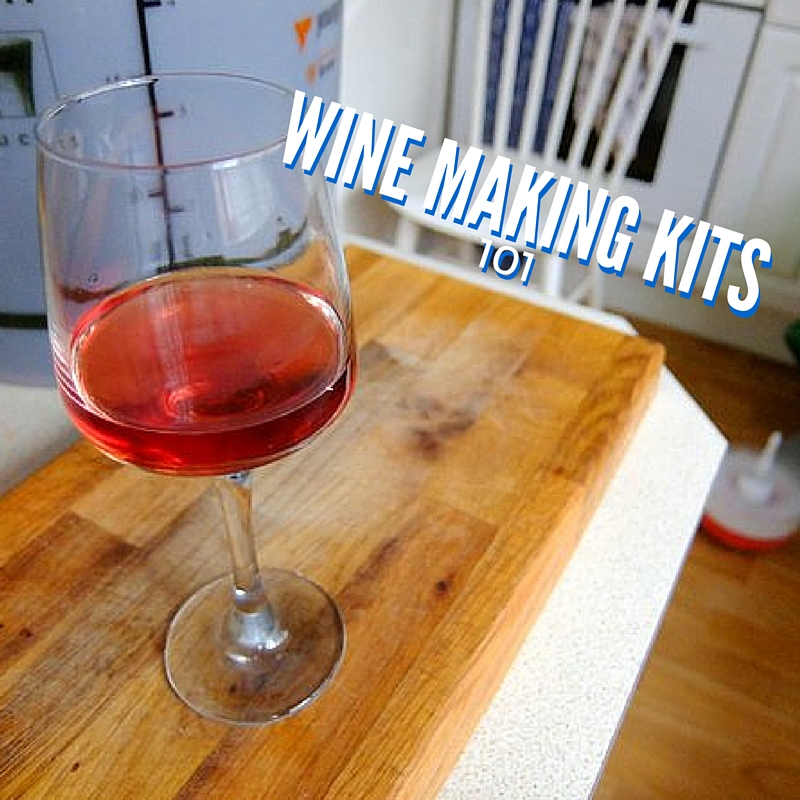
Complete Guide To Wine Making Kits
I absolutely love wine making kits. I was dubious of using them at first thinking that the wine would be inferior to what I could buy at the shops. I have to say though I’m converted. I have got though a couple of Reds, a White and now a Rosé.
The Rosé is what I’m making right now and as I write this it’s conditioning and maturing in my wine rack. I wanted to write about the process of making a wine kit because I really think they turn out well.
You might have the same reaction as me believing that the wine isn’t going to be that good, so you aren’t going to bother getting a wine kit. If I show you the process though it might change your mind.
The majority of my home brewing is beer. I occasionally venture into other drinks and liqueurs but I’d say 90% is beer. Yet my lovely wife prefers wine and I’m partial to a glass as well.
We would end up buying say, 2 bottles a week and at a minimum that would set us back £10 for some ok wines or up to £14 – £18 for more premium bottles. We have friends over and a bottle would be drunk in that one night. Over the course of the year the cost of wine adds up.
This is where the wine making kits come in. I thought about how much money I save brewing my own beer, it should be possible to do the same with wine.
Table of Contents
Choosing a Wine Making Kit
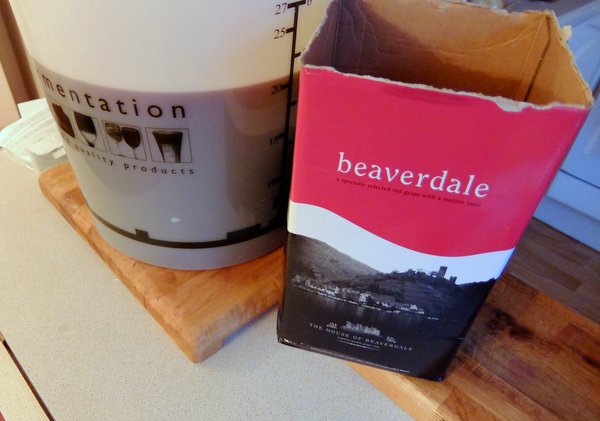
I opted for a Beaverdale Chablis Rose 30 bottle kit. Smaller 6 bottle wine making kits are available, but I will focus on the 30 bottle kits here. I have used this brand a couple of times and also the California Connoisseur varieties. These wine kits aren’t the budget 7-day kits, so are more expensive. Like most things though you get what you pay for.
The reasons why I choose these particular wine kits are:
- Varietal: Unlike the budget kits these premium kits are varietal, meaning they are made of a particular type of grape. Instead of just saying “Red Wine” you can make a Cabernet Sauvignon or a Syrah for instance. Also if you’re making a wine that is usually matured in oak barrels, such as Rioja for instance, the kit includes oak chips to add, which replicates the maturing process.
- Grape Concentrate only: A lot of the budget kits require the addition of sugar to the grape concentrate. I have spoken about this before with beer kits. If you add sugar you are adding fermentables without any flavour. This isn’t ideal. The primary goal of brewing is to create great flavours. The premium wine making kits are purely grape concentrate. You let this back with water and that is all the fermentables which means it’s all flavour.
- Price: The kit I chose cost £45 and makes 30 bottles, which works out at just £1.50 a bottle. There are cheaper wine kits available but as I say some of these sacrifice the quality slightly. There are also more expensive options available, some that include grape skins which are going to make much more complex wines. The high end wine making kits are a little pricey, going up to £120, but I’m sure make fantastic quality wine.
What You Get In Your Wine Kit
Everything you need to produce your wine should be included in your kit. You’ll of course need some basic brewing equipment which I will cover in a moment. The wine making kit I am using consists of:
Grape Juice: The bulk of the wine kit is the grape juice/concentrate. In this Beaverdale kit there is 7.5 litres of grape concentrate which is in a tough plastic pouch with capped opening.
Yeast: Of course to make wine you need yeast. When buying your wine kit check the expiry date to make sure it hasn’t been sat on a shelf for a long time. Dried yeast will become less viable after about a year.
Bentonite: Used mainly in white a rose wines bentonite is a clay that is used to clarify and fine wines. Bentonite bonds with particles suspended in the grape juice and aids the clearing of the wine.
Oak Chips: Occasionally you’ll have oak chips in the kit. These are to replicate the barrel aging process of certain wines. Primarily this is used in red wines but can be added to other varieties if you wish.
Stabiliser: Wine stabiliser is added to the wine after fermentation to prevent re-fermentation in the bottle. Stabiliser is made from Potassium Sorbate and is stirred through the wine. A stabiliser won’t stop an active fermentation so must be added once fermentation is completely finished, prior to clearing and bottling. It will also help keep the flavour stable during long storage.
Fining Agents: Clearing the wine and ensuring a crystal clear finished product is achieved with fining agents. The two that are supplied with the Beaverdale wine making kit are kieselsol and Chitosan. The finings work by binding particles and yeast together that are suspended in the wine. These particles then fall to the bottom of the fermenting vessel.
What You’ll Need
To put together this wine kit I only used a small amount of brewing equipment. Some of it you could get away without using at all.
You may be worried if you don’t have any equipment to begin with that the investment is going to make the process expensive. When you look at how much you are saving though you’ll recoup most of the cost after the first or second batch of wine. If you already have some home brew equipment however you’ll probably have everything you need. Here is what I used:
Sanitiser: You’ll need to buy this separately. There are only a few bits to sanitise, but things like the mixing spoon will need repeated sanitising throughout the process. You can read further about cleaning and sanitising here.
Fermenting Vessel and Airlock: I used two fermenting bins and transferred the wine half way through the process as per the instruction for my kit.
Mixing Spoon: You’ll need a long handled spoon or paddle to mix together the grape juice and water as well as incorporating the finings agents and degassing the wine (more on that later)
Syphon Tubing and Cane: To transfer the wine after the primary fermentation has completed you’ll need to syphon between the fermenters. You may also need to syphon into bottles if you don’t have a bottling wand.
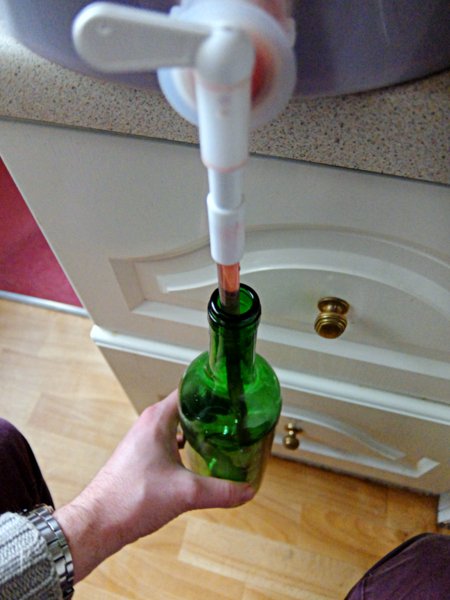
Bottling Wand: You don’t strictly need this, as I say you can syphon the wine into bottles. I find this little tube a god send though. Attach it to the tap on your bottling bucket and it’s so easy to fill bottles. If you don’t have one I strongly recommend you invest in one.
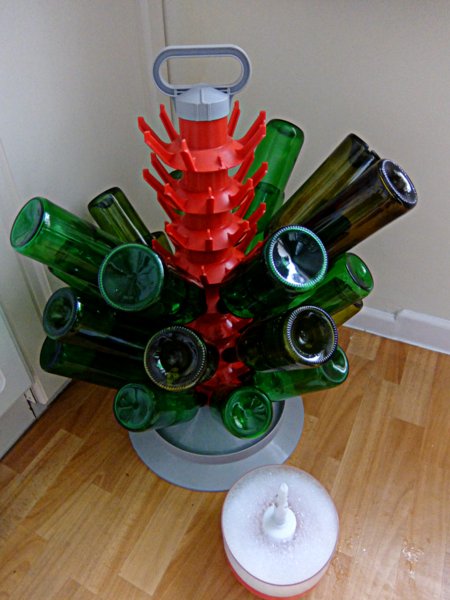
Bottling Tree and Bottle Washer: Again not strictly necessary but really helps to sanitise bottles and dry them. If you haven’t got these then fill a bucket with sanitising solution and dump your bottles in, then just rinse by hand. More on bottle cleaning here.
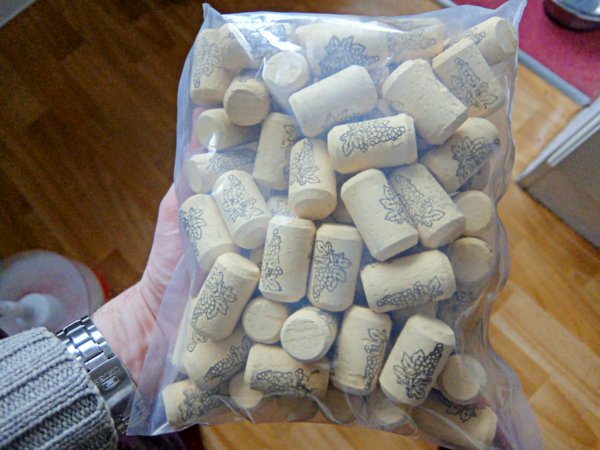
Bottles, Corks and Corker: You will need some bottles to put the wine in. I have saved a few from wines I have bought. Bottles and corks are available to buy from any home brew shop or online.
The corker I use is a simple hand push type. It’s super cheap and simple but does the job easily. You can buy more robust plier type corkers but I thought they were overkill.
That is all the equipment I used. There is not a lot to it and the same equipment is great for beer making kits.
The Process
Putting together this wine making kit couldn’t be simpler. There are plenty of instructions covering the whole process but I have summed up the whole thing here so you can see how it works.
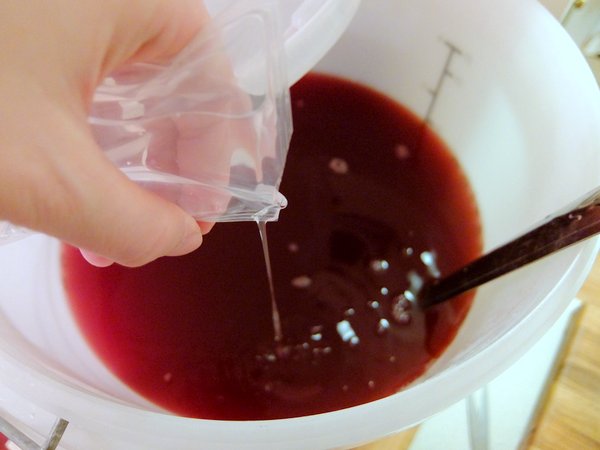
Step 1: Dilute down the grape juice. I opened the box prised the cap off the juice pouch and poured the whole thing into a sanitised fermenter. I dilute this down with water to the recommended 23 litres. The plastic pouch can be filled with recently boiled, warm water to rinse out the remaining grape juice. The whole thing is mixed thoroughly.
Step 2: I’m making a rose so added the Bentonite that was included in the kit. Sprinkle onto the surface, wait 15 minutes then mix again with a sanitised spoon.
Step 3: Add the yeast by sprinkling onto the surface of the wine. Cover with the lid and airlock and wait for fermentation to take place.
Step 4: Allow to ferment at between 20 – 25°C (68 – 77°F) and as close to 20°C as possible. The instructions suggest transferring once fermentation is complete after 10 – 15 days for white and rose wines and 15 – 20 days for red wines.
It’s important to take a hydrometer reading at this point to ensure fermentation is actually complete the final gravity for the wine should be between 0.990 – 0.995.
Step 5: After fermentation is complete and the wine has been transferred to a new fermenting vessel you’ll need to add the stabiliser to the wine. The stabiliser won’t stop active fermentation but rather prevent future fermentation, so it’s important to ensure fermentation has finished
The stabiliser is added and the wine now needs to be degassed.
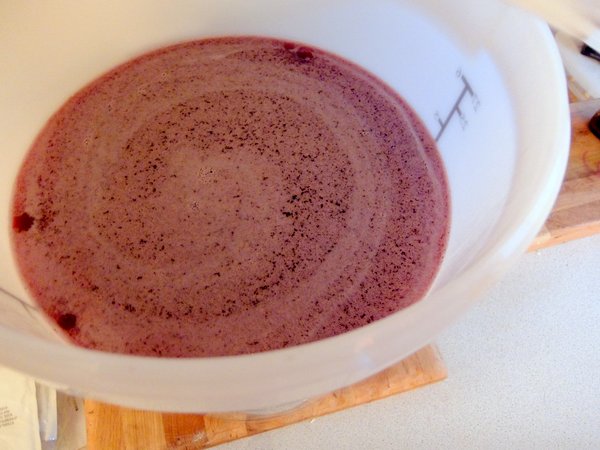
Step 6: Degassing means to agitate all of the carbon dioxide created during fermentation out of the wine. The yeast create carbon dioxide during fermentation and whilst most escape some is dissolved into the wine.
To remove the carbon dioxide you take a sanitised spoon or paddle and stir/swirl the wine for a couple of minutes. This process is repeated a few times a day for 3 – 4 days. The idea is not to vigorously beat the wine just to agitate it enough to encourage the CO2 out.
Step 7: After this degassing stage it’s time to clear the wine by adding finings. There are two in my wine making kit, one is Kieselsol and the other Chitosan.
They are added separately with the Kieselsol being added first and stirred through with a sanitised spoon. The second, Chitosan is added the following day and again mixed through.
Step 8: You’ll need to wait for the finings to work and the wine to clear. The instructions suggest 3 – 7 days depending on things like the temperature. I waited 4 days for my wine kit and the wine was crystal clear.
Step 9: It’s now time to bottle the wine. If you are careful and don’t disturb the sediment, you can bottle straight from the fermenter. I mentioned previously that I use a bottling wand which means I can attach that directly to the tap and I’m good to go.
If you are syphoning into bottles you may be best to transfer the wine off the yeast to avoid disturbing it.
Sanitise your bottles and then fill them and cork. That is all there is to it.
The wine is best matured for 2 – 3 months but tastes pretty good straight away. Generally the wine will improve with age so try and keep a few bottles back to sample maybe a year or 2 down the line.
Wine Making Kit Done!
There you have it. The process is simple, you get a fair amount of bottles with these wine kits so they are great if you are interested in getting a wine cellar together.
As I mentioned previously, quality-wise the more you spend on a wine kit the better and more fuller flavoured the end product. Experiment and see which varieties you like and I’m sure you will find something worth brewing time and time again.


Hi Neil – great blog on wine kits – you may want to take a look at Moonshine Drinks who have an ‘all in one’ approach to wine and beer making. It does take some of the kit out of the equation as it ferments and conditions in the same brew bag.
Thanks Andy, I haven’t seen those kits so I will check them out.
Cheers
Hi Neil
Great blog, I am making blackcurrant wine now following your recipe, the blackcurrants are from my allotment so the wine should be good.
One question, can I use used screw top wine bottles in stead of corking the bottles?
I was think of dipping the the screw top bottles in wax to keep the air out!
Thanks
Stephen
I
You can use screw caps. You are right the main thing it to keep air out and waxing the tops looks great too.