
How To Make Mead
Here at Home Brew Answers there are hundreds of articles about beer and wine, there are recipes for liqueurs and even soda but so far we have neglected the oldest of all alcoholic beverages which is Mead.
In this article, we are going to cover how to make Mead which is indeed one of the most ancient of all fermented alcoholic drinks. The ingredients are simple, the method is simple and the results can be truly phenomenal so let’s take a look at how to make mead.
Table of Contents
What Is Mead?
Mead is essentially a honey wine and is sometimes referred to as such. The main thing we need to understand is that mead is an alcoholic beverage made with honey that is most often between 8 – 20% ABV.
The honey is what is providing the fermentable sugars to create alcohol and at its simplest mead is just honey, water and yeast, that really is all that goes into it. The honey is diluted with water and then yeast is added to ferment all the sugar, converting it to alcohol. What you end up with is called a mead.
There are certain variations of Mead that you may have heard of, here are a few of the most common variants:
Melomel: This is a type of mead made with fruit. The fruit adds another layer of flavour and some people prefer this to a plain honey mead.
Metheglin: This is a variant of mead with spices and herbs added.
Hydromel: This is a style of mead that is less than 8-9% ABV, most traditional meads are made to around the same alcoholic strength as a wine or sometimes slightly higher.
Cyser: This is a combination of cider and mead. To make cyser instead of diluting the honey with water you would use apple juice to create a hybrid of mead and cider.
Pyment: Pyment is similar to Cyser but rather than using apple juice you would use grapes or grape juice to create a hybrid of a wine and mead.
Braggot: Braggot is a hybrid of mead and beer, usually without the hops. Most often braggot is 40 – 50% honey with the rest of the fermentable’s coming from malted barley. Traditionally braggot is not hopped but if you choose to it can be worth experimenting with hops to add a further dimension to the drink.
Start By Making A Basic Mead
I think the best way to begin making mead is to start with a basic mead, get to grips with the process (and the result) and then begin experimenting with fruit, spices or other variations. This way you can get a true sense of exactly what a mead is.
What You Need To Make Mead
The equipment needed to make mead is fairly minimal. In comparison to brewing beer, mead making requires much less equipment so it is a great way to start brewing your own alcoholic drinks.
Here is a checklist of the basic equipment you will need to make your mead. This guide is for making 4.5 litres / 1 gallon of mead but the vessels can be scaled up for larger batches should you wish.
Fermenting Bucket: A simple plastic bucket is the best vessel to start the fermentation of your mead. A bucket with an airtight lid and airlock attached makes it easy to get the ingredients in and mixed thoroughly and then the initial burst of primary fermentation to get underway. These buckets are a great size for gallon batches.
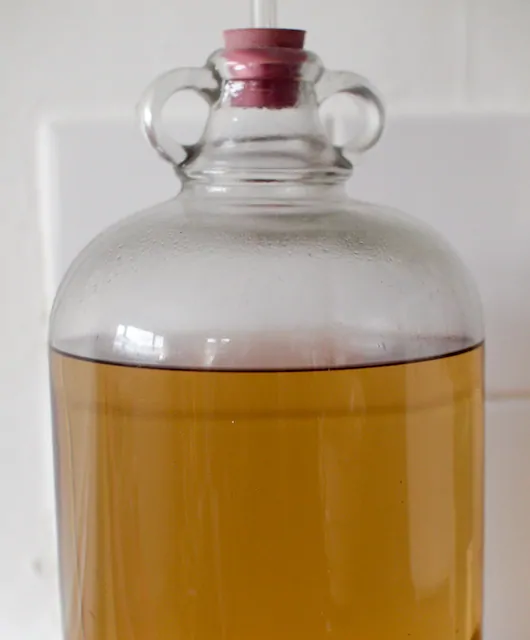
Demijohn: A glass or plastic demijohn is a vessel perfectly suited for conditioning mead and leaves a small surface area to avoid any oxidation while the mead is aging. After fermenting in a bucket for a short time the mead is transferred to a demijohn for more extended aging.
Airlock & Bung: An airlock allows carbon dioxide created whilst the mead is fermenting out of the fermenter but allows no air in. You can attach the airlock to the fermenting bucket and then to the demijohn with a bung after the mead is transferred.
Syphon Hose & Racking Cane: To move mead from one vessel to another you will need a syphon and a racking cane. Using a syphon is simple, you can find a guide here which explains how to use a syphon efficiently and hygienically.
Bottles: When your mead is ready you will want to bottle it. I prefer to use wine bottles and cork them but you can also use beer bottles and secure them with caps should you wish.
Capper or Corker: Depending on what bottles you use you will need a device to secure the closures. A capper or corker will serve the purpose and will last a lifetime in my experience.
Thermometer: We occasionally will need to hit specific temperatures during the mead making process to having a thermometer is handy.
Hydrometer: This instrument measures the density of liquid and can be used to tell us how much sugar is in our mead. This can then tell us how much alcohol will be in the finished mead, this guide will explain a little more about hydrometers.
Large Pot: Should you wish to pasteurise the must before you ferment the mead you will need a large pot to heat the honey with water before you combine all the ingredients in the fermenter. The method for this will be detailed in the recipe below.
The Ingredients You Need To Make Mead
Once you have the equipment needed you can then begin to gather the ingredients to make your first mead. Let’s start with the star of the show.
Honey
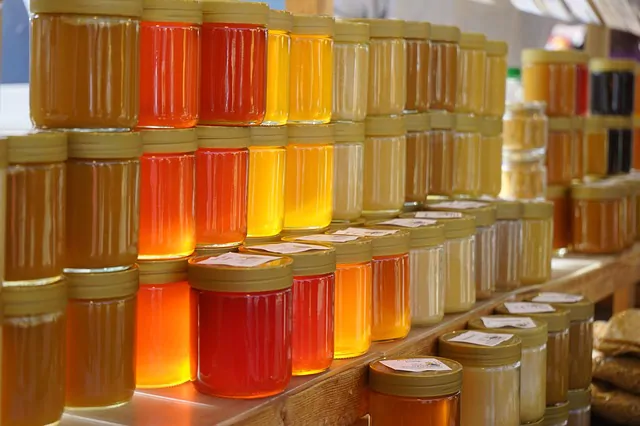
The main ingredient of mead, of course, is honey. In the case of a plain honey mead it is the only fermentable and with the exception of the yeast the only ingredient that will provide flavour. With this in mind, we need to consider what type of honey to use, we want to make sure the honey has a good flavour, to begin with as this is what is going to provide the vast majority of the meads flavour.
There are a few things to keep in mind when sourcing honey for your mead:
Liquid vs. Set: It doesn’t matter whether the honey you use to make mead is a liquid/runny clear honey or a set/creamed honey. Most liquid honey will crystallise if you give them enough time anyway. If you do choose to use a set honey to make a mead then you can sit the jar in some warm water and the honey will soften and liquidise enabling you to pour it out of the jar easily, ready for fermentation.
Varietal Honey: When bees predominantly visit certain blossoms the flavour and colour of the honey can change. When you come to make your mead if you have a varietal honey the flavour and colour will come through in the finished wine.
You do not need to use a varietal honey to make mead but it can help to create a more unique or slightly different mead suited to your taste.
Orange blossom honey is a varietal honey most people will be aware of, there are other varieties such as lavender, acacia and other blossoms but also by location. If the bees are visiting flowers in a mountainous area it will produce a different flavour of honey than bees whose hive is in a woodland because of the different plants.
Raw vs. Pasteurised Honey: The differences here are in the way the honey is processed. Raw honey has had less processing than pasturised honey. The differences between the two are that raw honey is likely to have a more flavour than pasturised honey, pasturisation is likely to remove some of the more delicate flavours of honey and of course we want as much flavour as possible.
The reason why honey is pasturised is that it increases the stability of honey whilst it is sitting on the shelf in your cupboard or supermarket. Raw honey contains wild yeast, enzymes and lots of particulates that are removed, filtered and heated up in pasturised honey.
Honey is naturally resistant to going bad, in an airtight container it will last indefinitely because honey is primarily sugar which means there is very little water, this in itself prevents spoiling. The pH of honey is another contributor to its shelf life, it is acidic with a pH of between 3 and 4.5.
When water is introduced to honey if there are any particulate or wild yeasts present these will eventually spoil the honey. This can be something to consider if using raw honey to make your mead, whilst there will be a broader range of delicate flavours there is also a need to carefully control fermentation so as to not let spoilage organisms, like wild yeasts, take hold.
We will cover ways to prevent spoilage of your mead in the methods section below, usually, it will be a case of heating the honey and water to pasteurisation temperature or using a chemical additive, we will cover this in a moment. These are optional precautions that aren’t totally necessary, many mead makers do not do this and produce fantastic quality meads they are only safeguards (a spoiled batch of any sort of home brew will not make you ill it will just taste bad).
There is a vast array of honey to choose from just at your local supermarket, each subtly different so try a few and see what you like. In this recipe I will use a wild flower honey as I like the flavour and it makes a wonderful mead.
Water: If your tap water tastes good then it is fine to use this, if you don’t drink your tap water or it is not to your taste for any reason then use bottled water to make your mead.
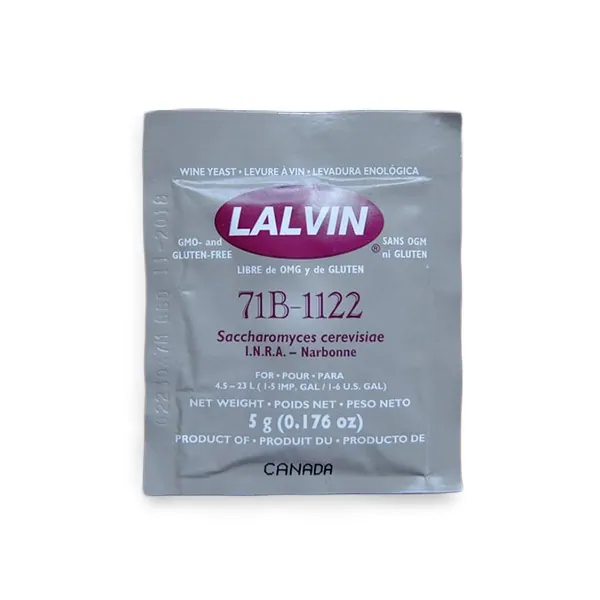
Yeast: Wine yeast is the most common choice for making mead. Dry wine yeasts are easy to keep around and will last a lot longer than liquid yeasts so I always have some of these laying around for when I want to make mead. For making sweeter meads you can also use ale yeasts which will not ferment out all the available sugars and leave a sweeter finished mead.
Lalvin D-47 is my choice for a mead recipe in most cases and is very versatile. Lalvin EC-1118 is also a popular choice for mead makers and is very robust, in this recipe I have used Lalvin 71B.
Yeast Nutrient: Most meads will call for yeast nutrients to provide enough nutrition for the yeast to ferment out the sugars fully. Yeast need an environment that supports their growth and reproduction, yeast nutrients enable this.
Campden Tablets (optional): Campden tablets of Sodium Metabisulphate can be used to pasturise the must before fermentation. This will kill any organisms or wild yeasts in the honey to ensure the mead ferments as intended. Campden tablets can also be used at the end of fermentation to stabilise the mead. Used in conjunction with another additive, potassium sorbate this will enable you to backsweeten a mead. We won’t be doing that in this recipe but it is a useful technique to know.
How To Make Your Mead
It is now time to bring everything together and finally make your mead.
In this recipe, I am going to make a wild flower honey mead with honey from the supermarket. Most honey will say if they have been pasteurised or not and will almost always tell you if they are raw honey. It is up to the mead maker whether you want to pasteurise the honey yourself before you make mead. I most often do not and have never had a problem with the mead spoiling, that is not to say it could not happen.
If you wish to pasteurise the must before you ferment the mead then it is a simple case of two options
Heating the honey with water to pasturisation temperature.
Or
Chemical pasturisation with Campden tablets.
In this recipe I will go through the steps to pasteurise the mead via heat so you can see the process, if you decide not to do this then you can skip those steps.
Mead Ingredients – Makes 4.5 litres / 1 gallon
- 1.6kg of Wild Flower Honey
- 4.5 litres of Water
- 1 tsp of Yeast Nutrient
- 1 sachet of Lalvin D47 or Lalvin 71b-1122
Method
- Gather together all your equipment and make sure everything is clean and sanitised, for more on this take a look at this guide on how to sanitise your equipment.
- We now need to heat the must and pasteurise the honey. To do this you will need to place a large pan on the hob and add 3 litres of water. Begin to heat gently and add the honey, stir thoroughly and do not allow the honey to sit at the bottom of the pan and scorch. We need to reach a temperature of 71°C. Once you get the honey solution to 71°C turn down the heat and keep the must at this temperature for around 10 minutes.
- After the 10 minutes at 71°C the honey will be sanitised and we can add everything to the sanitised fermenter. Add the remaining 1.5 litres of cool water to the fermenter and then carefully pour the hot honey solution into the fermenter as well. This pouring will help to aerate the must which is beneficial for yeast health.
- Add the yeast nutrient and mix thoroughly through the must. It may still be fairly warm we want to let the must cool to at lead 24°C before adding the yeast. Check the temperature with a thermometer, if the yeast is added when it is too warm the yeast could fail to ferment at all.
- It is recommended to rehydrate the yeast, almost all yeast packages will have rehydration instructions on them. It is a usually a case of adding the yeast to a small amount of warm water between 30°C – 35°C in a sanitised container for 15 minutes. Check the packet instructions, if there are none check this guide on rehydrating yeast here.
- When the must is cool enough pitch the yeast there is no need to stir, place the lid on the fermenting bucket and fit an airlock.
- The yeast will now begin reproducing, fermenting the sugars from the honey and producing alcohol for your mead. The fermenter can be left at room temperature (18 – 22°C) alone whilst the yeast do the work, after a week or so the airlock will begin to slow it’s bubbling and stop. After 2 weeks almost all of the sugar will be fermented out this can be checked with a hydrometer. It is now time to rack the mead to a demijohn.
- Sanitise your demijohn and rubber bung and now you can transfer the mead from the fermenting bucket to the demijohn with the syphon and racking cane. If you have never syphoned before read this first. The mead can now age for a few months, it will clear in this time and after it has completely cleared it is ready to bottle.
- To bottle your mead is simple enough, syphon into your bottles and either cap or cork depending on what bottle you chose to use.
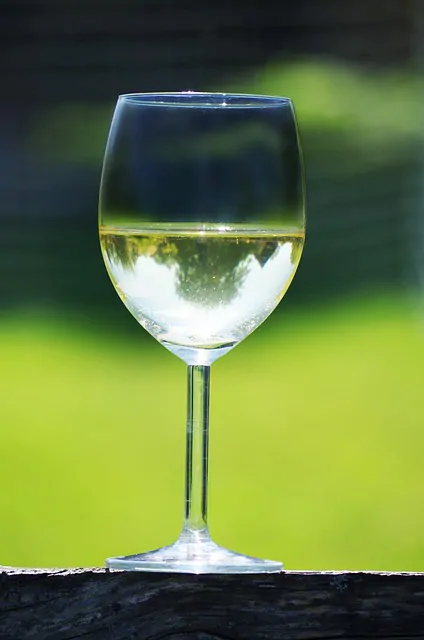
That is it, set the bottles aside for a few months, within 6 months the mead will start to come into it’s own and will last for years, slowly maturing and most often getting better. This recipe will make a medium sweet mead up to around 14% ABV. Making a mead is a really simple process when you get the hang of it and this guide really is just the tip of the iceberg. There are 1000’s of possibilities to experiment with from here so why not give it a go, make your own mead.


I have bees and lots of my own honey. I’ve made 4 batches of mead so far and all have been different…and I have made different mistakes!
I’ve been simmering the must for up to 2 hours, skimming off all the while…but maybe the temperature has been too high…you mention 70 deg. Is it likely that a higher temp will change the flavour and damage the must?
Next question…can I take the airtight lid and water trap off part way through fermentation to add yeast nutrient…or will letting air in damage the must?
Hey, when you heat the honey it can drive off some of the more delicate aromatics. Heating the honey will not ruin the flavour but could drive off some of the more subtle flavours so I wouldn’t worry about the temperature too much. You could always add honey partway through fermentation to add flavour back in if you are worried but I wouldn’t think it will make too much difference.
It will be fine to remove the lid to add yeast nutrient, I would only worry if something falls in 🙂
Sounds like you have got plenty of mead to try after 4 batches. As you have experienced, every honey is different and these differences will be in the finished mead too. After a few more batches you will be a pro.
Cheers, Neil
So heating the must to a pasteurization temp not a real necessity? Curious to this because I am ready to put 15# popcorn tree honey to work.
Worried about getting a wild yeast from the honey as it is not pasturzed.
Will campden tablets(how many for 5gal batch) hurt the yeast I use after must is blended together for fermentation?
I brew beer never done a Mead, I am very ready and willing to give it Go.
Thank You
There is always a possibility of a wild yeast infection if the must is not pasteurised. The key is to pitch a healthy yeast starter of really viable yeast to outcompete the wild yeast or bacteria.
Campden tablets will definitely work if dosed at 1 per gallon/ 5 litres (or according to package instructions) prior to fermentation. You will need to wait at least 24 hours after adding Campden tablets to pitch the yeast and proper fermentation will be unaffected.
Hope this helps.
Many thanks Neil…
We will give it a run and shate results…..
Hi Neil.
Have just been given some squeezable bottles of Meil de Fleur honey, (flower honey i presume).
I have ‘Young’s, Super Wine Yeast Compound’, other than filtered water, will I need anything else.
This will ‘bee’, my first attempt at this, lol. sorry!.
First time on your site, thank you for what you do.
Hi Stevie, Glad you find the site helpful. From what I understand the super wine yeast compound is a blend of wine yeast and nutrient so should be all you need to make a basic mead, like in the recipe here. I have not used the yeast compound before but from what I read it will work just fine. Good luck with your first batch!
I don’t have a fermentation bucket, but have gallon glass jar with a fermentation lid, any reason I should not use glass instead of plastic for primary fermentation?
No problem at all. Glass is just as good, if not better, than plastic!