
All About Mashing
Malt and Brewing
At this point I’m going to assume you are familiar with the basic principles of brewing. You know what malt, hops and yeast are and have a basic understanding of fermentation. If not then take a look at the earlier categories such as “Brewing with Malt Extract and Hops” where these topics are covered.
In this section we will look into more detailed aspects of brewing, in particular how to process ingredients from their raw state into beer just as a commercial brewery would.
Malting From Barley to Malt
Fermentable sugars are required to make beer, and Barley is the most common choice to provide fermentable sugars and has been used for many hundreds of years. It has a number of attributes that make it ideal for brewing and one of those is the ease of which it can be processed (malted) then utilised by the brewer by mashing to create an ideal habitat for yeast to turn the sugars created during the mashing process into alcohol.
Barley is the seed of a grass. Of all the cereal grains Barley is one of the hardiest and can tolerate a fairly wide range of growing conditions. The kernels grow in rows along the head of the stem in either 2, 4 or 6 rows and you will often see this noted when you come to buy malt. Two row is primarily used in Europe whereas 6 rows of grains clearly yields more barley so is a lot more economical to grow.
The grains are harvested when they reach full ripeness and are stored until the moisture level drops from around 20% to below 14% when they become ready for malting.
Malting – How It Works
Malting begins by steeping the barley in water, with the barley absorbing up to half of its weight in water. The water is then drained away and the barley is ready to germinate. The barley is spread out in a layer and kept at controlled temperatures to provide the ideal conditions for the barley kernel to begin the process of growing and germinate. The barley is turned with rakes and carefully monitored until it reaches the correct point to halt the process.
Germinating the barley transforms the grain, to begin with the endosperm (the starchy insides of the grain) is broken down by enzymes within the seed. The starches in the endosperm are transformed into simpler carbohydrates and sugars which are used to help the grain grow but are also the exact sugars you need for brewing.
The maltster turns the grain for several days until the endosperm becomes modified, allowing enough time for the starches to break down as much as possible. The barley is now ready for drying and kilning.
Drying & Kilning
A kiln is effectively a large room where the grain is sat usually over multiple levels with the temperature being raised in the room and ventilation in the room being adjusted to first dry the grain at fairly low temperatures and then cure it at a higher temperature
Much of the flavour and the varieties of colours of malted grains comes from the drying and kilning processes. Kilning and then roasting the grains creates reactions called Mailliard reactions. This reaction is what gives food browned during the cooking process its desirable flavour, for example when you caramelise onions they turn brown and become sweet. The exact same reaction occurs when grains are kilned. By controlling the temperature of the kilning process a huge variety of flavours and colours can be produced from the very same raw ingredient.
Before the drying and kilning process starts the grain is known as green malt, the rootlets that formed when the grain was germinated is still attached and these are broken off and removed during the kilning process.
Depending on what type of malt is being produced, the kiln is set to a certain temperature with the grain being dried at this temperature for a determined period. As an example pale malts are dried at a temperature around 40°C with high ventilation for up to 24 hours. Once the moisture content of the green malt falls below 10% the temperature of the kiln is raised to around 95°C for about 5 hours.
Drying the malt slowly at low temperature prevents the enzymes needed for mashing from being destroyed. In the case of a malt like Munich malt which is slightly darker than pale malt the drying phase in the kiln is usually at 50°C and the moisture content is higher at around 20% before being kilned at 105°C for 5 hours. This higher moisture content means some of the enzymes present in the grain are lost, this is why munich malt has less diastatic enzymes, which are needed for mashing than pale malt.
Roasting malt
Once malt is kilned there is also then the option to transform the malt completely by roasting or toasting it. To do this a barrel roaster is commonly used which consists of a rotating drum that is heated from beneath with water sprayers to stop the malt from burning too quickly.
The barrel roaster can take a very light pale malt and turn it completely black with any number of possible shades in between by adjusting the time and temperature the malt is held at in the barrel roaster. This process of toasting or roasting the grain destroys the majority or all of the enzymes required for conversion in the mash, the enzymes to convert these malts must come from other malts in the grain bill.
Mashing
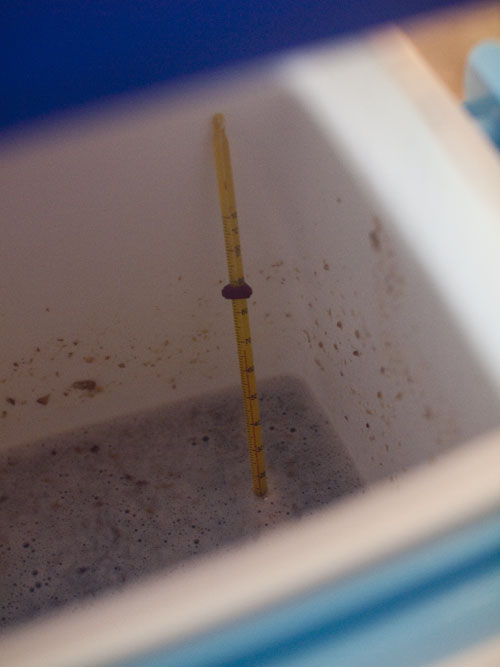
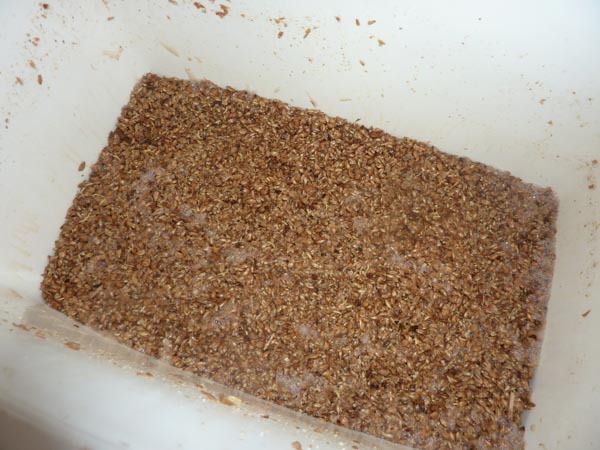 The term mashing isn’t a good description of what’s happening during this particular stage of the brewing process. What is actually happening is crushed malted barley is being steeped in hot water (which the brewer calls “liquor”) at around 64 – 68°C for around an hour to an hour and a half. There may be other steps involved as well as this but in simple terms this is all that is happening.
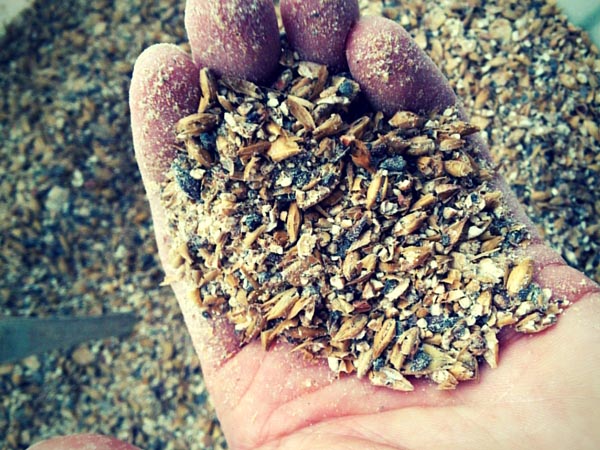
It is what is happening during the mash that is of particular interest to the brewer. Firstly the crushed malted barley is hydrated which is important because in the case of the mash, natural enzymes in the malt need the water to be able to work. The brewer needs the enzymes working to break down the starches into fermentable sugars, the malt is crushed to break up the kernels and expose as much of these starches as possible.
The temperature is important because it’s at a temperature of around 64 – 68°C that the enzymes we want working start converting the starches to sugars. The brewer can control the temperature for instance aiming at the upper range, 68°C and this will produce a beer with more body as the enzymes leave more dextrins (unfermentable sugars) in the wort. At the lower end of the range the enzymes convert a lot more of the starches to fermentable sugars making a thinner more fermentable beer.
This mashing procedure usually takes an hour for the enzymes to convert the starches in the grain to simpler sugars and can involve taking the temperature up through ranges that activate different enzymes.
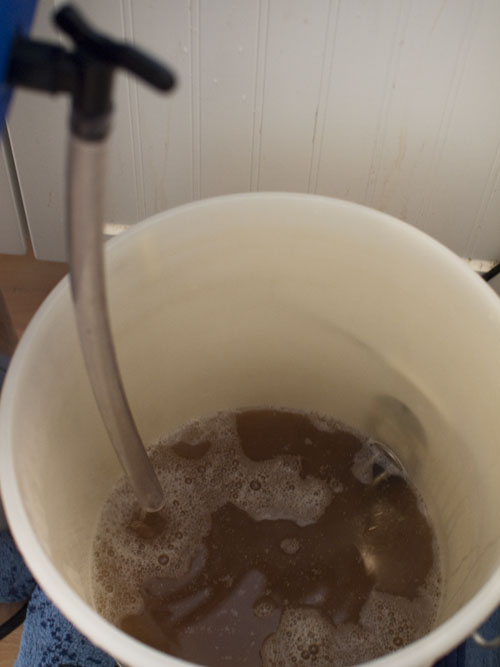
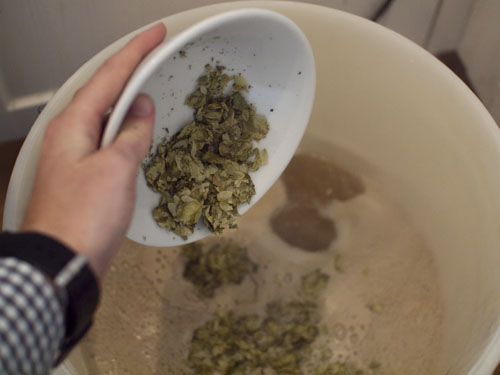
After the mash is complete the grains need to be separated from the liquid which is now wort. The separated wort is called the first runnings and the vessel used to mash in is usually designed to easily separate liquids from grains and produce a clear wort. The resulting grains are then sparged with extra water whilst the first runnings are being drawn off, sparging rinses the grain to extract all the remaining sugars that are left clinging to the spent grains.
What The Hell Are Malt Enzymes
So we know that mashing causes starch in your malted grains to be converted to fermentable sugars. The things that are responsible for these conversions are malt enzymes. In this article I want to introduce the basics.
What Is An Enzyme
In short here is a definition from Wikipedia:
Enzymes ( /ˈɛnzaɪmz/) are proteins that catalyze (i.e., increase the rates of) chemical reactions.[1][2] In enzymatic reactions, the molecules at the beginning of the process are called substrates, and they are converted into different molecules, called the products.
If we apply this to brewing in a round about way, the enzymes that are present in malted grains are what transforms the starches into sugar chains, which are then easily digestable by yeast.
Malt Enzymes and Starches
There are a number of enzymes in malt that become active at certain temperatures of the mash and the ones that are most important to the brewer are the enzymes that turn the starches stored inside the malt into fermentable sugars and dextrins.
Starches are long chains of glucose molecules. If you can imaging a big, thick tree branch with lots of smaller branches attached to it with smaller twigs coming from those, then that is what these starches would look like.
The main thick straight limb of this branch is called Amylose and a limb with lots of smaller branches emanating from it is an Amylopectin. These starch molecules need to be broken down in the mash to create sugars that the yeast can consume, the main enzymes to do this are Alpha Amylase and Beta Amylase
Alpha Amylase – Alpha Amylase will break the long amylopectin branches of the starches and create long sugars and amyloses. Alpha Amylase will become most active between temperatures of 67°C – 73°C and a mash favouring these temperatures creates a less fermentable wort with a fuller body.
Beta Amylase – Beta Amylase will eat the smallest twig ends, of straight branches of Amylose, they can only work from the end of a branch and for every cut they make they free a maltose molecule. They also work away at the amylose starches freed by the alpha amylase. Beta Amylase favours temperatures between 55°C and 66°C and will create a highly fermentable wort with less body and a drier finish.
A mash temperature that is a good combination to get both alpha and beta amylase enzymes working in balance is around 67°C and will make a wort that has a good balance between body and fermentability.
Mash Temperatures
There are other enzymes present in malt like protease and beta glucanase that are activated at lower temperatures, to activate these enzymes a step mash is required to take the temperature up through varying temperature ranges from low to high. Modern malt however is well modified and a single infusion mash targeted to balance or favour either alpha or beta amylase will work for most styles of beer.
If you know your beer is supposed to ferment out fully and finish dry you will want to adjust your mash temperatures slightly to target beta amylase to create sugars that are easier to consume by the yeast. A full bodied beer on the other hand requires you to mash a few degree higher and favour alpha amylase.
Other enzyme rests will break down various starches:
| Temp °C | Temp °F | Enzyme | Breaks down |
| 40–45 °C | 104.0–113.0 °F | β-Glucanase | β-Glucan |
| 50–54 °C | 122.0–129.2 °F | Protease | Protein |
| 62–67 °C | 143.6–152.6 °F | β-Amylase | Starch |
| 71–72 °C | 159.8–161.6 °F | α-Amylase | Starch |
via wikipedia
(Need info on enzymatic rests here)
Different Types of Mash
The saying goes “there’s more than one way to skin a cat” and this also applies to mashing your grains. I will run you through the basic mash schedules that home brewers can do and what the benefits of each one are.
Mashing is a process to convert the starches in malted grains into fermentable sugars. Different types of mashing vary in complexity and laboriousness, obviously they aren’t just to create extra effort and hassle, they do have purpose and benefits which we will look at now.
Single/Basic Infusion Mash
The infusion mash is the simplest of the three types of mashing I’m talking about here. The infusion mash is so called because you are basically infusing all the grain in water at a single temperature, usually for around an hour. The only thing you need to make sure of is that you maintain a constant temperature to allow the naturally occurring enzymes in the malt convert starches to sugars.
The obvious benefits of this mash is it’s simplicity and ease. You don’t need to constantly tend to the mash and the process is usually the best option for the vast majority of beers you brew. You won’t be able to brew certain beers though. Those that use high proportions of adjuncts or unmalted grains like wheat. Although these make up very few of the vast varities of beers you can make these types of beers you will need to alter the temperature of the mash multiple times using what is called, step mashing.
Step Mashing or Multistep Mashing
Slightly more laborious, depending on your equipment than a single infusion mash is the step mash. Using this type of mash you raise the temperature to certain targets and rest at those temperatures i.e 50°C, 60°C, 70°C.
The brewer calculates these rest temperatures according to the type of beer and ingredients, each rest promotes the activity of certain enzymes. The protein rest for example favours proteolytic enzymes that break down larger protein molecules in the beer, promotes head retention and prevents chill haze.
The thing about step mashing is you need a heat source through the mash to raise the temperature up to each rest, unless you have a way to directly heat your mash tun then it can be a pain to do a step mash. If you use a cool box mash tun then you would need to use a thick mash and add boiling water to raise the temperature, this can be tricky and cumbersome. Step mashes are easier in pots that can be directly heated, whilst stirring the grains to prevent scorching.
As I mentioned before though in some cases a step mash will be required for example when brewing a wheat beer where there aren’t enough enzymes to convert the malt to make fermentables.
Decoction Mash
A decoction mash is the most laborious and is similar in some respects to a step mash. It involves taking portions of the mash (usually a quarter or third) heating this up to boiling whilst stirring and then adding it back to the main mash. This process of boiling sections of the mash is repeated two or three times until the final mash temperature is reached.
This might seem a peculiar way to go about things, but this mashing process came about because a few hundred years ago metal pots big enough to mash in weren’t available. By heating part of the mash large quantities of beer could be made using the available equipment.
As the decoctions are boiled and added back to the mash the overall temperature rises up in steps that simulate those of a step mash giving you rests that allow enzymes to work.
As you can imagine this is a very labour intensive method of mashing and takes the longest time. However many people say that decoction mashing will add a more complex malt profile to your home brew and it’s qualities can’t be achieved in any other way.
Mashing and Sparging
The Mash Tun
 The most important elements of a mash tun are that it will hold heat well over a duration of a mash of around 60-90 minutes and that the grain can be seperated from the liquor easily, plus it being easy to clean.
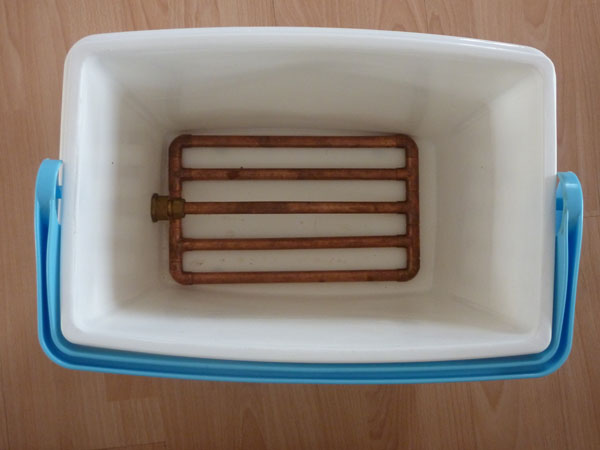
There are numerous mash tuns available on the market. The picnic cool box with a manifold in the bottom connected to a tap on the outside to separate the grain and wort are probably the most common. The clear advantage of using an insulated box is the very fact that it’s insulated, with mash temperature being such an important part of the brewing process, you’ve got a product ready made to hold temperate. The manifold in the bottom comes in several variations such as a copper pipework system with holes drilled into the pipes to allow wort to flow through but not grain A stainless steel braided hose is another option. The main objective is whichever mash tun you use it needs to be able to separate the liquid from the grain.
Another type of mash tun would be a vessel with a false bottom an outlet is connected below the false bottom and only the wort can get past this false bottom. The simplest form of creating a mash tun like this is to drill hundreds of small holes (smaller than your crushed malt) in the bottom of a fermenting bin, this is in effect is the false bottom. This is then inserted into a fermenting bin with a tap at the bottom and the whole thing wrapped up in insulation or blanket so the mash tun can retain temperature. This method of building a mash tun is as basic and cheap as it gets but is still very effective and will produce beer just as good as any other mash tun.
The next variation for mash tuns are those that can be heated. So far the options would only really be good to do single infusion temperature mashes. If you wanted to perform a step mash then it would be difficult to raise the temperature in the mash up through the necessary increments. A vessel that can be heated would be able to perform a step mash and options for these often are constructed from stock pots with false bottoms that can be heated via a burner. In essence they perform the exact same function as the other mash tuns we talked about apart from the construction material.
Mashing In
Mashing needn’t be thought of as hard. This is the most common conception of why people that I have spoken to anyway don’t make the step from extract to all-grain. If you have ever sat an wondered if your homebrew could be a little more complex and you want to know exactly what goes into your beer than Mashing is the way forward.
I am just going to lay out the basic steps required because in essence that’s all it is and there is no reason to make it more complicated in your head without having tried it.
OK here it is for a basic mash:
1. Crushed malted grains in the quantities of whatever recipe you are using are added to a mash tun with water that is heated to 72°C (or strike water temperature as discussed in a moment). You will need a thermometer for this as the temperature is the important part for the chemical processes that will happen in the mash. This process is called “doughing in” you need to make sure the grains are stirred thoroughly and all of it is soaked.
2. The temperature of the mash should have dropped to around 66-67°C by this addition of malt. If not add hot or cold water to bring to the correct temperature.
3. Leave the grains to mash. This is called a “rest” and is the longest part of the process and the part where you do nothing. You need to leave the mash to convert starches to sugars and perform other chemical process for around an hour and a half. You only really need to sporadically check the temperature hasn’t dropped below 63°C, if it has add boiling water. I don’t bother checking for around an hour into the mash as my mash tun is fairly well insulated.
4. Toward the end of the rest you need to be heating water (liquor in brewing terms) in preparation to sparge (run off the sugary wort and rinse the malt) which leads onto the next part of the brewing process.
Calculating Strike Water Temperature For Mashing
When you first start all grain brewing or partial mash there are all sorts of thing that you need to start worrying about that you might not necessarily need to consider when you brew with kits or extract. Whilst you are a lot more involved and there are more variables to consider for example, water adjustment, water needed, mash volume and mash temperature just to name a couple of things that you need to include in your calculations before you even begin brewing.
When you come to brew your first batch this seems like a whole lot of hassle I know for me I was all over the place trying to figure out what was needed and when I should use it. When you get a few batches under your belt however these thing become second nature, just par for the course.
Strike Water Temperature
When I say strike temperature I am talking about the temperature of the water needed to achieve your desired mash temperature.
Say for example you want to hit a mash temperature of 67°C / 153°F we need to take into account what drop in temperature is going to occur when you add water to the mash tun and then add grain or if there is already water and grain in the tun. There is calculators and software available to calculate this for you, but why not give it a try by hand first.
Single Infusion Mash – Calculating Strike Water Temperature
The most common mash you are going to perform is a single infusion mash that only requires a rest at one temperature. For this type of mash you generally want the grain to sit between 65°C – 68°C (150°F – 155°F) for an hour for proper conversion.
With this in mind you’ll need to calculate the initial temperature we need to bring the strike water up to so that when we add it to the mash tun and add the grain it sits in the correct temperature range, below is the equation you need to use to find what this initial infusion temperature:
If you are using Fahrenheit, Pounds and Quarts then you’ll need to change the constant of 0.41 to 0.2
Strike Water Temperature Tw = (0.41 / R)(T2 – T1) + T2
- Wa = The amount of infusion water to add
- Wm = The total amount of water in the mash
- T1 = The initial mash temperature (temperature of dry grain for initial infusion)
- T2 = The target mash temperature
- Tw = the actual temperature of the infusion water
- G = The amount of grain in the mash
- R = The ratio of grain to water in the mash
Mash Infusion Equation
To calculate the effect of an addition of water will have on a mash for example to bring the mash temperature up to hit mash out temperature or to perform a multi step mash we need to use the following equation:
Again you’ll need to substitute in 0.2 if you are using Lbs, Fahrenheit and Quarts
Wa = (T2-T1)(0.41G + Wm) / (Tw – T2)
An Example of Calulating Mash Temperature
Ok so with the above equations in mind let’s run through an actual calculation. Let’s say we are brewing a beer where we want the mash to sit at 67°C (152°F) for 60 minutes and then bring up the mash temperature to 74°C (165°F) to mash out. The temperature of our grain is 18°C
Using the initial infusion equation – Strike Water Temperature Tw = (0.41 / R)(T2 – T1) + T2 we would get the following.
(0.41 / 2.5) x (67-18) + 67 = 75°C
So we would need to heat our initial strike water to 75°C to hit our desired mash temperature of 67°C.
Calculating the addition required to raise the temp to mash out
We would then need to calculate how much of an addition of water is needed to hit the mash out temperature of 74°C. We will also assume the mash has cooled a few degrees to 65°C, our grain bill is 4kg and initial mash liquor is 10 litres. If we add recently boiled water that has cooled to 95°C we will need to use the following equation – Wa = (T2-T1)(0.41G + Wm) / (Tw – T2) achieving the following
(75 – 65) x (1.64 + 10) / (95 – 75) = 5.82 litres
So we would add 5.83 litres of 95°C water to take the mash from 65°C to 75°C.
Bear in mind there is software out there that will do all of this for you, but like a lot of the brewing maths I think it’s a good idea to know whats going on before you blindly plug figures into a computer. Doing calculations by hand first of all just gives you that little extra understanding.
Separating Wort From Grain
 During the mash the enzymes have done the job and extracted the sugars and dextrins from the grain to create a wort, now we need to get the wort out and leave the grain behind. This procedure is called lautering.
Earlier we looked at different types of mash tun and talked about the false bottom or manifold that allows the wort out but the grain is too large to pass through and is stopped from reaching the outlet. This is only part of the process, the manifold or false bottom is just the to stop large particles from running out the mash tun, it’s the grain and particularly the husks that are important to achieving a good run off. As you open the tap to the mash tun the wort starts running through the bed of grain compacting it, the very first running will be full of particles and flour that are the result of the crushing of the malt. As the grain bed compacts down the particles get caught in the husks and the runoff becomes clearer and debris free, it’s the grain itself that becomes the filter and a large part of lautering is controlling this flow through the grain bed to keep as much of these particles out of the wort and left in the mash tun.
Recirculating
As the first runnings come out the wort will be full of grain particles and debris, the first few litres should be drawn out into a jug and poured back into the top of the mash tun, recirculating it. Ideally we want the wort being run off to be a clear of debris as possible, after a few minutes of recirculation the wort should run relatively clear and the wort can be collected in the boiler.
Sparging
Sparging is the term used to describe rinsing the grain bed to extract as much of the sugar left in the mash as possible, the consequence of this sparge also increases the amount of wort collected from the mash. The liquor used in the mash is usually in ratio to the amount of grain used in the recipe, somewhere along the lines of 2.5 – 3.5 litres of water per kilogram of grain, this amount of liquor is then run off whilst the sparge is performed to reach the level of wort for the brew length.
Sparge liquor is heated to around 75 – 80°C this increases the solubility of the sugars in the wort and makes the whole mash less viscous which aids the run off. If the wort is run off too quickly the grain bed will compact to much and the sparge liquor won’t run through the grain bed resulting in a “stuck mash”. Running off and sparging slowly will keep everything flowing smoothly.
There are two main methods of sparging available to the homebrewer, one is fly or continuous sparging and the other is batch sparging both have their own advantages and disadvantages.
Fly Sparging
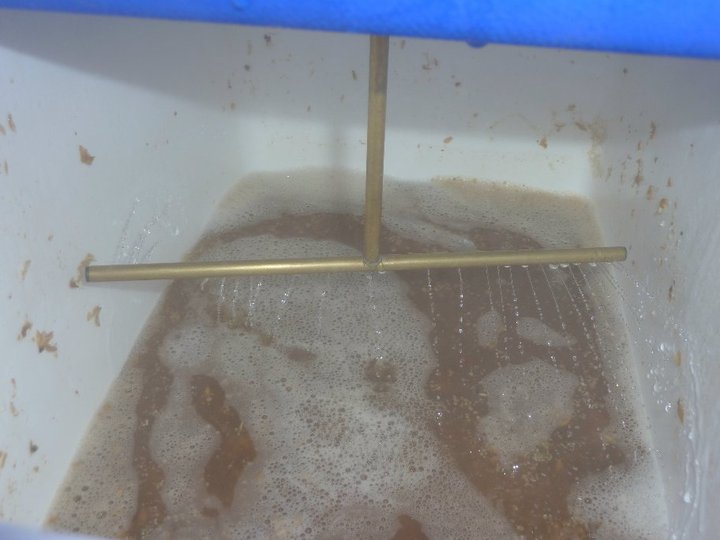 Continuous sparging, also known as fly sparging is the most efficient method of sparging in the sense that it will extract the most amount of sugars from the mash. This method of sparging involves running of the wort as normal, starting slowly and recirculating to avoid compacting the grain too much. Then as the level of wort is just above the grain bed, slowly adding the sparge liquor at the same rate as the wort running out of the mash tun. The sparge liquor is sprinkled onto the grain bed to avoid disturbing the structure of it through a sparge arm or a similar sprinkling device. A sparge arm in most cases will look like a large T-shaped pipe with holes drilled all the way along it, the arm is suspended above the grain bed and the sparge liquor pumped through it. As the water is pushed through the sparge arm the whole thing rotates due to the way the holes are drilled, this evenly distribute the sparge liquor across the grain bed.
As mentioned before the extract of sugars from the mash is most often highest with fly sparging, this is why almost all commercial breweries use this method. The home brewer though may not or need not be as concerned with the extraction efficiency and more with time and the amount and cost of equipment as this method of sparging takes more of both. A method of sparging available to the homebrewer who doesn’t have the same concerns as their commercial counterparts is batch sparging.
Bach Sparging
Batch sparging is simpler and requires less equipment than the continuous version. The process involves running off the mash and recirculating as before to attain a clear run off, then collecting these first runnings until the mash tun is completely emptied of wort. The outlet is then closed and the mash tun recharged with sparge liquor to attain the required amount of wort for the brew length. The whole mash and sparge liquor are vigorously stirred to aid the extraction and rinsing of sugars and left to settle for around 15 minutes. The runoff process is then restarted with recirculation as before to collect the second runnings, the mash tun is emptied again and both runnings combined. The speed of the batch sparge is a definite advantage and the only real downside is a small loss in extraction, this might sound bad but on a home brew scale it relates to a relatively small amount of grain being added to the recipe.
Performing A Mash Out?
What Is A Mash Out?
A mash out, put simply is a method of raising the temperature of the mash just before the sparge is started. Usually, the temperature of the mash is raised to around 75-77°C (167-170°F) or thereabouts which does a few things.
First off, all the activity of the enzymes working at converting starches to sugars is halted as the temperature deactivates them. The higher temperature also has the effect of making the mash less viscous and flow more freely.
So Why Perform A Mash Out
To be honest the only reason I would consider a mash out is if I thought there would be problems with the sparge getting stuck or not flowing freely. Using a mash out to fix the ferementable profile and stop any further conversion is in my opinion of minimal effect.
If you sparge continuously then you are going to be raising the temperature of the mash anyway as part of the process. This is what happens in commercial breweries that perform single infusion mashes. They have no way to raise the temperature of the mash except when running the sparge which will be with significantly hotter liquor at around 77°C (170°F)
So how do you know if you’re going to have issues sparging freely. It’s quite simple and something you should be able to tell before you even begin brewing. If there is a large quantity, say more than 20-30% wheat or oats for example the sparge will be more liable to getting stuck in part because they have no husks to act as a filter. Raising the temperature with a mash out increases the viscosity of the mash and frees everything up.
Another reason to use a mash out would be if you have a particularly thick mash i.e. the grain to water ratio is close. A thicker mash increases the concentration of sugars and consequently increases the viscosity making the sparge difficult. Similarly if for some reason over the course of the mash you lose a lot of temperature it has the same effect.
A good analogy of this would be to compare the thickness of the mash to oil in an engine. When the engine is running and heating up the viscosity of the oil changes making the oil flow more freely.
Performing A Mash Out
If you can apply direct heat to the mash tun then it’s simply a case of doing so and stirring the mash to avoid creating hotspots until you reach the desired mash out temperature around 75-77°C (167-170°F).
If you cannot apply direct heat to the mash tun then an addition of hot water is the simplest way of achieving mash out temperature. Take a look at the strike water temperature article and calculate the addition of water needed to raise the temperature as desired. A more complex version of this would be to do a decoction but frankly unless doing a decoction mash is more effect than it’s worth.
Brewing Efficiency
Brewing Efficiency and How To Work It Out
It’s common when you start brewing to see and hear brewers obsess over what they call their efficiency. I know it’s obvious that they aren’t talking about how organised they are but I want to cover the basics of what your brewing efficiency involves because without knowing this you won’t be able to design a recipe or follow a recipe and hit your target gravity. In other words there will be more or less alcohol than you originally intended.
If you want to formulate your own recipes and to a certain extent follow a recipe then you will want to know your efficiency, in an ideal world everyone would be 100% efficient and but this is impossible even for commercial brewers, although not if you use extract. We will have a look at why in a minute.
For all grain brewers different types of malted grains will only yield a certain amount of extractable sugar, you will be able to find out just how much each variety of malt contains by looking at the specification that each maltster provides or from figures on the internet. When you mash these grains you are attempting to extract as much of these sugars as possible, the amount you extract compared to the amount available is your efficiency and will be expressed as a percentage.
An Efficiency Example
A typical extraction efficiency for all grain brewers will be in the range of 60-80%, if you have an efficiency of 60% and you brew a the same recipe as your friend who has an efficiency of 80% you are going to have less sugar available to the yeast at the end of your brew day. This means you may need to adjust the amount of malt used to achieve the same final gravity as your friend who has 80% efficiency
You can see why commercial brewers would be concerned with getting the maximum efficiency in their brew house because brewing such large volumes means the higher efficiency the less malt will need to be used for each brew. Depending on the size of the brewery this will add up to hundreds or thousands of pounds a year. For the home brewer it doesn’t really matter what your efficiency is, if it’s 75% then increasing it to 80% is going to make little difference to your wallet in an 19 litre brew length.
Working Out You Efficiency
To work out your efficiency requires a bit of trial and error, you will need to know a few things about your recipe. First of all you will need to know the potential extract for each grain in your recipe, then you will be able to determine when brewing 19 litres what the final gravity would be if you managed to extract all these sugars. You can then compare this figure to what you actually achieve when brewing the recipe, a good efficiency to brew your first recipe to is about 75%
It is of course easier to perform your calculations using software but lets take a look at how to work out efficiency using a few simple examples, I think it’s always good to know how to work things out by hand.
First of all lets look at how you would go about adjusting a recipe if you already know your efficiency.
In this simple example let’s say you are brewing a recipe with just two malts; Pale Malt and Crystal Malt. Here are a few key details
Brew Volume: 19 Litres
Target Gravity: 1.050
Recipe Efficiency 75%
Pale Malt: 3.58kg
Crystal Malt: 0.650kg
Now if you already know your efficiency is 82% for instance then you can recalculate the malt you need quite simply, all that you need to do is take each malt and perform the following calculations.
3.58 (weight of pale malt) x 0.75 (percent efficiency as a decimal) = 2.685
2.658kg is the amount needed for 100% efficiency so know we know this we can take this weight and divide it by 82% efficiency to find the weight you need.
2.658 / 0.82 = 3.27kg
So with this calculation if you know your efficiency then you can recalculate the recipe as follows
Brew Volume: 19 litres
Target Gravity: 1.050
Efficiency: 82%
Pale Malt = 3.27kg
Crystal Malt = 0.595kg
Calculating Efficiency
Now this may seem fairly complex to begin with but bear with me and hopefully it will be clear enough.
To calculate what efficiency you are actually achieving we need to know the potential extract for each type of malt being used. This information is always provided by the maltster making the malt and is also available on the Internet from various sources.
Being British I work in litres and kilograms so when looking at various malts I look for a figure called LDK which stands for litre degrees per kilogram.
You can see an example of this here at Simpsons Malt
Americans tend to measure the potential extract in points per pound per gallon (ppppg) so pale malt for example may be 1.036 ppppg, luckily though we can convert these figures to LDK by multiplying the last 2 digits by 8.3454.
1.036 x 8.3454 = 300 LDK
Let’s work through an example now:
Assuming we brewed the two malt recipe above, got 19 litres and we hit a gravity of 1.057 lets work out our efficiency we achieved at the end of the brew day.
Just to remind you of the recipe:
19 Litres
Pale Malt: 3.58kg
Crystal Malt: 0.650kg
We can calculate efficiency with the following formula Efficiency = Total Gravity of Wort / Total Potential Extract From Grains
The total gravity of the wort in this case is 57 x 19 Litres = 1083
The total potential extract from the grains is as follows:
3.58 (weight of pale malt) x 300 (LDK) = 1074
0.650 (weight of crystal malt) x 292 (LDK) = 189.8
Total Potential of Grains = 1263.8
So your efficiency = 1083/1263.8 = 0.86
There we have it the total efficiency equals 86% lucky you.
There are two types of efficiency people talk about and they are brewhouse efficiency and Mash efficiency. The difference between the two are the brewhouse is the efficiency of the volume and gravity of wort in the fermenter so this would include any wort lost to hops, boiling and so on, mash efficiency is the efficiency of the volume and gravity of wort before boiling.
I don’t really want you to get too bogged down in this for now but as long as you measure your efficiency in the same way consistently for every brew then it doesn’t really matter. You’ll calculate your recipe according to whatever you efficiency is.
Boiling and Cooling
Boiling the Wort
 Once the first runnings of wort are collected and then combined with sparged wort it’s time to start the boil. There are a couple of reasons why the boil is vitally important to making beer, firstly the wort needs to be sanitised and free from bacteria. There may be bacteria present in the malted grain in the mash and boiling will eradicate all of these beer spoiling bacteria. In the not too distant past, beer was considerably safer to drink than many sources of water simply because of the fact it was boiled and drinking water sources were full of bacteria.
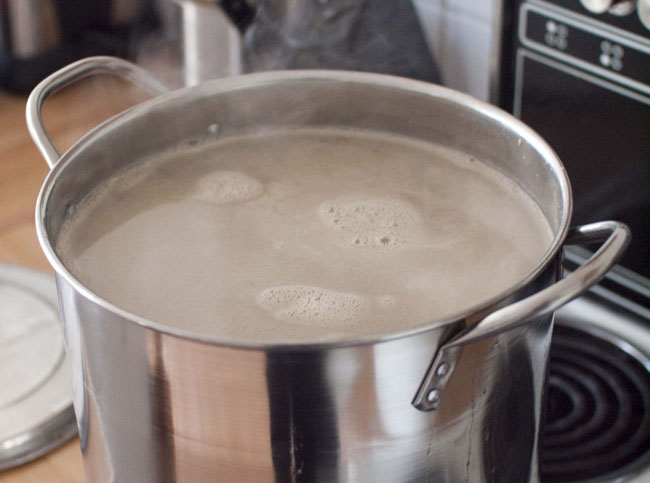
A really important reason for boiling is to do with the taste. Bitterness is key to the way beer tastes and the way we get bitterness into the beer is by boiling hops to isomerize the acids within them. The process of isomerization takes time and this is the reason why most beers will be boiled for 60 minutes or more. Hops added at the beginning of the boil contribute the most to bitterness as the rate of isomerization grows the longer the hops are boiled. After around 60 minutes isomerization slows as all of the alpha acids are used.
As well as these two factors there are a couple of other reasons a good vigourous boil is desirable, firstly the hot break. The hot break occurs during the early stages of the boil, you will notice when the wort is close to boiling large amounts of foam on top and small clumps forming in the wort. This is caused by proteins coagulating together. This together with the cold break (rapid cooling), will help to ensure the beer doesn’t have any haze when bottled or packaged. The next factor is to clean up some unwanted flavours in the beer. Di-methyl Sulfide is present in the wort and evaporates during the boiling process. This is a sulfur compound and will add a vegetal aroma to the beer if present in large enough amounts. It also occurs if the wort is cooled slowly. Although in some lagers it is desirable you can avoid this off-taste occurring by having a good rolling boil with the boiler uncovered so it can evaporate out of the wort.
Home Brew Boiler or Kettle
The boiler, along with the mash tun are the two basic bits of kit you will need to invest in to progress into all grain brewing, what may seem like a big expense at first soon recoups its value after brewing a few times.
When we brew all grain we ideally want to boil the whole batch of beer, unlike brewing with extract, where you perform a partial boil and then top up the wort to the desired level at the end. Taking the time to mash and extract all the flavour and sugars from grain provides a better quality wort than if you extract only a partial amount and then dilute down with water. This means we need a vessel big enough to accommodate more liquid than the intended batch size.
What Kind Of Home Brew Boiler?
There are various options available to the home brewer and one of the first places to check will be your nearest home brew shop. There are various commercial varieties of boiler available and all will do an admirable job for our purposes. The boilers available are usually around 25 – 30 litres or more which are large enough for a 21 litre or 5 gallon batch. Many of the commercial examples available in the UK are electric boilers with elements in which plug directly into the mains. These boilers will easily achieve a vigorous rolling boil in a short time and often have hop filters in the bottom which allow you to run off a clear wort.
Alternatively if you can get your hands on a large enough catering stock pot you can modify this to your needs. If you are brewing with malt extract or brewing smaller batches you can get by with a stock pot to boil the whole or just part of the batch of beer. At the end of the boil you will be able to top up the wort to the required level. A 12 – 15 litre stock pot is ideal for this kind of brewing. These stock pots are great because they can be placed on the hob in the kitchen which means making beer is as easy as cooking.
If you want to boil bigger batches and brew all grain though you will need a 25 litre pot. To heat this size boiler you will need a burner and gas bottle which means you will need to brew outside but they are a great option which are easily available. Some modifications may be necessary such as making a hole for an outlet tap at the bottom and some brewers even go as far as completely overhauling the pot to add electric elements and sight glasses to measure wort levels. If you do not have these means however there are plenty of brewers who just use a jug to move wort from pot to fermenter so do not worry too much.
Cooling The Wort
 During the brewing process after the boil has finished it is a good idea to think about trying to cool the wort down as quickly as possible. There are a couple of reasons to do this, one is that oxidation can occur when cooled over a long period as well as allowing possibilities of bacteria contaminating the wort. Also as the beer cools slowly it also produces a sulfur compound that won’t be boiled off but remain in the finished beer creating off-flavours.
This effect of rapid cooling is called the “Cold Break” just as bringing the wort to the boil is called the “Hot Break”. This cold break causes proteins to precipitate out of the wort. If the proteins remain in the beer which will occur if the beer is cooled slowly you will notice the finished beer will have a haze when put in the fridge. This is purely cosmetic however and won’t effect the taste.
What we are going to look at now are some of the most common ways to chill the beer quickly. First off I will look at the easiest way for the first time brewer, it requires no excess equipment and is what I used to do.
Types of Wort Chiller
So here are the basic options you can go for to get the wort from boiling to cool enough to add yeast as quickly as possible:
Cooling the Wort in a Water Bath
This really is as easy as it sounds. Obviously if you boil your wort in a metal pot then it will cool a lot quicker due to conduction. If you boil your wort in an electric boiler you will need to syphon off to the fermentation vessel before cooling.
So you sit your vessel in a bath of ice cold water. You can of course throw a load of ice into the water bath to speed up cooling and you will notice after 5 minutes or so the water bath will be noticeably warm. Its a good idea to stir this water to even out the temperature. Also you may find you will need several changes of water to get it to around room temperature.
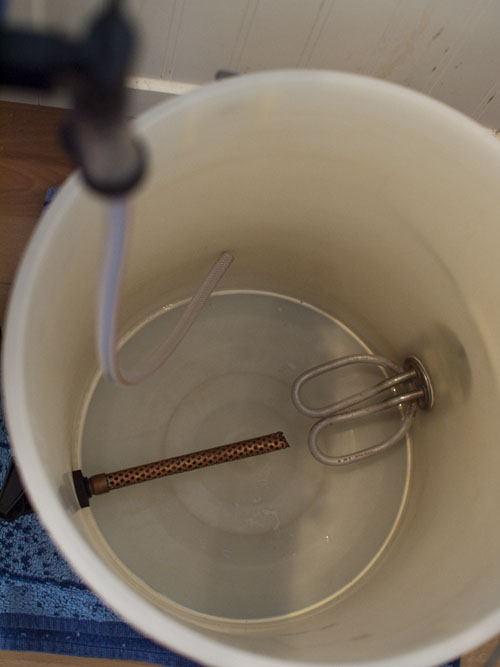
Immersion Chillers
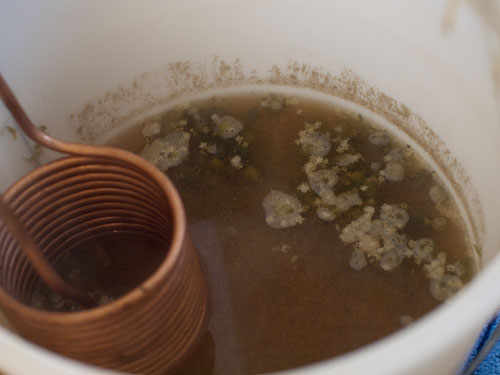
Immersion coolers are a relatively cost effective solution to cooling your wort rapidly. They are basically a long length of copper pipe coiled many times with a couple of hoses on each end of the pipe. All you need to do is attach one end of the coil to a cold water tap and put the other end in a bucket or in the drain to get rid of the water, turn the tap on low and let it do its thing. You will surprised at the heat transfer.
I must say this is what I use and they cool my batch of 21 litres in around 20 minutes to pitching temperature. It has shortened my brew day by a fair amount.
You can find immersion chillers at your home brew shop and a number of people have made their own just by coiling a length of copper pipe. If you have the means to do it then I thoroughly recommend it.
Counter-flow Chillers
Counter-flow chillers work with the same principle as immersion chillers but in this case the wort is run through a copper pipe that is being cooled from the outside. A common setup is to run a copper pipe through a garden hose. The wort is then run through the pipe whilst cold water is run in the opposite direction through the hose.
Counter-flow chillers have greater cooling effect and the wort can usually be run straight from the boiler to the fermenter and be cool enough to pitch straight away. They are particularly effective when you’re brewing larger batches.
Leave a Reply
Want to join the discussion?Feel free to contribute!