
Introduction
Welcome Homebrewer
This is where we progress from making the occasional beer kit to creating our own beer. If you have never made beer before, getting started can seem daunting. However, it is a simple process which is enjoyable and satisfying so why not give it a try. If you are wondering whether it’s worth the effort then just hear me out and I’ll do my best to convince you brewing is something you should start doing as soon as possible.
Why You Should Bother Brewing
If I told you, “You can make a beer just as good, if not even better than one you can buy in a shop” would you believe me? Perhaps not. Trust me when I say it’s not only possible to do this, but it’s also much more satisfying to brew your own beer than buy it and cheaper too!
You may know nothing about beer for the moment, that’s fine. Before I made my first beer I didn’t even know what was in it. It’s safe to say, like most hobbies, there is a learning curve, be it football, surfing or knitting, the first time you try something it’s often not easy, and can even be bewildering. Let’s face it though part of the joy of any activity comes from overcoming these challenges when they arise.
Let’s Get Brewing
This guide is here to try and give you a good understanding of what beer is and how it is easily made at a small scale from the comfort of your home.
I hope it will give you the confidence to make one of the recipes at the end of this section and you realise your inner brewer, building upon these techniques to create your own beers for future years to come.
To begin with we will cover the basics of what goes into beer, what equipment you need to make it and how you make it. At the end I have provided a couple of recipes to choose from. So pick a beer style you like and give brewing a try!
What Is Beer?
The Brewing Process In A Nutshell
To provide a grounding in the process of brewing I’m going to explain how beer is made in a brewery. You might think making beer in a brewery is not the same as making it at home, but I assurel you, it really is!
Brewing your own beer puts you in the exact same position as the head brewer of your favourite commercial brewery, you decide on what ingredients go into it, you put them together and process them with your brewing equipment. The only difference is you get to keep all the beer at the end and you don’t have to please anyones tastes apart from your own.
So here is what happens:
You take a few agricultural ingredients, one is the cereal grain barley, the other hops. This is the basis of most modern beers, alongside water which is fundamental to all beer as you’ll see later.
The grain is malted by people called maltsters before it arrives at the brewery. Malting changes the properties of the grain unlocking starches that are required for the brewing process. The grains can be toasted to varying degrees which will affect the colour and flavour of the beer. Almost all breweries won’t malt grain themselves so don’t be too concerned if you don’t fully understand the process right now.
The brewery takes the malted grain, crushes it and then steeps it in water inside a vessel called a Mash Tun. This process allows enzymes, which naturally occur in the barley, to break down the starches into simple sugars (vital for making alcohol) all the while releasing malty, sweet flavours.
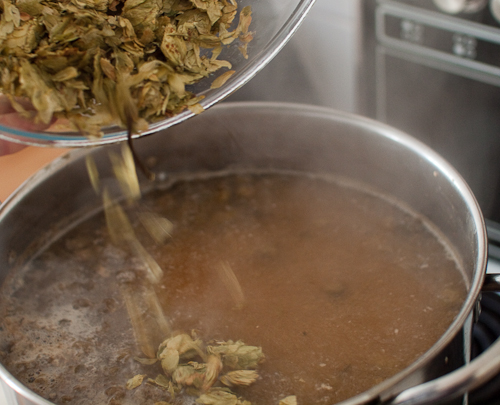
After steeping in the mash tun the grains are rinsed with more water and the sweet malty liquid (called Wort) is moved into a separate vessel to be boiled. The boiler is called a “Copper” or a “Kettle” and boiling is necessary to extract the flavours of our next ingredient, Hops.
Once the “Wort” is boiling hops are added. The boiling of the hops releases a bitter acid from them and also some aromatic compounds. The whole boiling process lasts around 60-90 minutes and hops are added at various stages throughout the boil. Adding hops early in the boil provides more bitterness, whereas adding hops later in the boil provides more aroma and flavour qualities.
Here’s An Overview
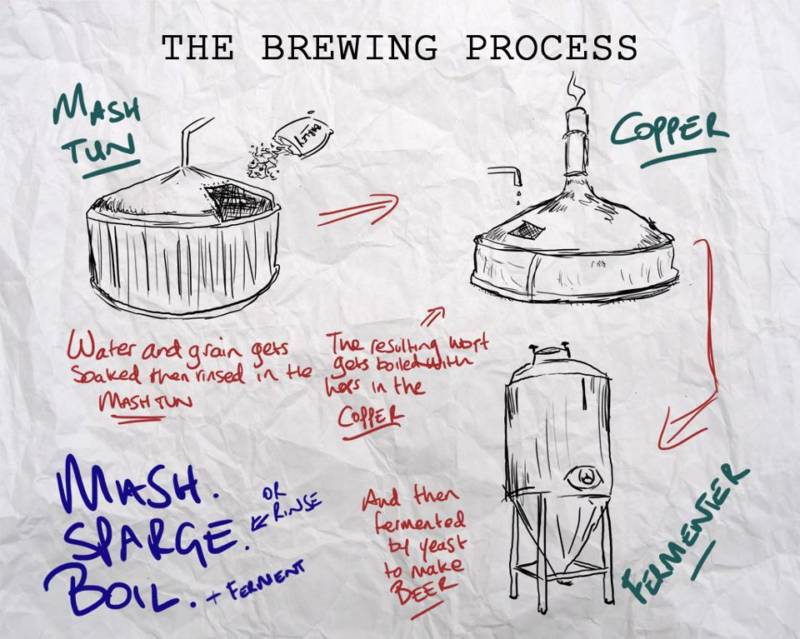
The Grains Are Crushed ➤ The Grains Are Steeped ➤ They Are Drained and Rinsed ➤ The Resulting Liquid Is Boiled ➤ Hops Are Added At Beginning ➤ They Are Also Added Around 30 – 60 Minutes Later ➤ The Liquid (Wort) Is Cooled ➤ Yeast Is Added ➤ The Beer Ferments and Alcohol Is Made ➤ The Beer Is Bottled ➤ You Open Your Beer And Enjoy
A Primer On Ingredients
Malt Extract
 If you have ever visited a brewery the first thing that will hit you is the smell- A thick, sweet, malty smell that will have you salivating instantly. Well that same smell is what will be filling your nostrils when you start brewing your beer.
When we looked at the brewing process we covered the steeping of the grains in the mash tun, this period, called mashing, is one you can bypass by using malt extract.
Mashing is a process which takes time and extra equipment so removing this process by using malt extract instead is often desirable. There are many commercial breweries and brewpubs that use malt extract, rather than choosing to mash grain in a mash tun themselves, for the very fact it saves time and provides consistent results every time.
Malt extract is made by soaking and rinsing malted barley, a process called mashing, that can take a couple of hours, to create a concentrated sweet liquid. Using malt extract saves you the time and expense of doing this yourself and will make the brewing process easier with less technical difficulties. Perhaps preferable for a first time brewer!
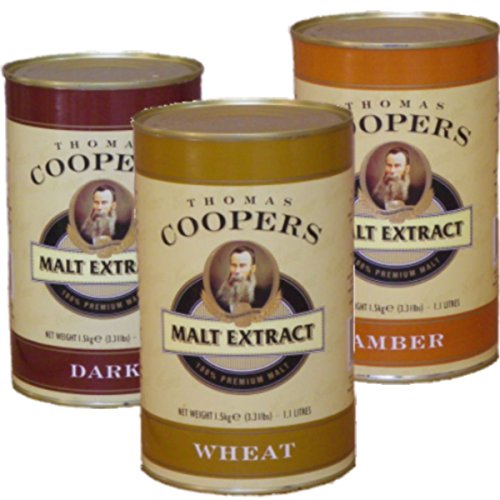
When buying malt extract for creating your own recipes it is a good idea to ensure you are purchasing unhopped malt extract because we will be adding our own hops during the brewing process. It also comes in two forms:
or
Either variety are fine for our purposes and can be used interchangeably simply by following the guidlines below:
How can I convert liquid malt extract (LME) to dry malt extract (DME)?
Liquid malt extracts are roughly 20% water so 1kg of liquid is the same as 800g of dry malt extract. If you want to convert a recipe that list LME then multiply the amount by 0.8 to achieve the amount of DME required. If your recipe list dry then divide the amount by 0.8 to reach the amount of liquid extract needed. For example
3kg of LME = 3 x 0.8 = 2.4kg of DME
3kg of DME = 3 / 0.8 = 3.75kg of LME
Hops
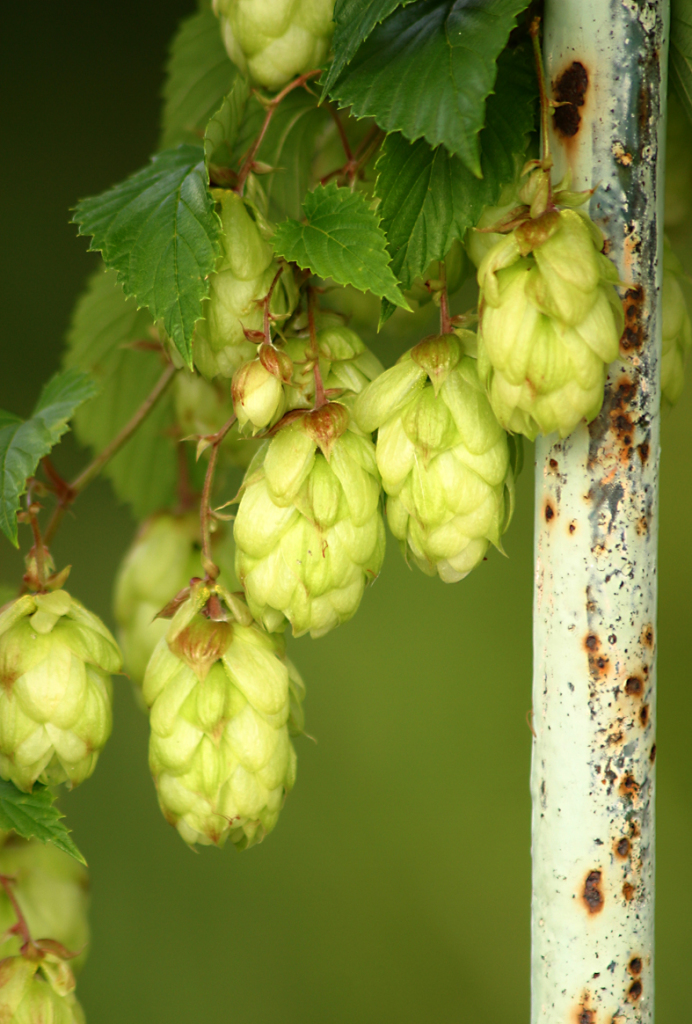
Hops are the next ingredient you need for your beer. They are in fact small flowers that grow on hop vines. Hops balance out the sweet maltiness from the grain with bitterness.Without hops your brew will taste more like ovaltine than beer.
Boiling hops during the brewing process causes them to release bitter compounds called alpha acids. These alpha acids provide bitterness to balance the beer and stop it from being way too sweet and cloying. There are also other compounds present in the hops, these compounds provide aroma and flavour to beer and can range from piney, earthy, spicey to citrusy and floral.
Even though they provide so much of the taste we associate with beer all of the hops actually get filtered out. In essence using hops is a bit like making tea.
Some beers use small amounts of hops just to balance the sweet and bitter, other beers use a lot to add a whole new flavour in itself. There are quite a few hop varieties with each having their own unique aromas and characters.
Right now hoppy beers are riding a wave of popularity, people can’t get enough of them in their beer and on this website you can find a recipe to brew a beer that showcases some of the wonderful flavours you can achieve with them.
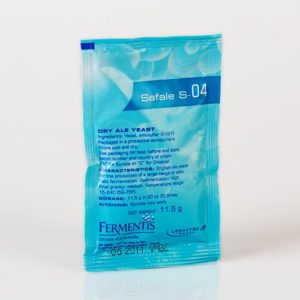
Yeast
Without yeast there is no beer, it makes alcohol and produces the carbon dioxide that carbonates the beer after brewing, you owe it to yourself and your beer to know how it works and how to look after it.
The yeast used for making beer is brewers yeast and there are many strains available. Yeast is not an ingredient to skimp on, bakers yeast whilst it would technically ferment some of the sugars, won’t make a good beer.
Fermentation is a process that takes time and, most of all, your patience. If you set up the ideal conditions for your yeast, a sweet delicious wort with plenty of nutrients, the yeast thrive. They reproduce and eat their way through the sugars and during the process produce alcohol. It’s just not beer without yeast. Yeast are also used in many other applications of food production as well. Different yeast strains specialise according to their environment.
A sugar filled wort with nutrients that come from the malted grains combined with the correct temperature is the perfect environment for yeast, the better quality conditions and ingredients will mean the yeast is a lot more effective at converting sugars to alcohol and produces desirable flavours too.
Generally there are two main strains of yeast; ale yeast and lager yeast. Ale yeast are what’s called a top fermenting yeast and work well in warm temperatures between roughly 16°C – 22°C, lager yeasts are bottom fermenting yeasts and work best in cool temperatures 7°C – 13°C.
Water
Water is one of the most important ingredients in beer and has a major impact on the final batch. It is also one of the more complex aspects of brewing, so much so that a whole book could be written on the subject so what I want to do here is give you an introduction without being too technical and give you a few tips that will make you better beer without much extra work.
I could start by saying about breweries like Burton are famous because of their water or that Pilsner being made from soft water is why you get crisp, pale lager but we know this already. What most people don’t consider is the water they home brew their beer with.
I am not going to go deep into the chemistry of water and talk about the different elements here but I will do in the future. All I want to do here is give you one or two things you can do straight away and end up brewing better beer.
Tip 1: If you don’t drink your tap water, don’t brew beer with it. This goes without saying to be honest. If you don’t like the taste of your tap water on it’s own then it’s going to make your beer worse. I have, on many occasions bought bottled water and I’m not advising you go an buy 25 litres of Evian here, I mean the super saver supermarket own brand stuff. Just try it once and see if it works for you.
Tip 2: If you are using tap water then make sure you get rid of the chlorine. The thing with chlorine is it makes your tap water safe to drink because bacteria cannot survive alongside it. However your bacteria won’t survive in your beer either, one because everything is sanitized and boiled and two because of the alcohol. The chlorine in tap water will react with phenols (aromatic compounds) in the malt to make chlorophenols and give you a taste reminiscent of band-aids or plasters.
To get rid of chlorine in your tap water there are a couple of easy solutions. The easiest is to use a carbon block water filter that filters water through the tap (rather than by the jug). This will remove any chlorine present in the water. The other thing you could do is to add a campden tablet. 1 tablet will remove any chlorine in 20 gallons of water so is a fairly cost effective way to go about it. Lastly you can boil water to remove chlorine which is simple, but in my eyes the most effort.
Setting Up Your Brewery
Brew Day Gear
Probably the biggest hurdle when it comes to getting started brewing is getting all the equipment needed to actually start brewing in the first place. It can seem like a lot of money to part with to begin. But to be honest if you were to go out and buy the amount of beer you can make in just one batch you’ll see it isn’t all that expensive.
Some equipment is used to actually brew the beer, some equipment is used whilst the beer is fermenting and other tools are required for bottling. Really the amount of stuff you need is not a lot although it may look it on paper. Once you have invested in it though, most things last for years and the more beer you make the better return you get on this initial investment.
Large Pot (ideally 12+ litres)The bigger the better really, the larger the pot the more you can boil. This may be the biggest investment.
ThermometerA thermometer really is essential, you can’t measure temperature accurately without one and they are cheap. A regular spirit thermometer is ideal, if you want to get fancy then you could invest in a digital thermometer which tend to be easier to read.
HydrometerA hydrometer allows you to measure the amount of sugar in the wort and after fermentation find out how much alcohol is present in the beer. Check out this article on using a hydrometer to find out how it works. Even if you don’t want to know how much alcohol is in your brew, you’ll need a hydrometer to indicate when fermentation is over so don’t tell yourself you don’t need one.
Sanitiser
Keeping any bacteria away from your precious beer is probably the most important thing to keep in mind. If you don’t sanitise your equipment properly the beer could go sour and taste horrible, nobody wants that! In the next section cleaning and sanitising is covered in more depth so be sure to read through before you go and buy anything.
Jug
A simple jug that you can measure quantities with as well as move liquid about with.
Muslin BagsThese muslin bags cost next to nothing and are ideal for steeping your grains and boiling your hops in. They mean you can just pull the grains or hops right out and not have to mess around straining or sieving anything out of the wort. Your homebrew supplier will usually have muslin bags or something similar that are suitable for this purpose and are usually pretty inexpensive.
Fermenting BinIf you are brewing 21 – 25 litre batches you’ll need a 30 litre fermenting bin to ferment the beer in. The extra headspace allows room for the krausen, or yeast to froth up, preventing any overflow. Obviously if you plan to brew smaller quantities then a smaller fermenting vessel will suffice, just bear in mind most beer kits and recipes are around 5 gallons or 22 litres.
Syphon tubing
It is never a good idea to pour beer from one vessel to another even in small amounts. Once the beer is fermented introducing oxygen is an easy way to introduce off-flavours that are undesirable. Aerating the beer, by pouring it, once it’s fermented will oxidise it and make it taste like sherry at best or wet cardboard at worst, also introducing all that air is a good way to introduce bacteria that can spoil the beer.
A simple plastic tube can be used to move beer around without introducing air and is pretty inexpensive. A guide on how to syphon can be found here.
Large spoon
This is a simple piece of equipment but you will make a mess without it. It doesn’t matter if you are making beer kits or if you brew all grain, you’ll need to stir large amounts of liquid that is often fairly deep. A long handled plastic spoon that can be sanitised is fine, if the handle is too short you won’t reach the bottom of your large pots or fermenting bins.
Bottling Day Equipment
Once your beer is ready to bottled you will need to package it, here is what you’ll need on hand on bottling day
Sanitiser
As mentioned above, sanitising everything that will contact your beer is one of the most important aspects of brewing. Spend some money on proper sanitizing chemicals and do it as per the instructions.
Bottling bucket
A bottling bucket is not strictly necessary but is a huge help when it comes to bottling your beer. A bottling bucket is basically a fermenting bin with a tap at the bottom. When it comes to bottling your beer you will syphon your fermented beer out of the fermenting vessel into the bottling bucket and in the process leave behind all the old yeast. Now when you bottle you will have a lot less sediment in the bottles and a handy spigot to fill the bottles from. A bottling wand as explained further down can attach to the spigot and make bottling even easier.
Bottles
You’ve brewed the beer so now you need something to put it in. Bottles are the easiest option to begin with. You could opt to buy them from your local home brew shop, either glass or plastic will be fine as long as they hold pressure. My preference is to reuse bottles from beers you buy at the shops. Pretty much any beer bottle is suitable as long as it has a crown cap. Once it’s finished rinse it out and store them up until you have enough for your brew.
Bottle caps
If you plan to reuse glass bottles then you will need to cap them once they are filled. Crown caps are the same as the caps used by commercial breweries, they are supplied by home brew shops and are splayed out. You sit the cap on the bottle of beer and use a capper to fit the cap which makes the whole thing airtight and seals the beer.
Bottle CapperA capper is a piece of equipment to properly seal the beers. As mentioned above the caps come with the edges splayed out. A bottle capper or crown capper simply pushes the splayed edges around the opening of the bottle and seals it. A variety of options are available from devices that use a hammer with to bench mounted cappers. The best to start with in my opinion is a plier type capper as pictured, these are pretty cheap and will seal thousands of beers without deteriorating.
Syphon Tubing with Racking Cane
As I said before, you should never pour beer- always syphon to avoid introducing oxygen. A racking cane is a rigid tube that attaches to the end of the syphon tubing, the end of the racking cane has a cap to ensure the end of the syphon sits above the sediment and doesn’t pull any up into the bottling bucket.
Bottling WandA bottling wand is truly a godsend when it comes to bottling day, if you can get one then consider it. You can attach the bottling wand to the end of the syphon tubing or even to the bottling bucket. You then insert the bottling wand into the bottle when it hits the bottom it starts the syphon and fills the bottle. When the bottles full you simply pull the wand up from the bottom of the bottle and it immediately stops syphoning.
This means you aren’t fiddling around with stopping and starting the syphon with beer splashing all over the kitchen flow, instead you can rattle through the bottling process much quicker and tidier.
Cleaning and Sanitising Your Brewing Gear
One Of The Most Important Parts of Brewing
Out of all the things you can do to make sure your brew day goes well, cleaning and sanitising your brewing equipment has to be one of the most important as well as the easiest.
Neglecting this simple task though is one of the easiest ways to ruin a batch of beer. I can assure you that having 5 gallons of sour infected beer is the last thing you want to happen. So with that in mind, I am going to cover the best tools and techniques to make sure your brew equipment is sparkling clean and bacteria free.
note: no bacteria that can make you ill can survive in beer, don’t worry you will not get sick from drinking beer.
Cleaning Vs. Sanitising
There is a difference between cleaning, sanitizing and sterilizing. First off let’s get sterilizing out of the way because as home brewers, sterilizing is not something that can be done economically.
To make something sterile you have to remove all traces of bacteria and spores, no chemicals available to home brewers can do that. Sterilization can only really be done in an autoclave or with heat for an extended period.
What us home brewers need to do is remove as much of the bacteria as possible to levels where they won’t be able to infect our beer. When we talk about sanitising we are actually talking about disinfecting.
Cleaning on the other hand is something everyone is familiar with and usually involves scrubbing and elbow grease. The purpose of cleaning is to remove all the organic material and dust from your equipment.
So now we have our terms defined, cleaning gets your equipment to the point where you can’t see any dirt then sanitizing reduces invisible bacteria to negligible levels, meaning they won’t be around in enough numbers to infect your home brew.
Cleaning Your Gear And What To Use
Some cleaning and sanitizing is more important depending on which part of the brew day it’s for. As a general rule anything you use before the beer is boiled doesn’t need to be sanitized to such an extent because the boiling process itself will kill any contaminants in the beer. That is not to say you don’t have to worry about it being clean.
The Importance of Cleaning
Bacteria are microscopic and hide out in hard to get to places, things like scratches and the corners of your equipment are places that will naturally accumulate dirt and grime. Bacteria will happily live in these scratches and crevices and will be protected from any sanitising you may do. Later on when the dirt is dislodged the bacteria will be exposed and ready to infect your beer. This is why all traces of organic material need to be removed before sanitising.
Common Cleaning Products
Dish Detergent: One thing you want to take caution over is reaching for the dish soap. A large proportion of dish soaps will leave a film that cannot be completely rinsed off and leave traces in your beer, also most soaps contain perfumes that will interfere with your beer. If you do use dish soap then use it in small quantities and rinse thoroughly, it’s better and usually more cost effective to use something like bleach.
Bleach: Ordinary household bleach is one of the mainstays of brewing equipment cleaning. It’s one of the cheapest solutions and is available almost everywhere. You will need to use unscented bleach and a dilution of 1 tablespoon per gallon or 4 litres, this will break down most organic material so it can be scrubbed off and rinsed away. Do not leave metals in contact with bleach for too long as corrosion can occur. If cleaning metals then minimize contact time. All items cleaned with bleach need thoroughly rinsing before use.
Sodium Percarbonate or Oxiclean: You may of heard of Oxiclean or similar products which are touted as oxygen cleaners. Sodium percarbonate is the active chemical in these cleaners and when combined with water, release hydrogen peroxide which will break down nearly all organic material. These types of cleaners should be used according to manufacturers instructions and rinsed thoroughly. The good thing about these are you can get one brand or another at most big supermarkets.
Dedicated Brewery Cleaners: If you go to your home brew shop they will usually have a large array of cleaners suitable for washing your equipment. It goes without saying, just follow the manufacturers instructions.
Sanitising Your Equipment & A Few Tips
Everything that comes into contact with your beer after it’s boiled needs to be disinfected and sanitized. There are a number of cheap solutions available and they will all minimize the risk of infection in your beer
Bleach: Again bleach is one of the cheapest and most commonly available options for sanitizing your brewing gear. You’ll want ordinary unscented household bleach in a quantity of 1 tablespoon per gallon and leave your equipment to sanitise in this for around 10 minutes. It is then a good idea to rinse with boiled water although most people do use tap water without any issue.
Star-San: This is one of the most cost effective sanitisers and one of the easiest to use too. Star-san is a no rinse sanitizer and is diluted in water according to the instructions. This solution can then be sprayed onto your equipment which will be sanitised within 30 seconds. Star-san foams very easily which helps it penetrate into all surfaces, also the foam needn’t be rinsed as it also acts as a yeast nutrient. Only small quantities of Star-san is required per use therefore, one bottle can last quite a while.
A number of other sanitisers are available from your home brew shop and should be used according to instructions. Most of the time I use either bleach or star-san because they are so cost effective and easy to use.
Tips on Cleaning and Sanitizing Your Brew Gear
First off, whatever chemicals you are using make sure you protect yourself, most chemicals require the area to be well ventilated and wear gloves to protect your hands.
Clean Items As Soon As Possible: Your fermenter will be a lot easier to clean just after you racked beer out of it rather than a few days later when everything has dried out and stuck like glue. Rinse everything straight away and make cleaning later on so much easier.
Use the Right Tools: If you use a carboy/demijohn invest in a bottle brush, you will make life so much easier in the long run if you make cleaning less hassle. Another thing to point out is that using an abrasive pad on plastic equipment is not a good idea, all that you will do is scratch the surface and create more crevices for bacteria to inhabit.
Be Consistent: I know it’s not the best part of brewing but being sloppy with cleaning and sanitation is a good way to ruin a batch of home brew. Take your time, be thorough and you will never have to risk getting an infected brew.
Extract Brewing Process
Extract Brewing with Steeped Grain and Hops
Extract brewing opens up a whole variety of options to the home brewer to create countless types of beer without the need to invest in too much equipment. This type of brewing is an ideal progression from making beer kits. In essence you create a beer using a malt extract base but modified by adding different malted grains and hops as well as your own choice in yeast. These different variables allow you to truly customise the type of beer you make.
In this section we will explore some of the varieties of malt available to the extract brewer, varieties of hops and then decide on a recipe to brew, either a Pale Ale or a Porter. These recipes will be made with a malt extract base and then a variety of speciality malts will be steeped to add further flavour followed by the addition of hops to balance the malt base.
Quick-Start Guide to Our Brewday
Let’s take a look at what our brew day is going to look like, in essence a quick start guide to brewing one of the beers I’ve listed down below.These short steps are all you need if you just want to get going right away. However, below I run through with some more details for each part of the process and give you a little more information on why the brewer does certain things. All you need to do is click on the sidebar if you want to get a fuller explanation. Cool.
Extract Brew Day As It Happens
- 8 litres of water is heated in your brew pot.
- Grains are placed in a straining bag and immersed in the brew pot at 70°C, bringing the temperature down to about 67°C.
- The grain is steeped for 30 minutes.
- The grain bag is removed and drained. The resulting wort is then heated to a boil.
- Once we reach a rolling boil hops are added at varying intervals and the boil is maintained for an hour.
- 20 minutes before the end of the boil the malt extract is added and thoroughly mixed in
- After an hour the heat is turned off. The brew pot is immersed in a water bath.
- The cooled wort is added to the fermenter through a sanitised strainer and the level topped up to 19 litres.
- Yeast is pitched (added) and fermentation takes place over the course of 2 weeks.
- The beer is then transferred into bottles and stored for 2 weeks.
- The beer is ready for drinking.
Speciality Grains
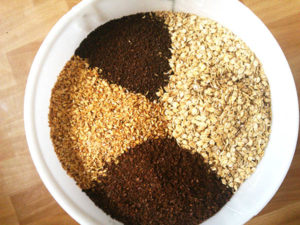
For an extract brewer there are a number of speciality grains that can be used to make a wide range of different beers providing a lot of scope to start experimenting with all sorts of combinations.
There are 2 types of malted grains, those that need to be mashed and those that don’t. When brewing with speciality grains the conversion of starches to sugar within the malt has already occurred, bypassing the need to mash.
We are replacing the malt that needs to be mashed with extract and using the speciality grains to add further sugars and more complex flavours to the extract base.
Below is a list of some of the types of speciality grain that you can use in an extract brew to add more depth, character and complexity:
Crystal Malt – This is made in a slightly different way to ordinary barley malt using barley that has not been dried and is called green malt. It is kilned in a set range of temperature steps that in effect mash(the process that converts starches to sugars) the grain inside the husk. This means when it comes to brewing the sugars are already present in the malt. Crystal malt will add sweetness to the beer and a caramel-like quality, this attributes body to the beer which people refer to as mouthfeel. It comes in a variety of colours according to the length of time it is roasted for and can be referred to as caramalt
Chocolate Malt – This is a barley malt that has been kilned to quite a high degree but still retains some aromatic qualities. Chocolate malt will add a toasted, nutty and cocoa like flavour to the beer and also colour.
Amber Malt – This is a malt that has been kilned to a lesser extent than chocolate malt so therefore is lighter in colour. It is said to add a biscuit aroma to beer and chocolatey/coffee characters.
Black Malt – Black malt like chocolate malt has been kilned but for a longer time so many of the aromatics have been driven off. It is primarily used in stouts and porters for colour and certain dry bitterness.
Roasted Barley – This is barley that has not been malted, just kilned at a higher temperature and is a rich brown colour. As the name suggests it will add a rich roasty character to your beer
Wheat Crystal Malt – This is processed in the same way as barley crystal malt, but as the name suggests uses wheat instead of barley, and is often used in the darker variations of wheat beers.
Using Speciality Grains
Our extract beer will be made with an unhopped malt extract and further to this we will steep grains in hot water to add further complexity to the malt extract base. The steeping of special grains, such as chocolate and black malts, will turn an ordinary pale malt extract beer into a dark porter. Alternatively the same pale malt extract beer can be given a more complex malt flavour by steeping crystal malts to make a flavourful light coloured pale ale. These are just examples and the tip of the iceberg regarding the scope there is for creating some unique beers.
 Steeping Process
Before you can steep your special malts they need to be crushed. Most home brew shops will be able to supply you with crushed grain so you don’t have to invest in a grain mill, just make sure you buy the crushed varieties.
To enhance the steeping process and extract the most flavour from your malts hot water is best. A temperature range of around 60°C and 75°C is ideal and will get the most flavour from your malts without extracting unwanted flavours that hotter temperatures can sometimes encourage.
To steep the special malts you will need a large stock pot and a steeping bag as specified in the equipment section. Heat up water at around a ratio of 4-6 litres per kilo of grain in the brew pot and when you are just above the target temperature add the malt in the grain bag to the pot.
At this point stop heating, give the grain a good mix to get everything wet and then secure the bag opening. The malt now needs to steep much like you would a tea bag.
Allow the malt to steep for around 30 minutes then lift the bag and allow to drain on its own. It’s best not to squeeze the bag as this can affect the clarity and extract tannins which will affect the taste of the finished beer.
The grains can now be discarded and what we are left with is essentially a grain tea in our stock pot. We can now move to the next part of the brewing process which is the boil.
Hop Use in the Boil
There are very many varieties of hops available to the home brewer and at first it may seem overwhelming. However, they are great for adding different flavours to a beer and give the brewer scope to make something completely unique.
When looking at different hops it’s a good idea to do some research. You will find that each variety will be categorized into groups depending on how they are best used in the brewing process:
Bittering: Used to add bitterness to the beer and balance the malt sweetness. Bittering hops are added early on during the boil to extract alpha acids from the hop. This process is called isomerisation and is most effective when the hops are boiled for around an hour.
Alpha acids in the hops are the primary source of bitterness, each variety of hop will have a different level of alpha acid present. The higher the level of acids, the more bittering power the hop has.
Aroma: These hops are most effective when added at the end of the boil. Aroma hops are added late so their volatile compounds stick around and aren’t driven off by the boiling wort. These hops all add some character to the beer which can range from floral, earthy, pine or even citrus and tropical fruit qualities.
Dual Use: As you may of guessed dual use hops give you the best of both worlds and can be added early to provide bitters or late for aroma. Dual use hops are great all rounders.
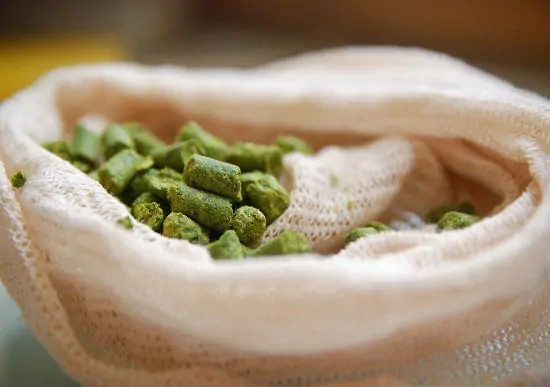
Hops can come in different forms, either pellets, whole leaf or plugs. Our recipes will use whole leaf hops as they are easier to separate from the beer after being boiled. The varieties I have suggested to use in the recipes later on are; Centennial and Cascade for the pale ale; and Fuggles and Bramling Cross in the porter.
Boiling Your Beer with Hops
To extract bitterness from the hops they need to be boiled. Alpha acids in the hops are the primary source of bitterness and aren’t very soluble, boiling for around an hour is the most effective length of time to extract the alpha acids.
As you are probably aware certain beer styles have differing amounts of bitterness in comparison to others so this means the amount of bitterness needs to be measured. This measurement is called “International Bitterness Units” (IBU).
When a recipe is formulated the Alpha Acid % that is associated with the hops can allow us to work out how much hops are needed in that brew, according to what level of IBU is needed. In our recipes I have worked out the IBU for each brew so it falls in the range for the style.
Our steeped grain tea we made earlier can now be topped up the wort to a level suitable for the stock pot you are using. If it’s 12 litres for example a suitable level will be around 10 litres. The idea is to boil as much as possible without risking the pan boiling over and being unsafe. Now it’s full bring to a boil, turn off the heat and then the malt extract can be added, stirred in and thoroughly incorporated. Again be safe and leave plenty of head space in your pot so you can conduct the boil safely. You can now heat again and start a rolling boil.
Now the wort is boiling we can add the hops as directed by the recipe. The first hops added are boiled for an hour and provide the bulk of the bitterness as time passes add the aroma hops at the time indicated. During the boil leave your stock pot uncovered and keep an eye on it the whole time to ensure it doesn’t boil over.
Once the hour has elapsed we can start cooling and get the beer ready for fermentation.
Dry Hopping
Previously I have talked about hops as a means of providing bitterness by boiling them to extract the alpha acids present..
So you can add hops at the beginning of the boil to provide bitterness and towards the end to give you a sense of the aroma and flavour of a particular hop, these are called late additions.
As you boil them for less time more of the flavour of the hops are preserved. As well as this brewers can also do something called dry hopping. Even a late addition of hops in the boil will lose some of the aroma of the hops so dry hopping involves putting them in the fermenter. This means none of the aromatic oils are lost in the boil and you can achieve completely different flavour characteristics in your home brew.
A number of notable styles of beer use dry hopping such as IPA’s and Pale Ales but the beauty of brewing your own beer means you can experiment as you wish and incorporate dry hopping in any style you want.
Dry Hopping Techniques
Generally the best time to add hops is during secondary fermentation when the yeast activity has settled down after the initial burst. Depending on your recipe you add around 25 – 50 grams to the fermenting beer for the period of the secondary fermentation, so around 2 – 4 weeks.
Because there is already alcohol and the compounds present in the hops it is not generally necessary to worry about sterilising the hops and of course you don’t want to boil then as this will drive off the aroma that you are trying to attain.
There is also the option of adding a smaller quantity of hops to the keg if you keg your beer rather than bottle it. This works in the same way as adding them during the fermentation process but remember that your kegged beer will be sitting around longer so less hops should be used.
Also you will want to decide whether to add the hops in loose or in a hop bag. The obvious advantages of using a bag will mean you can separate the hops from the beer a whole lot easier once you’re finished. Of course ensure the bag is sanitised before using, I use muslin bags a boil them for a short while.
Generally when you use loose hops pellets are your best option because they fall out of suspension after a few days and allow you to rack beer from above.
Making A Yeast Starter
 When making beer it is imperative to get the fermentation started as soon as possible. We want to ensure an adequate amount of yeast is pitched to get the beer fermenting straight away and also to form a protection against infection from bacteria.
The sachets and tubes of yeast that are supplied from the home brew shop are a long way short of what is required, a lot of time to begin with will be the yeast cells reproducing to an adequate quantity to ferment the whole batch of beer. This is fine of course and I have pitched yeast straight from the packet but there was a noticeable lag in the time it took to begin fermenting.
Commercially, yeast will be pitched at a rate far higher than what is available to buy in either liquid or dry forms. If you are making a higher gravity beer it may be necessary to make a starter so here is a basic guide to how to go about it.
Things you will need:
Glass Jug or Jar
Dry Malt Extract
Sauce pan and lid
Yeast
Thermometer
Sanitiser
- Put 4 tablespoons full of dry malt extract into the pan and add 2 pints of water. It is important that not to much dry malt extract is added as when the starter starts to ferment it will produce alcohol. If the levels of alcohol are too high it will become toxic to the yeast cells.
- Bring the mixture to the boil. Whilst the is happening make sure your glass container and thermometer are completely sanitised using your preferred sanitiser, this is imperative.
- After boiling the malt extract and water for around 10 minutes this will also be sterile allow to cool to room temperature with the lid on. It may be a good idea to use a cold water batch for this to get it cool quickly.
- Pour the malt extract solution (wort effectively) into the sterilised container and check it is at room temperature with a sterilised thermometer.
- Pitch the yeast. If this is liquid straight from the vial. If dried it should be re-hydrated according to the packet instructions.
- Cover the container with a sterilised piece of foil and shake vigorously to get as much oxygen as possible into the wort. You can shake every so often for the next 24 hours whilst the yeast reproduces.
It may not seem to be doing anything for a while but eventually you will see some signs of activity and a layer of yeast will form at the bottom of the container in a whitish layer.
It is a good idea to do this a couple of days before hand so you can ensure the maximum amount of yeast cell reproduction. When you are ready to pitch you can swirl the yeast back into suspension and add the whole lot or decant off a proportion of the starter without disturbing the yeast then swirl and pitch to the wort.
Cooling and Pitching Yeast
To get the beer ready for fermentation we need to start cooling the wort down. Yeast require a specific temperature range to thrive in. Ale yeasts need be kept around 16°C – 24°C any colder and the yeast will begin to hibernate and not ferment the beer, warmer and the yeast will produce harsh flavours and at much warmer temperatures the yeast cells will die.
Our aim is to cool the beer as quickly as possible. There are a couple of reasons to do this, one is that oxidation can occur when cooled over a long period as well as allowing the possibility of bacteria contaminating the wort which would completely ruin the batch. Also as the beer cools slowly it produces a sulfur compound that will remain in the finished beer creating unwanted off-flavours.
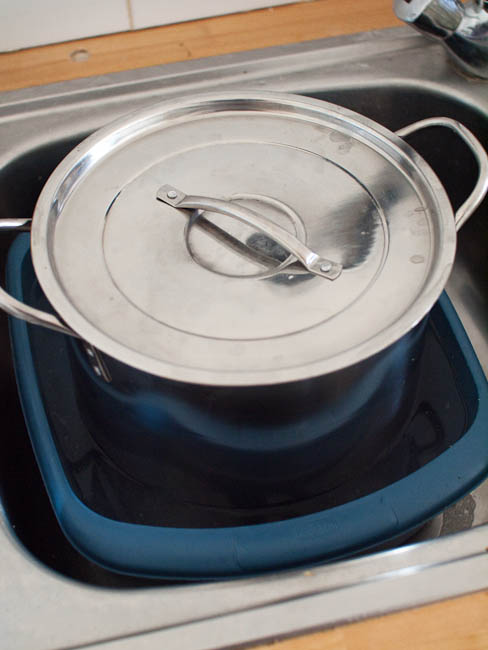 Cooling the Wort in a Water Bath
This really is as easy as it sounds. Obviously if you boil your wort in a metal pot then it will cool a lot quicker due to conduction.
Sit your vessel with the lid on if you have one in a bath of ice cold water. You can of course throw a load of ice into the water bath to speed up cooling and you will notice after 5 minutes or so the water bath will be noticeably warm. It’s a good idea to stir this water to even out the temperature. Also you may find you will need to change the water several times to get it to around room temperature. Using this method you can quickly cool the beer to room temperature within a fairly short period of time.
Once the wort is cooled it can be added to the fermenter. Remove hops and debris by running the beer though a sanitised strainer into the fermenter. The resulting amount can be topped up to the full desired brew amount(for the recipes below this will be 18 litres). Remember this action of topping up the fermenter will also cool the beer too.
Pouring and topping up the beer in the fermenter should introduce enough oxygen that the yeast need to ferment the beer. At this stage take a final temperature check and you can now add the yeast to the wort simply by sprinkling over the surface. Seal the fermenter with the lid and insert the airlock. That’s the brewday over, it’s now time to sit back and wait for the yeast to do its thing and ferment out the beer.
Primary and Secondary Fermentation
The fermentation of your beer is one of the most important parts of the brewing process. It may seem like the part where you don’t really do much but it is also the stage of the process where many things can influence the taste of the finished beer, so what exactly is happening during fermentation.
Lag Phase
After pitching the yeast the first thing they do is adapt to their new environment and begin to reproduce and growing at a high rate. To aid this growth phase nutrients in the wort and any available oxygen are utilised by the yeast cells. This lag time for the beer is a critical point during fermentation, the yeast need to produce enough cells to ferment the beer fully without leaving any residual sugars unfermented. At the same time the wort is at its most susceptible to bacterial infection that could ruin the batch, this is why making sure everything is clean and sanitised is vitally important. The only thing we want to thrive in the beer is the yeast we the brewers select.
This lag phase can last anywhere between 12 – 48 hours, generally speaking the shorter the time the better. The next phase of fermentation is the primary phase.
 Primary Fermentation
After the lag phase the yeast should now be at a point where they have reproduced and exhausted all the oxygen available, so they begin to consume sugar as a means of energy. This primary phase is where the majority of the sugars in the beer are converted to alcohol and carbon dioxide.
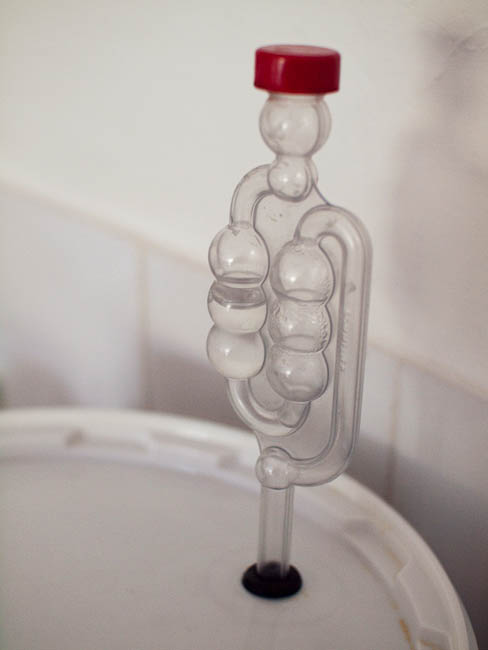
Primary fermentation is easy to identify because the beer visually transforms in the fermenter. The vigorous activity by the yeast creates a foamy head on the beer called a krausen which is made up of yeast cells, hop debris and proteins in the wort. Your airlock fitted in the fermenter will be actively bubbling every few seconds and this whole process will last several days before winding down.
At this point the majority of the fermentable sugars present in the wort will have been consumed by the yeast and alcohol will have been produced. Depending on the type of beer this period of primary lasts between 2 and 7 days (lagers take slightly longer up to around 2 weeks). The beer now moves into the next stage of fermentation, Secondary.
Secondary fermentation
Some people prefer the term conditioning phase as when you brew a typical ale there is only a small amount of fermentable material left at this point. During this phase the beer will begin to clear as the yeast cells drop out of suspension and some of the undesirable compounds created during primary fermentation will be cleaned up and the flavours will become rounded and any harsh flavours evened out.
In a lot of brewing texts there is some difference in opinion as to whether this second phase should happen in the same vessel as the primary fermentation. A lot of people use the term secondary fermentation to mean they are transferring the beer to a second fermenting vessel. This has benefits such as helping to get a clearer final beer. However there are only a few particular instances when I think using a second fermenter may be considered so I will list them here:
- When Brewing High Gravity Beers
It takes a lot longer to ferment beers up above 8% abv. This means that after primary fermentation the yeast will settle out, those dead yeast cells and the trub can cause off flavours in the beer. If you rack the beer to a second fermenter you leave all the undesirable material behind and ensure a better beer.
- When Fermenting with Hops, Fruit or Wood
If you are adding anything to the beer I think it’s a good idea to add it after the primary fermentation is over. If you are dry hopping there is no way to sterilise the hops so it’s best to add them after there is alcohol present to minimise risk of infection. The easiest and cleanest way to introduce hops or fruit is to put them in the secondary vessel and syphon the beer on them. This means they aren’t going to get caught up in the trub and make the process difficult and messy later on.
If you are using fruit or wood chips you might want to keep them in the beer for longer than 2-3 weeks so using a second fermenter will reduce the risk of any off flavours from the the beer sitting on the trub too long.
- When You are Brewing Certain Styles
If you are brewing a lager generally it will be fermenting for longer so it’s a good idea to get the beer off the trub.
Is It Necessary to Use a Secondary Fermenting Vessel?
If you are brewing an ale then I would say no, not really.
Primary fermentation and conditioning will be over with 2-3 weeks so you aren’t going to get any off flavours and by moving to secondary you have a small risk of oxidising the beer or getting an infection. Unless I am leaving the beer in the fermenter for long periods or doing one of the things listed above then I always just bottle or keg without a second vessel being used.
Primary fermentation and secondary (conditioning) will be over within 2-3 weeks, then it’s time to bottle the beer or keg it.
How Strong Is My Beer?
When I started brewing I made a beer using malt extract a little bit of crystal malt and some East Kent Goldings hops. I had found a process online and followed it, I brewed the beer, waited for it to ferment and then bottled it. It tasted like beer and wasn’t too bad for a first attempt, I had one question left unanswered though and that was how strong was my beer. I had looked at the guide I found online and couldn’t see where the % ABV (alcohol by volume) was written.
So How Do You Work Out How Strong Your Home Brew Is?
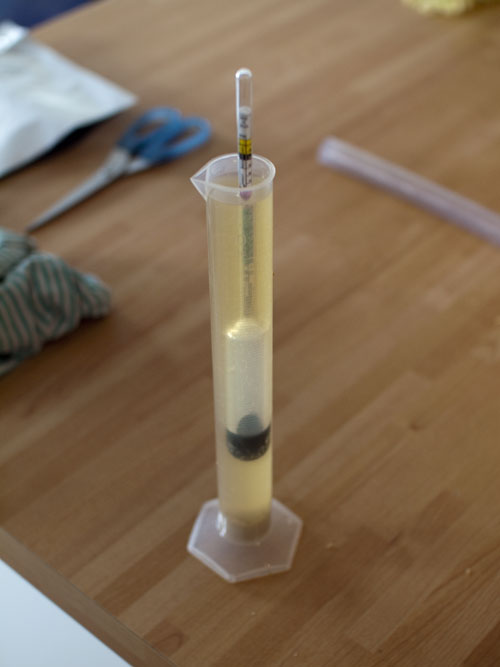
Calculating the percentage of alcohol in a beer is simple so don’t worry, the only thing you need is a hydrometer. Using a hydrometer is a simple. It is basically a measuring device that measures the density of a liquid. When you measure the density of plain tap water you pop your hydrometer in it and it sinks to a certain depth. The scale on the stem of the hydrometer indicates the density. The density of water is 1.000
Unfermented beer (wort) on the other hand is full of simple sugars and carbohydrates, these things will alter the density of the liquid meaning when you drop your hydrometer in the wort it won’t sink as much. The added density will mean the hydrometer sits higher up in the liquid giving us a different reading say 1.050.
When the beer ferments the sugars will be consumed by the yeast, this process removes the sugar turning it to alcohol as well as carbon dioxide and this reduces the density back down. Once fermentation is complete another reading is needed from the hydrometer, you will find it will not be 1.000, this is because there are some unfermentable carbohydrates in the beer. A more usual reading will be 1.012 for instance. It is with this information we can calculate the alcoholic content of the beer.
Calculating Alcohol By Volume or the Strength of Your Beer
Using the readings above as an example you have the following information:
Hydrometer reading before fermentation: 1.050
Hydrometer reading after fermentation: 1.012
To calculate the ABV we simply subtract the lower gravity figure from the original gravity figure like so:
1.050 – 1.012 = 0.038
Multiplying the result by 131.25 will give us a good approximate alcohol content:
0.038 x 131.25 = 4.99%
So the strength of the beer is approx. 4.99% ABV.
The Beer Recipes
Citra Pale Ale Recipe
American Pale Ales are a great showcase for some of the boldest and newest varieties of hops available to the home brewer. Differentiating themselves from European Pale Ales, US versions use clean tasting strains of yeast and neutral light coloured malts to really allow the citrus, tropical and fruity hop varieties grown in America to shine.
The hop I have selected for this Pale Ale is Citra because it is new, unique and one of the most aromatic available at the moment. That being said it would be simple enough to substitute in another variety to suit your own tastes. The yeast is a Californian strain which is clean tasting and true to style.
[pdf-embedder url=”https://homebrewanswers.com/wp-content/uploads/2015/06/CitraExtractBrewsheet.pdf”]
Download Brewsheet
German Hefeweizen Recipe
Wheat makes up the bulk of the grain used in a Hefeweizen. Originating in the South of Germany up to 50% or more of the grain used in the grist is wheat and this plus the yeast used for fermentation are the main drivers of the distinct flavour and hazy appearance of the beer.
The name is derived from “Hefe” meaning “with yeast” and “weizen” meaning “wheat”. Hefeweizens are very sparingly hopped with traditional German hops and the yeast provides banana and clove character that make these wheat beers pleasingly refreshing. Served in a traditional Wheat beer glass and you have an iconic beer.
IBUs (Bitterness): 15
EBC (Colour): 6
OG: 1.049
FG: 1.012
ABV: 4.8%
[pdf-embedder url=”https://homebrewanswers.com/wp-content/uploads/2015/06/GermanWheatBeerExtractRecipe.pdf”]
Download Brewsheet
London Porter Recipe
A beer originating in London, Porter was a style that was born from a blend of beers in the 18th century called three threads, eventually a beer brewed that recreated the blend of beers and this became known as Porter. The name porter is supposedly derived from the popularity of the beer with the porters who worked in London.
Porter as a style of beer has a few variations so they can range in alcohol content from between 4% to 9.5% but all of them share a colour somewhere between Deep brown to near black, with ruby highlights being common because of the use of dark roasted and dark caramel malts.
London Porter
Brewed primarily with British ingredients London Porter or Brown Porter typically is full of caramel and toffee notes and has a hint of sweetness. Hop bitterness is medium and aroma is low or has the earthy character from English hop varieties like East Kent Goldings or Fuggles for example. The recipe for our beer is similar to that of a famous porter brewed by Fullers in London. Here is the information and the brewsheet to download.
IBUs (Bitterness): 35
EBC (Colour): 33
OG: 1.051
FG: 1.013
ABV: 5%
[pdf-embedder url=”https://homebrewanswers.com/wp-content/uploads/2015/06/PorterExtractBrewsheet.pdf”]
Download Brewsheet
Carbonation and Packaging
A Guide To Carbonation
Something that I think that is often overlooked when it comes to packaging or bottling beer is the carbonation (or the level of fizz).
The level of carbonation can contribute to the beer in a variety of ways. It affects the level of perceived body in the beer and the mouthfeel, the formation of a foamy head and also enhances the flavour compounds present in the beer. Anyone who has ever drunk a flat beer will know it’s no way near the same as a correctly carbonated beer.
There are a couple of ways to achieve carbonation for home brewers. If you are kegging your beer you can force carbonation by pressurizing the keg with carbon dioxide, you can follow the technique of krausening which involves adding unfermented wort to fermented beer although this is not entirely practical for home brewers and finally you can bottle condition which involves adding priming sugar to the fermented wort then bottling which allows the fermentation of that sugar to be carried out in the bottle. The CO2 naturally created as a byproduct of fermentation has nowhere to go in a sealed bottle so is dissolved into the beer.
So How Much Priming Sugar is Enough
Below is a table showing how much sugar is required in a 19 litre batch of home brew. As you can see on the table to achieve a low level of carbonation in a 19 litre batch you would need 75 grams of table sugar added to the fermented beer. The easiest way to do this is to create a solution by adding the sugar to a small amount of water and boiling it to sterilise it and ensure the sugar is fully dissolved. This can then be cooled and added to the bottling vessel and the beer racked on top of it.
| Very Low | Medium | Very High | |
|---|---|---|---|
| Grams of Corn Sugar in 19 Litre Batch | 75 | 115 | 150 |
| Volumes of CO2 | 1.9 | 2.4 – 2.5 | 2.9 |
The table also shows “Volumes of CO2”. This term Volumes of CO2 is a way of measuring the level of carbonation in your home brew, it means for 1 volume of CO2 1 litre of carbon dioxide is dissolved into 1 litre of liquid or beer.
So we can see for the chart above we can see for the high levels of carbonation 2.9 litres of CO2 has been dissolved into every 2.9 litres of beer. It is good to know this measurement when brewing different styles of beer. Below is another table (I know another one) which I hope will be useful to you if you are brewing a particular style of beer.
Now to work out how much table sugar is needed your best bet is to use a calculator. There is a variety of software that can do these calculations or you can try an on line calculator such as this one at Brewer’s Friend.
Carbonation Levels For Different Beer Styles
| NAME | TYPE | CARBONATION RANGE |
|---|---|---|
| American Amber Ale | Ale | 2.3-2.8 vols |
| American Barleywine | Ale | 1.8-2.5 vols |
| American Brown Ale | Ale | 2.0-2.6 vols |
| American IPA | Ale | 2.2-2.7 vols |
| American Pale Ale | Ale | 2.3-2.8 vols |
| American Stout | Ale | 2.3-2.9 vols |
| Belgian Blond Ale | Ale | 2.2-2.8 vols |
| Belgian Dark Strong Ale | Ale | 2.3-2.9 vols |
| Belgian Dubbel | Ale | 2.3-2.9 vols |
| Belgian Golden Strong Ale | Ale | 2.3-2.9 vols |
| Belgian Pale Ale | Ale | 2.1-2.7 vols |
| Belgian Specialty Ale | Ale | 2.1-2.9 vols |
| Belgian Tripel | Ale | 2.4-3.0 vols |
| Berliner Weiss | Ale | 2.4-2.9 vols |
| Biere de Garde | Ale | 2.3-2.9 vols |
| Blonde Ale | Ale | 2.4-2.8 vols |
| Brown Porter | Ale | 1.8-2.5 vols |
| Dry Stout | Ale | 1.8-2.5 vols |
| Dunkelweizen | Ale | 2.5-2.9 vols |
| Dusseldorf Altbier | Ale | 2.1-3.1 vols |
| English Barleywine | Ale | 1.6-2.5 vols |
| English IPA | Ale | 2.2-2.7 vols |
| Extra Special/Strong Bitter (English Pale Ale) | Ale | 1.5-2.4 vols |
| Flanders Brown Ale/Oud Bruin | Ale | 2.2-2.8 vols |
| Flanders Red Ale | Ale | 2.2-2.7 vols |
| Foreign Extra Stout | Ale | 2.0-2.6 vols |
| Fruit Lambic | Ale | 2.4-3.1 vols |
| Gueuze | Ale | 2.4-3.1 vols |
| Imperial IPA | Ale | 2.2-2.7 vols |
| Imperial Stout | Ale | 1.8-2.6 vols |
| Irish Red Ale | Ale | 2.1-2.6 vols |
| Kolsch | Ale | 2.4-2.8 vols |
| Mild | Ale | 1.3-2.3 vols |
| Northern English Brown Ale | Ale | 2.2-2.7 vols |
| Oatmeal Stout | Ale | 1.9-2.5 vols |
| Old Ale | Ale | 1.8-2.5 vols |
| Robust Porter | Ale | 1.8-2.5 vols |
| Roggenbier (German Rye Beer) | Ale | 2.5-2.9 vols |
| Saison | Ale | 2.3-2.9 vols |
| Scottish Export 80/- | Ale | 1.5-2.3 vols |
| Scottish Heavy 70/- | Ale | 1.5-2.3 vols |
| Scottish Light 60/- | Ale | 1.5-2.3 vols |
| Southern English Brown Ale | Ale | 1.3-2.3 vols |
| Special/Best/Premium Bitter | Ale | 0.8-2.1 vols |
| Standard/Ordinary Bitter | Ale | 0.8-2.2 vols |
| Straight (Unblended) Lambic | Ale | 1.8-2.6 vols |
| Strong Scotch Ale | Ale | 1.6-2.4 vols |
| Sweet Stout | Ale | 2.0-2.4 vols |
| Weizen/Weissbier | Ale | 2.5-2.9 vols |
| Weizenbock | Ale | 2.4-2.9 vols |
| Bohemian Pilsner | Lager | 2.3-2.6 vols |
| Classic American Pilsner | Lager | 2.5-2.7 vols |
| Classic Rauchbier | Lager | 2.4-2.8 vols |
| Dark American Lager | Lager | 2.5-2.9 vols |
| Doppelbock | Lager | 2.3-2.6 vols |
| Dortmunder Export | Lager | 2.4-2.7 vols |
| Eisbock | Lager | 2.2-2.6 vols |
| German Pilsner (Pils) | Lager | 2.4-2.8 vols |
| Lite American Lager | Lager | 2.5-2.8 vols |
| Mailbock/Helles Bock | Lager | 2.2-2.7 vols |
| Munich Dunkel | Lager | 2.2-2.7 vols |
| Munich Helles | Lager | 2.3-2.7 vols |
| Oktoberfest/Marzen | Lager | 2.5-2.8 vols |
| Premium American Lager | Lager | 2.5-2.8 vols |
| Schwarzbier (Black Beer) | Lager | 2.2-2.7 vols |
| Standard American Lager | Lager | 2.5-2.8 vols |
| Traditional Bock | Lager | 2.2-2.7 vols |
| Vienna Lager | Lager | 2.4-2.6 vols |
A Guide To Bottling Beer
 Bottling beer is the final hurdle when it comes to brewing, it’s the last process you are directly involved in before drinking so it’s good to spend time and care doing it properly and hygienically. It would be a great shame to make a mistake at this point so far along the line that would turn an otherwise great beer into just a good one. Let’s take a look at what’s involved with bottling a beer a well as possible and a few tips to speed along a largely repetitive task.
Hassle Free Bottling Of Your Beer
First of all, as the beer has finished fermenting we need everything that comes into contact with it to be clean and sanitised. If you have a bottling bucket fill it up with your sanitising solution and throw in everything you’ll be using to rack and bottle the beer; this includes syphon tubing, canes, bottling wands and anything else you might need. Once everything is clean and sanitised you can begin.
To begin we need to prepare a priming sugar addition to add to the beer so when it’s bottled it achieves the correct level of carbonation, use the information laid out above to find how much priming sugar you need. Add the correct amount of sugar to a clean pan along with twice the amount of water to sugar, with the lid on, heat the liquid up to boiling point to dissolve the sugar and sanitise the liquid. Boil for 5 minutes or so and then remove from the heat and allow to cool down.
Prepare The Bottles
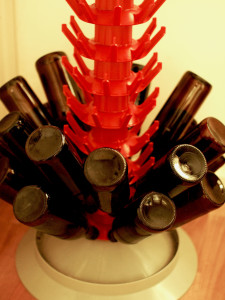
Whilst this is occurring you can begin sanitising the bottles, bearing in mind they should already have been cleaned. If you have a bottling tree and bottle sanitiser then you’re in for a smooth sail, fill the bottle injector up with no-rinse sanitiser and start pumping sanitiser into the bottles, a couple of squirts should be fine. Place these on the bottle tree and work your way through all the remaining bottles. Sanitise the caps in a bowl of no rinse sanitiser ready to go for when the bottles are filled
If you don’t have the bottling tree and injector then you will need to fill each of the bottles with sanitiser by hand and then drain and rinse manually. This way is fine but if you don’t use no-rinse sanitiser you’ll need to spend extra time making sure the bottles are free from sanitiser, the whole process will take more time but is just as effective. Caps can be sanitised at this point as well.
Once everything is sanitised, and rinsed where necessary, it’s time to transfer the beer to the bottling bucket if you are using one. Add the now cooled priming sugar solution to the bottling bucket and then syphon the beer on top of this being careful not to disturb the sediment on the bottom or introduce oxygen by splashing or bubbling the beer. The process of syphoning should do a good job of mixing the sugar solution and beer together. If you aren’t using a bottling bucket you will need to carefully stir the priming sugar in using a sanitised spoon.
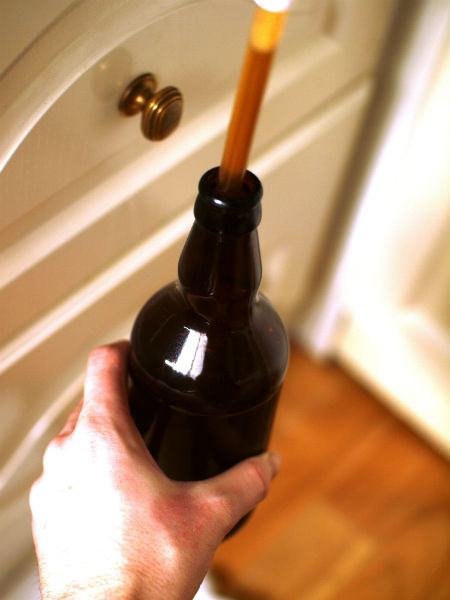
Now it’s time to fill the bottles, attach the bottling wand to the tap of the bottling bucket open the tap and start filling bottles by pressing the tip of the bottling wand on the bottom of the bottle. If you aren’t using a bottling bucket with a tap it will be slightly more tricky but entirely possible to attach the bottling wand to the end of a syphon tube and use this method to fill bottles.
Once a bottle is filled place a crown cap in the capper and seal the bottles as you go along, this reduces contact with the air and stops you from spilling any beer. Work your way through all the bottles, label them up so you know what they are and when they were brewed then store them away for a few weeks.
What To Avoid When Bottling Beer
Oxygen is not a friend to beer, it will shorten the shelf life and introduce unwanted stale flavours. The whole task of bottling opens up a lot of opportunities for air to get in the beer. As much as possible you want to avoid splashing, bubbling or general contact with the atmosphere, this is why bottling wands are so good because they fill the bottles from the bottom. When you syphon keep the ends of the hose submerged to there is no splashing and cap those bottles as soon as convenient to keep the oxygen out
Bottling means a lot of cleaning we want to be as thorough as possible, each bottle needs to be clean and sanitised along with all the other equipment used for bottling. Keep your gear and environment clean and hygienic to avoid spoiling your beer.
Bottling is a chore, believe me I know, but don’t rush and invest in equipment like a bottling tree and bottle sanitiser if you can to make it easier.
Finally, always remember there is nothing as enjoyable as cracking open a bottle of your own beer after a long day at work, at the beach or giving them away to friends so keep this in mind during the arduous bottling process.
Kegging and Barrels
I think bottling your home brew beer has many merits and positives. However if you are brewing big batches of session beer there is nothing simpler than kegging it, it saves so much time and hard work that some people give up on bottles altogether. Today I want to talk about how to go about kegging your home brew, what you will need and what options are available.
Now here in the UK at least there are a couple of options when you decide you want to buy a keg. You have stainless steel Cornelius (Corny) kegs or a heavy duty plastic pressure barrel (I’m not sure if these are available in the US). Of course the Corny kegs are the more expensive option, but first of let us take a look at these pressure barrels.
Pressure Barrels
Pressure barrels almost always have around a 25 litre capacity and as the name suggests work by using pressure built up inside to dispense your beer (you can get kegs that have valves in the top, these use gravity to dispense but I won’t cover those here). They come in a few variations which all work from this principle.
This type of keg typically has a valve in the lid that allows you to inject Carbon Dioxide in the form of CO² bulbs or from a canister. When you are buying one you need to make this decision.
- CO² bulbs use a pin valve and are a one hit thing, providing only a small charge of CO². They were used commonly in soda streams.
- Cylinders or Canisters use an s30 valve and are screwed onto the valve and will release air until they are unscrewed. This gives the brewer some form of control over how much carbonation is happening. The canisters are larger and will allow many charges until they need refilling.
Either option basically produces a similar result and to be honest when I have used pressure barrels I have used bulbs but not very often because I prime the barrel with sugar like when bottling and the CO² builds up naturally. This is an easy option but by the time you get to the end of the barrel you will need another source of CO² (or if you have more than 2-3 pints in a row).
Another decision you need to make with these kegs is the position of the tap. You can have a tap at the bottom or the top of the keg. The top tap uses a float inside the barrel meaning it will only draw beer from the surface making the beer generally clearer. In my view it makes little difference as the sediment wil lsettle out by the time you serve the beer.
Using one is simple enough. Syphon in your home brew (onto your priming solution if you are naturally carbonating) and seal the lid. It’s a good idea to lubricate these with Vaseline and replace the O-rings every year or so. Then either wait for a few weeks for natural carbonation, or inject with CO² via the valve in the lid and wait a week or so. You are then ready to dispense.
Cornelius Kegs
This is where you step it up, I wouldn’t advise spending money on Cornelius kegs until you have brewed for a while. The investment and extra equipment needed just isn’t worth it unless you brew a lot and frequently. That being said, corny kegs are very versatile and so easy to use you can see why they are so popular. Typically they are around 5 US gallons or 19.48 litres but you may find smaller varieties also. The kegs will have a removable lid with two fittings, one for injecting Carbon Dioxide and the other for dispensing home brew.
Along with the keg itself you will need a tank of CO². CO² comes in a few sizes, the smaller ones are more portable but have to be filled more regularly so it’s up to you to decide which to go for.
If you are new to using these kegs then it’s a good idea to buy a complete system which will include a keg, a pressure regulator and two hoses, which are for the gas to go in and the other for beer to exit, and the taps. You may have to buy the gas separately.
As for using the keg you just treat it like a big bottle. This means everything is sterilised and you rack the beer into the keg then seal. You then connect the gas and set the pressure you want to carbonate at. It will usually take a week or so to get fully carbonated. Be careful when serving and turn the pressure down if necessary The great thing about these kegs is that they can be kept in a fridge and your serving temperature can be kept just right.
Leave a Reply
Want to join the discussion?Feel free to contribute!