
What Is Beer?
Introduction
![]()
So you have decided you want to make yourself some beer. Getting into a pursuit like brewing, or any for that matter can be daunting to begin with but fortunately there are some easy and affordable ways to get started, one of those is purchasing a beer kit.
Brewing a beer kit is most brewers first step into making beer, some will take to the process and, depending on their enjoyment of the finished product, continue to pursue their new hobby others will never move on from their first batch. This doesn’t have to be so though, with a little know how you can make sure every beer you brew is a winner.
The purpose of this guide is to help you ensure you are getting the best out of whatever beer kit you decide to buy and hopefully take the hobby of home brewing on full time.
This guide along with others is available on kindle, if you’d prefer to read this in a book format along with more advanced guides for malt etract and all grain brewing check out the Home Brew Answers book here.
What Is Beer
Now I know this may seem a bit condescending but you may be in a position where you like beer and drink it regularly but you aren’t exactly sure what’s in it and how it is made.
This isn’t going to be an in depth study of all the intricacies of beer and the long history of how it has been made. Instead, I’m going to arm you with key information so that when someone asks about your lovingly crafted beer you can tell them with certainty what’s in it, how you brewed it and the process of packaging it yourself at home.
The Ingredients
All beer or at least the vast majority of beer consists of 4 main ingredients; Barley, Hops, Yeast and Water. That is it. Of course there may be additional ingredients but the vast majority of beers you buy at the shops only contain these 4 key ingredients. These ingredients combine and are fermented to create alcohol which is what makes beer.
- Barley is a grain just like wheat, before reaching a brewery Barley is processed via malting, enabling the brewer to extract the stored sugars from it. Malting the barley changes the flavour and composition of the grain itself which make it perfect for creating beer.
- Hops are the flowers of hop vines. They are full of resins and acids that balance and season the beer when added during the brewing process.
- Yeast are the organisms that turn the sweet liquid created from a beer kit into the beer itself. They consume the sugars and as a by-product produce alcohol and carbon dioxide, which are vital components of beer.
- Water is the main ingredient of the beer and any water good enough to drink will be just fine for using with your beer kit.
A beer kit contains all the ingredients you need to make your first beer. They are specially prepared in such a way that it makes it extremely easy to go from kit to beer in just a few steps and a very short amount of time.
The next thing we need to do is to start looking at the various beer kits available and which one to buy to suit your needs.
Types of Beer Kit
What Beer Kit?
You may have already purchased a beer kit, if not your first decision is what beer kit to select.
There can be a bewildering array of beer kits to choose from so here we’ll take a look at some of the most common and popular types so you can make an informed decision when you come to make your purchase.
Budget Kits
The simplest, and often the cheapest, beer kits on the market consist of just a single tin of hopped malt extract and a sachet of yeast. The main attraction of such a kit is firstly the price and also the method is usually the simplest too, with the fewest steps to creating your beer.
There are some drawbacks however, as with most things the less you pay the lower the quality. That’s not to say the beer at the end of the process is going to be bad, it’s just not going to be as high quality as a more expensive beer kit. A further disadvantage of these kits is their reliance on the addition of a large amount of sugar to make up most of the fermentable content. Using sugar in the brewing process is fine in itself but the higher the quantity used, the larger the amount of flavour you will be losing. Therefore, adding sugar boosts the alcohol content but adds little in the way of flavour to your beer. The sugar also has to be purchased separately from the kit itself in most instances.
Perfectly drinkable beer is easy to make with these budget style kits and many brewers are perfectly happy using these alone. To get you started I have listed below some of the more popular incarnations of these budget kits. Feel free to have a browse and get an idea of whats available.
IPA Budget Beer kitOne of the most popular styles of beer at the moment, IPA’s showcase hops and have a higher bitterness to alcohol ratio than most other beers. Big citrus flavored hops are the most frequently used varieties and lots of them. The hops are the main drive here maltiness is subtle as are fruit notes from esters created by the yeast. Colour is somewhere between golden and reddish copper.
Stout Beer KitFor those that like Dark beers then a stout fits the bill just right. Stouts tend to come out really well with these budget beer kits because they have bags of flavor and tend to retain more of their body.
But, there are other options- so let’s take a look at other ways to make beer.
All Malt Extract Kits
Moving up the price range you have all malt extract kits. These beer kits contain two tins rather than just the one like the budget kits discussed previously. This means all the ingredients of the beer are coming from the kit and not any additional sugar and because of this you often have a more flavourful beer with better qualities. These kits don’t require any boiling so there is no need for any further equipment here either.
The obvious difference is that these beer kits come at a slightly higher cost than the single can kits. It’s up to you to decide whether the price is worth the difference in quality.
There are also a few of these two can kits that come with hop aroma sachets to add to the beer whilst it’s fermenting to boost the hoppy character of the finished product, these little additions go a long way to improve the flavour of the beer compared to the modestly priced single can versions mentioned previously. Her are a couple of good choices:
In our opinion the best kit to choose out of all of these are our very own small batch malt extract beer kits. Check out out range of beer kits here.
Equipment
Everything You Need To Make Beer Using A Beer Kit
You may have purchased a complete beer making kit, in which case you should have everything you need to get brewing straight away. However if you still need to buy your equipment read on to find out what sort of gear you are going to need from the brewing process right up to bottling.
The largest piece of equipment you will need to invest in is a fermenting vessel or fermenting bucket. Not to put too finer point on it, it’s a bucket! Most beer kits on the market are designed to make 5 gallons of beer (around 40 pints). The fermenting bin is where the kit is turned into beer by the yeast so it needs to be big enough for the complete volume of beer you are making. Fermenting bins of this kind are fairly inexpensive and should last quite a while if you take care of it.
A smaller fermenting bin is available along with our very own beer kits in the shop.
A regular spoon isn’t going to cut it unfortunately, beer kits are usually of a thick syrupy consistency and you are going to need a paddle or spoon long enough to reach the bottom of the fermenting vessel.
When beer ferments it creates gas in the form of carbon dioxide. This all happens in the fermenting bin which has a lid. The airlock is a device that fits in the lid of the fermenting bin and allows the carbon dioxide to escape but also prevents any air back in which could potentially spoil your beer.
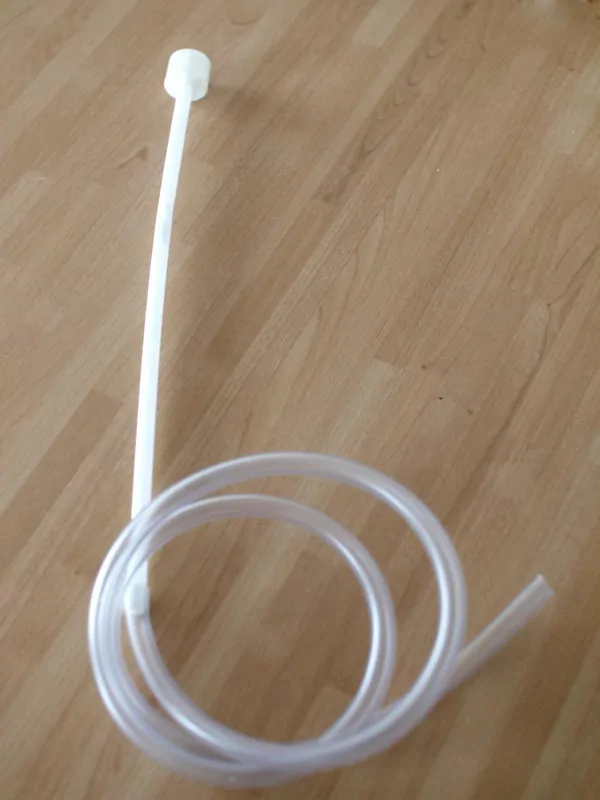
Moving beer from one vessel to another without splashing it around everywhere is important. Syphon tubing provides a more hygienic way to transport your beer between vessels and to fill bottles.
To package your freshly made beer you will need one of the following options:
Plastic PET Bottles and Screw Top Lids
This is the first option for packaging your beer.Plastic bottles are cheaper than glass and will do the job just fine. If you are making your first beer the most practical option would be to buy some PET screw top bottles along with your other supplies, they are reusable and very simple to fill, clean and store.
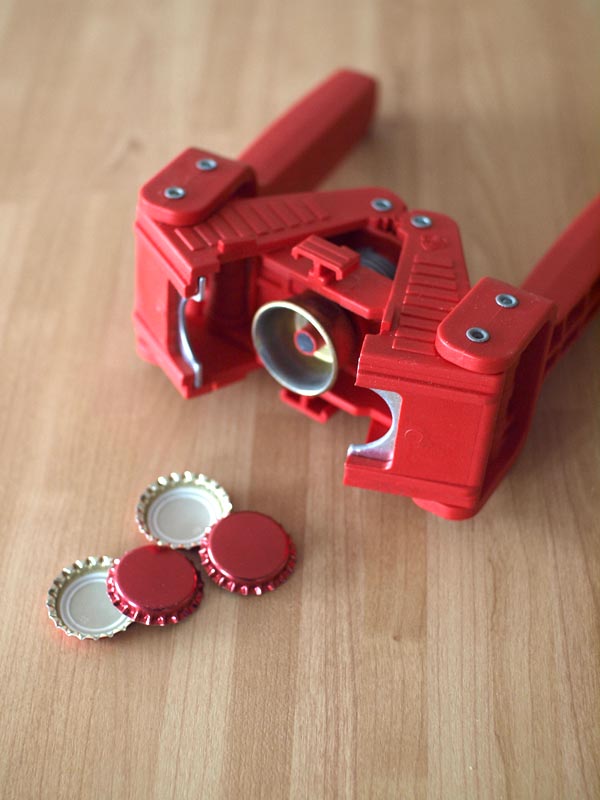
Glass Bottles with Crown Caps and Capper
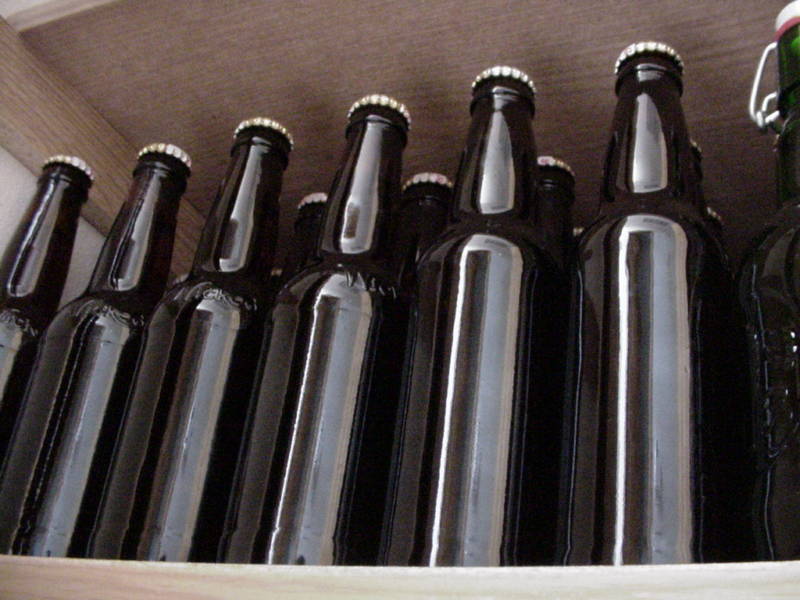
Glass is more robust and you can easily reuse the bottles from shop bought beer.
Making The Beer Kit
Putting Your Beer Kit Together
All home brew kits will come with its own set of instructions. As every beer kit will be slightly different I am not going to explain in great detail the process, as long as you follow the instructions supplied you’ll be fine.
A common phrase you may see on home brewing forums online and other home brewing resources is “The first step in brewing a beer kit is to throw away the instruction sheet”. Don’t take this advice, it is clear that the biggest manufactures of good quality beer kits want you to brew a beer and then like it enough to go a buy another kit when you have drunk it all. If the instructions provided weren’t up to scratch and produced bad beer it would be much simpler for the manufacture just to amend the instructions on the kit rather than lose potential customers in the future. Beer kits clearly range in value and some will produce better beers than others (generally the more you pay, the better the final product) but don’t be fooled into thinking the instructions with the kits are somehow impeding the quality that is possible from the ingredients provided.
Having said that, many of the processes underlying the brewing method itself are often not mentioned in the manufacturers instructions. Here I explain what is occurring in your beer during the brewing process and hope it gives you a good grounding to progress further in your home brewing hobby.
Basic Steps
Here are the basic steps that come with most beer kits to give you an idea of what’s involved.
- Clean and sanitise all your equipment, sometimes you will have a sanitising powder provided with the kit but usually not. Be sure to buy one along with the beer kit if it doesn’t come with one.
- Mix the malt extract with a quantity of water. The beer kit will usually be in one or two tins, these are concentrated so mixing with water dilutes them to the correct level for your beer
- Mix everything up and add yeast. Adding yeast is called pitching and the yeast are the organisms that convert the sweet sugary liquid you just mixed up, into beer by creating alcohol and carbon dioxide.
- Fermentation is an important part of the brewing process and is often not explained very well with your beer kit instructions so let see what’s happening during this process.
Fermentation and Yeast
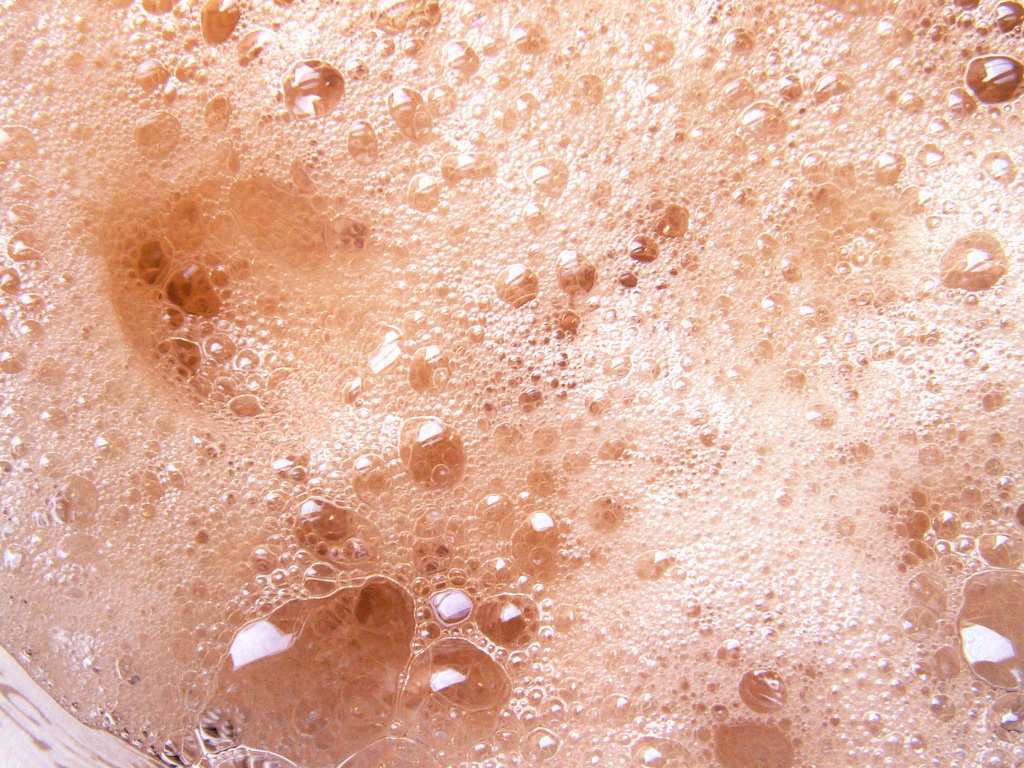
This part of the brewing process is the slowest and requires the most patience. This is where you, the brewer, do nothing but there is something happening to the beer, and it’s being done by yeast.
Yeast are a particular strain of fungus that have evolved to be particularly useful to the Brewer. They are perfectly suited to the environment created by your beer kit and have all the food (sugar) and nutrients they need to multiply and reproduce. This is vitally important because without yeast we wouldn’t have any alcohol at all. They also provide a large proportion of flavour to the beer so making sure they are happy is important so they perform as well as possible.
Once you have pitched yeast into your fermenting bin containing the sweet malty liquid they begin reproducing and multiplying. As they multiply they consume the sugars available and the by-product of this is alcohol. The more sugar available to the yeast the higher the alcohol content of the beer (within reason). The amount of sugar available to the yeast is how brewers can control the alcoholic content of their beers.
As I said you have to do nothing during fermentation, except that is, to make sure the fermenting beer is in an ideal environment for the yeast this means keeping the fermenter in a spot where the temperature is consistent and ideally around 17°C – 22°C. If the beer gets too hot the yeast will gradually die and leave you with unfermented beer. Too cold and they go into a sort of hibernation and again won’t ferment the beer probably. Keep them around room temperature and you will have a great beer to enjoy.
Bottling Your Beer
Bottling Day
Like I said above you will want to know fermentation has stopped so there should be no activity from the airlock. If you have a hydrometer use it, check the hydrometer reading on consecutive days it should be low between 1.010 – 1.016 and not of changed at all between those 2 consecutive readings. If the reading has changed the beer is still fermenting, be patient and leave the beer another few days
Now this is the part of brewing that most people agree is a chore. You are going to obviously need some bottles to put your beer in, all these bottles need to be sanitised.You can get various equipment like drying racks for your bottles and brushes. If you find this makes it easier then go for it, either way they all need doing.
Another thing is to do more than you think you need it’s always a pain to have to stop because you haven’t got enough bottles. The best bottles are brown glass ones as this stop light from effecting the beer. Just save the ones from the beer you buy from the shops. Like I said before plastic PVC bottles with screw caps are just fine and make no difference to the taste.
How To Use A Hydrometer
One of the tools that is essential to a home brewer aside from a thermometer, is a hydrometer. Knowing how to use a hydrometer is important because it can tell us a lot about the beer, so let’s take a look.
A hydrometer is a simple measuring tool that measures the density of liquids. Plain and simple water from the tap has a base density of zero. It is when you start adding sugar to the water, which is what the brewer is doing by steeping malted grains in water that the density changes. The more sugar present the higher the density of the liquid.
There are a number of things that using a hydrometer will tell you about the wort. The whole purpose of it is to tell you the amount of dissolved sugar in the wort. The first reading you would need to take is before you pitch the yeast in the wort.
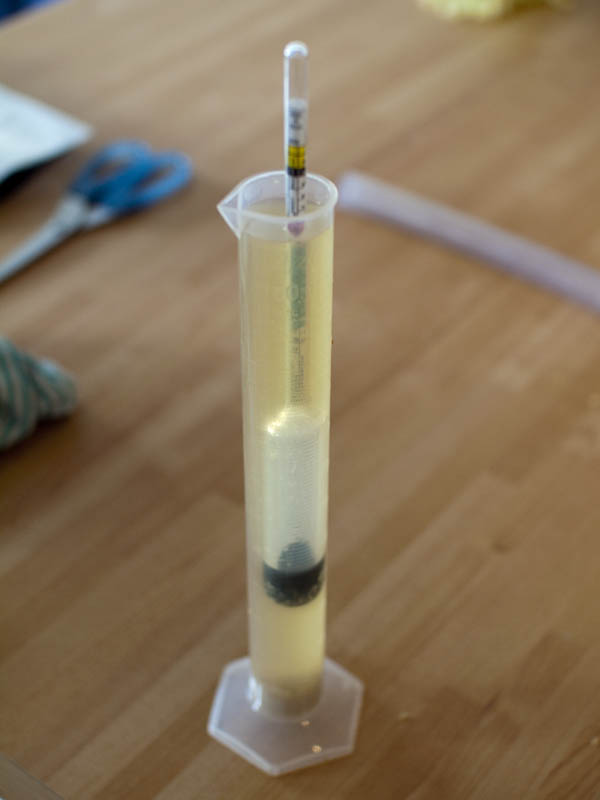
How To Use A Hydrometer
All you do is float the hydrometer in the beer. Usually the hydrometer will be supplied with a trial tube for this. Again make sure everything is sanitised before taking a sample from the beer. The hydrometer will float at a certain depth according to the density of the wort or beer. This density is called the gravity and because it is measured before fermentation the reading is the Original Gravity or OG.
Throughout the fermentation the amount of sugar in the wort will decrease as the yeast begin to consume it. This process makes CO2 and alcohol, meaning when you measure the gravity again the hydrometer will sink lower into the beer. Using the gauge on the stem of the hydrometer you will be able to see just how far along fermentation is, usually if you are following a recipe the original and final gravity’s are provided.
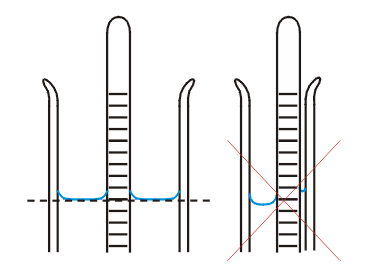
One thing to note when using a hydrometer is the level where the beer meets the stem of the instrument. If you look closely you will see the surface of the beer curve up where it meets the stem of the hydrometer. This effect is caused by the surface tension of the beer which is called the meniscus. When you take a hydrometer reading you need to note the level of the beer, not where the meniscus curves up to meet the hydrometer. Although this sounds a little complex it becomes second nature after a few readings.
Calculating Alcohol Content – ABV %
The density of water is 1.000 on a hydrometer, so when sugar is added the gravity reading will increase to say 1.040. When beer ferments there will be sugars in the wort that are non-fermentable this means your gravity will not finish exactly at 1.000 but say 1.010 for example. Using these readings however we can work out the Alcohol by Volume% (ABV) with a simple calculation. What you want to do is work out the difference between the 2 readings so 1.040-1.010 = 0.030 then multiply this by 131 so 0.030 x 131 = 3.93% ABV.
That’s all there is to it. There are calculators on line to do the calculation for you but its pretty simple anyway. The one thing to watch out for though is must Hydrometers are temperature calibrated so will only give the correct reading when at a certain temperature usually 20C. Again there are calculators online to adjust for temperature and hydrometers are usually supplied with temperature conversion charts.
Testing Extraction and Brewing Efficiency
When you brew “all grain” without using any malt extracts the home brewer will need to know how much sugar is being extracted from the malted grain. Using a hydrometer you will be able to tell how efficient the mash was at extracting fermentable sugars from the grain. This is important when you formulate recipes for knowing how much grain you’ll need to use to achieve the desired alcohol content for the beer.
Malted grains have a upper limit as to how much sugar can be extracted under ideal conditions. When we use the malt to make beer we can only extract a certain amount of that, this percentage tells us how efficient the brewing process is and the hydrometer is needed to test it.
If you are only just starting to brew all grain you don’t really need to worry to much about brewing efficiency. It can help down the line as you begin creating your own recipes but to begin with it is much better to just get started, not worrying about numbers.
Carbonating Your Beer
 At this point, just before bottling the beer is flat so we want to give it some fizz. To do this we need to prepare some priming sugar. Depending on you beer kit, there may be a recommended amount of sugar to add so follow the advice in the instruction. If however there is no clear advice and you have brewed 5 gallons of beer all that is needed is to boil roughly 100 grams of sugar in 2 cups of water for 10 minutes. This is to sanitise, allow the sugar mixture to cool to room temperature.
Its always a good idea to rack the beer on to another vessel before bottling if you can because this will decrease the chances of sediment making it into the bottle. If you are racking put the priming sugar in the new vessel and syphon the beer on top of this without splashing it. If you can’t do this don’t worry just take it easy and try not to disturb the sediment too much. Add the sugar mixture and mix the priming sugar in by stirring gently to avoid splashing with a sanitised spoon.
How To Syphon
 One basic technique of home brewing that you need to master is how to syphon (or siphon). At first glance it seems so easy and trust me it is easy, however it takes practice. Being able to syphon properly and easily without any splashing or bubbles is not only important, but necessary for brewing good beer.
Why You Need To Know How to Syphon Properly
The thing with home brewing is, you will mostly be making large quantities of beer that needs to be moved from one vessel to another. Whether that be from your boiler to the fermenting vessel or to keg/bottle. There are a couple of reasons why you will need or want to syphon, one is that pouring that quantity of beer or wort from one place to another is just not possible because it’s too heavy or just not safe, the other is that getting oxygen or air into the beer is not good. One of the common off flavours of beer (not just home brew, commercial beers too) is oxidation.
Oxidation will be present in all beer to some extent because it in the air but moving around beer and causing splashing or bubbling in it after fermentation will make oxidation much worse. The flavour most commonly associated with oxidation is wet paper or cardboard. Good syphoning technique can drastically reduce the exposure to oxygen and mean oxidation is not noticeable.
How to Start A Syphon
As you are probably aware there are all sort of bacteria that want to get into your beer and take over. Starting a syphon with you mouth by sucking it is not really a good idea here. We want to start the syphon with as little contact as possible. Here are the steps to follow:
- Take your clean and sanitised syphon block one end with your finger and fill it about 2 thirds full of water. Some would say to use pre-boiled water, I just use tap water. It’s up to you.]
- The vessel you want to syphon beer from has to be higher than the one you are syphoning into. Syphoning works with gravity the exit end of the syphon tube needs to be lower. Put the clear end into the beer, don’t let any water from the tube into the beer, if it’s too full, drain some water out.
- With the tube now in the beer, take the blocked end lower down than the fermenting vessel (or whatever you’re syphoning from and release your thumb.
- The water will drain out, so you need to catch it in a jug or something. At the same time beer will be pulled up through the syphon until it reaches the working end. Cover over the end and begin syphoning into the new vessel.
- Make sure the outlet end of the syphon tube is submerged in the new vessel as soon as possible. This will ensure the minimum amount of air can get into the beer. Basically don’t create any splashes.
Practical Tips For Syphoning
Reading the above points it makes syphoning seem complicated. I assure you it’s not, all it takes is practice. Before you start syphoning your home brew practice with water and get the hang of it. It doesn’t take long to master.
If however you want to make life a bit simpler there are some tips and gadgets available to make syphoning easier.
Using a detachable tube to get the syphon started is one such tip. All you need to do is take the tube of something like a turkey baster, which is tapered to one end. This narrow end can be inserted into the syphon tube and then you can suck to get the syphon started. Once it’s going just pull out the tube. This will remove all risk of sanitary issues.
The one thing I see many people using and having used one myself I can see why they are so popular, is the auto syphon. Basically it’s a syphon that you can get started by pumping a couple of times and away it goes. It does make life a lot easier and if you hate syphoning it’s a brilliant gadget.
Out of all the syphoning paraphernalia getting a racking cane and clip is I think the best way to make life easier. A racking cane is basically a rigid tube that attached to the inlet end of the syphon which means it goes straight to the bottom and you don’t waste any beer. It has a sediment trap on to stop to much trub or yeast being sucked up and the clip attaches it to your fermenter meaning you have your hands free. A simple solution to a simple task.
Bottling and Capping
 Right, now we now need to get the beer from the fermentation vessel into the bottles. You will need a syphon tube for this (sanitised of course). Usually you will have a length of tube with a sediment trap on and a cane so you can push the tube to the bottom of the vessel. On the other end you can have a clamp type device to control the flow. One thing I would recommend is something called a bottling wand, instead of the clamp, you have a rod that when you push against the bottom of the bottle allows the syphon to work and when pulled away shut the syphon off. This device will make the whole process so much easier and smoother.
If you haven’t syphoned before then have a practice with some water, get the hang of the process and it becomes easy. When you are ready fill up all your sanitised bottles and work your way through all of the beer.
Capping
Finally we need to seal the bottles. Unless your are using screw top bottles you will need a device called a crown capper (these come in various shapes and sizes so ask at your home brew store) and of course some caps. Soak the caps in a sanitising solution before beginning. Make sure the beer is roughly an inch and a half from the top of the bottle we don’t want to much head space at the top and not full to the brim.
Seal the bottles using your capper or screw the lids on, you can do this as you fill each bottle to seal them as soon as possible so they aren’t exposed or at risk of spilling as you work.
Now it is time to have some patience, the priming sugar you added to the bottle will need to ferment, store the beer in a place at room temperature for about 10 days, this will allow time for the yeast to work and carbonate your beer. Around two weeks after bottling is an ideal time to try your first home brew.
There we have it, your first home brewed beer, once you have the first one down, try a different beer kit or maybe take a look at some more of the articles here and try some other options for brewing with raw ingredients.
Happy Brewing!
Trackbacks & Pingbacks
[…] Source […]
Leave a Reply
Want to join the discussion?Feel free to contribute!