Minimum Amount of Equipment For An All Grain Brew
I spent last weekend brewing an all grain beer in the kitchen, using the minimum of equipment and I can tell you, it was the most relaxed brewday I think I ever had. It wasn’t by any means a demanding beer to brew, just a small batch of easy drinking German wheat beer. Rather than spending a day in the shed or outside (it was raining) I brewed in the kitchen on the stove watching the rain run down the window.
All the equipment I used would have fit into a space smaller than the cupboard under your kitchen sink. The batch size was a modest 9 litres, around 18 bottles. The ingredients cost £7.00 for everything, malt, hops and yeast. This has got to be the easiest way to get into all grain brewing, right?
When you first start all grain brewing you follow the advice of buying a 30 litre boiler or brewpot and burner, a mash tun that can hold up to 8 kilos of grain plus 20 litres of water, immersion chillers, sanitary valves and fittings. It’s quite a big barrier of entry and probably the reason why most brewers never start brewing all grain beers from the first batch.
I mentioned this quite recently, brewing can be as complicated or as simple as you want to make it. I like to try and simplify as much of the brewing process as possible because I find there is less to worry about when making a beer. I don’t want to be rushing around trying to deal with lots of stuff happening at the same time, I prefer to relax and concentrate on making the best beer I can with the minimum steps necessary for that particular type of beer.
Table of Contents
Smaller Can Be Better
It’s clear if you want to minimise the amount of equipment you have, or the amount of space you want to dedicate to brewing then you will be limited to making smaller batches. If the amount of space you have is limited, for example, if you live in a small flat/apartment then the setup we will go into below is a great place to start.
The other great thing about smaller batches is you can brew more often without having lots of beer piling up. If you are brewing 20 – 25 litres at a time you are going to have a big surplus of beer if you are brewing more than a few times a month, even if you are giving your beer away. A smaller batch around 8 – 10 litres means you could brew every week and have multiple beer styles ready to drink at all times without having a cases of beer all over the house.
Brewing more often gives you that practice that we all need in order to improve. The more often you do anything the better you get at it. The same principle applies brewing beer, smaller batches more often means you hone your skills and develop your craft. I have written about smaller batches before so check out that article for more of the virtues of small batch beers.
The Basic Brewing Gear You’ll Need
To brew all grain beers you’ll need to have the ability to mash your grains, sparge, boil wort, cool it and ferment the beer. In larger batches it makes sense to have separate vessels and chillers to do these things, and these are largest and costliest pieces of equipment to get started all grain brewing.
Brewing smaller batches means you can get away with a small brewpot of around 12 -15 litres which you will be able to heat on the stove, a mashing bag and a fermenter. This is what I use to make small batch beers and everything fits in a kitchen cupboard. I put the fermenter inside the brew pot and tuck it away.
So, you’ll need the following equipment for small batch all grain brewing:
- 12 litre Brew Pot
- 12 litre Fermenter
- Mashing Bag
You will of course need items like a thermometer, hydrometer and airlock but all these items are inexpensive and take up hardly any space.
Small Batch All Grain Brewing Process
Mashing
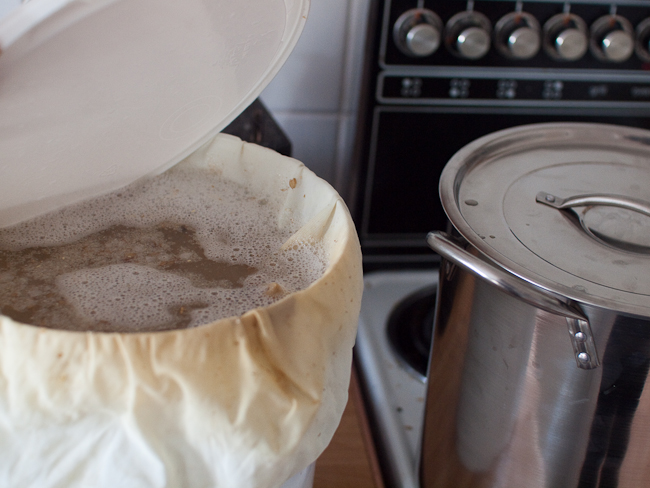
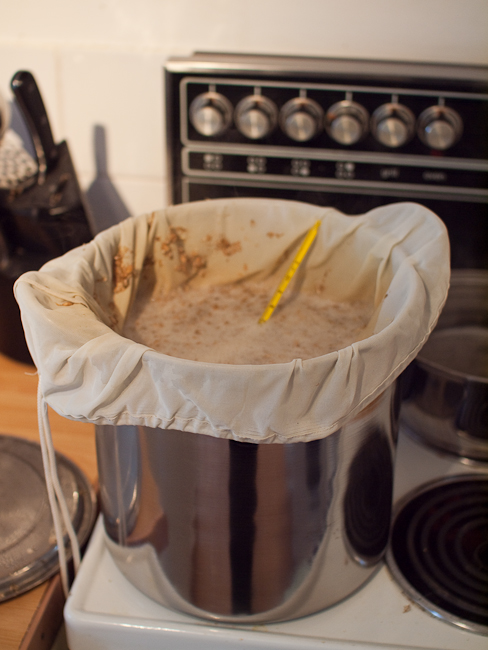
Step 1: Put 6 litres of water in your stock pot and begin heating to strike temperature of 72°C. Put your grain bag in the pot and fold the opening over rim of the pot.
Step 2: Ensuring you are at 72°C turn off the heat. Pour the grain into pot and stir thoroughly to ensure there are no dry spots in the grain and everything is well soaked. Take the temperature again it should be around 65°C
Step 3: Put the lid on and leave for an hour. Make a cup of tea, watch TV, read a book all you need to do is maintain the temperature between 62°C and 69°C. Check every now and again and apply heat if necessary.
Step 4: Towards the end of the hour, heat another 6 litres of water to 80°C and put in the fermenting bucket. If you don’t have another pot big enough use a big pan and the kettle and add 4 litres of boiling water to 2 litres of cold water this will give you a temperature around 70-80°C.
Sparging

Sparging
Step 1: After the hour has elapsed carefully lift up the grain bag from the stock pot and allow as much as possible to drain back into the pot. Once you have drained thoroughly without squeezing the bag gently lower the bag into the fermenting bucket full of water. Again tuck the opening around the rim and stir the grains thoroughly again.
Step 2: Leave for 15 minutes.
Step 3: Lift the grain bag once more and allow to drain as much as possible. Put this to one side I would suggest in a bowl to catch any extra drips. Now carefully pour the contents of the fermenting bucket into the stock pot. Begin bringing to the boil slowly.
Boiling
Step 1: Now that it is boiling it’s time to add the hops. Again be careful the hops will add to the foaming so make sure it’s under control before putting them in.
Step 2: Keep boiling for 60 minutes adding hops when indicated on your beer recipe.
Step 4: Remove from the heat and begin cooling. The easiest ways to do this is place the pot in a cold water bath in the sink and replenish the cold water as the heat transfers.
Step 5: This cooling should take 30 or 40 minutes to get to around 20°C. It is now time to pour the beer into your sterilised fermenting bucket. Make sure you’re on the correct temperature ready to pitch the yeast. This will be written on the tube or packet. Pour it straight in the beer.
Step 6: Fit the lid on the fermenting bucket and fit the airlock in the hole with a small amount of water in.
Fermenting
Step 1: Leave for 2 weeks.
Step 2: All activity in the fermenting vessel should have finished. There should be no bubbles emerging from the airlock. If there is still activity then stay patient and wait a few more days.
Step 3: Package or bottle as normal.
The Cheapest & Simplest Way To Start All Grain Brewing
As you can see the process is pretty simple. I find that making small batches like this takes around 3 hours and then however long it takes to let the beer chill for. It’s a lot quicker than brewing 20 litres batches.
The beauty of brewing small batches like this is you can make pretty much any recipe you find. As you are all grain brewing there are no grains you cannot use and you can even do step mashes if you wish because the mash tun can be heated directly.
All you need to do is scale down any recipe you want to brew. This guide will show you how to scale down a recipe and adjust it for your needs.


Very interesting method, witch efficency do you get?
thanks
I got around 68% efficiency on the wheat beer. I’m only using around 2.5kg of malt though so adding a bit more isn’t really an issue if you want to increase the ABV.
Hi I read your article and was pretty intrigued, I’ve only ever made cider and want to get into beer as I really enjoy the hobby, I was wondering for your recipe what quantities of wheat and hops is needed for this size of batch and what else is recommended.
Hi William,
I have actually written a pretty in depth guide to brewing a beer using grain and hops here – Complete guide to brewing all grain beer with little equipment.
This should cover everything you need to know and includes a choice of recipes as well.
Cheers
Great article and just what I’ve been looking for.
I’m giving this a go today. I’ll let you know how I get on.
Well my first brew went down really well. Lovely taste and loads of great comments from friends – ‘best I’ve ever tasted’ – from one.
Great article and brilliant intro to brewing. Now on my second batch. Can see this becoming quite addictive.
Thanks.
Presumably you’d need a 13 litre stock pot if you’re going to put 12 litres into it and boil it and add hops? Or does an litre stockpot normally have a bit of extra headroom. Same issue with fermenter and krausen/foam, although presumably you’ll have some losses to boil evaporation?
Yes, you will want a little extra headroom for the boil and for fermentation. If your stock pot is a little small you can always top up with a little boiled and then cooled water to bring you up by a litre or so just before adding to the fermenter.
Good idea! I’m just getting into this and have been trying to decide what I want to do. The advantage of small frequent batches for me would be that I can get more experience more quickly, and also be able to risk experimenting more.
I suspect I’ll be buying exactly what you’ve suggested, thanks again 🙂
Hope I’m not too late to ask a question: do you have any problems with the mash bag sticking or burning on the bottom of the pan? The only stock pot I have large enough is huge (21liters) pretty cheap and so thin and the mash bag I got from the local home brew shop is massive large enough for a 5 gallon brew – it looks nothing like your one. The guy in the shop expressed doubts and said I should think about putting in some sort of thing to stop it from touching the hot bottom. What do you think? I’m really excited about trying this – I am one of those people who has always been put off all grain by the cost and the amount of equipment I would need. Cheers Chris
Hi, Chris
I would suggest investing in a simple rack, something like this – on amazon would work I think.
Might be worth a try?