
Will Cleaning Bottles Ever Be Fun?
It’s not a popular subject, it doesn’t get talked about a lot and it’s most people’s least favourite part about brewing. Bottling beer. I’m going to talk about it anyway. Well cleaning bottles at least.
As with most things in life it’s the simple things that can have the biggest impact when it comes to brewing.
Keeping things clean is probably one of the most important, yet overlooked, parts of homebrewing. Collecting and cleaning bottles for your home brew even more so. Yet it’s so simple if you follow a few simple rules and that’s what we will look at in this article.
Table of Contents
Bottle Cleaning 101
First of all, cleaning is not the same as sanitising. Cleaning means removing dirt, organic soiling and other material. Sanitising involves taking an already clean item and killing the bacteria that may be present on the surface of the item. You can read more about cleaning and sanitising here.
The popularity of kegs among home brewers is a direct response to the arduous task of bottling your beer. A keg is after all pretty much just a big bottle so instead of cleaning and sanitising 40 bottles you only sanitise one keg.
If you browse any forums or community sites you will always encounter conversations where brewers suggest bottled home brew tastes “different” to keg beer. Brewers saying that they will never go back to bottling beer now they have a keg setup.
In truth though beer is exactly the same in both keg and bottle in the vast majority of instances, if there is a difference it’s because the cleaning and sanitising procedures weren’t as good for the bottles.
The problems of kegging are obvious to the cost conscious brewer. The setup, storage and refrigeration of kegs and the CO2 bottles, dispensing lines and other related paraphernalia can cost as much as the equipment used to brew the beer in the first place. Bottling on the other hand costs next to nothing with the exception of the crown caps and priming sugar. Bought beer bottles can be reused indefinitely.
The other problem with kegs is you cannot easily share your beer. You can fill a growler perhaps and you can use a rather expensive beer gun to fill bottles but apart from that, your beer is staying at home.
Bottles on the other hand are the ideal size to keep in the fridge, take to friends houses and even post to home brew competitions.
We all know the benefits of bottling beer but it is often shunned in favour of kegging when it shouldn’t be. If you keep on top of cleaning it really doesn’t take any more time to sanitise bottles and fill them than sanitising and filling a keg.
I work at a brewery that bottles by hand and believe me when I say, bottling isn’t that much of a chore. I have sanitised and filled over 1400 bottles a day ensuring every one of the bottles received the correct treatment. 30 or 40 bottles isn’t a problem.
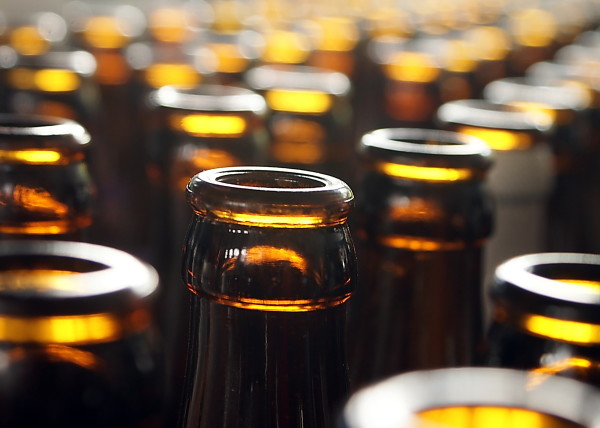
Start With Clean Bottles
If you are already using bottles then the best thing you can do to streamline the bottle cleaning process is clean it straight away.
As soon as you pour a beer wash the bottle!
The worst thing to do is to pour your beer then leave the bottle sitting for a few days. Your worst enemy is dried on yeast sediment.
First off leaving the dregs in a bottle sitting for a few days practically invites bacteria to colonise the bottle. Acetobacter will turn the dregs into vinegar and fruit flies will be attracted into the bottle among other things.
This is before the organic material i.e the yeast sediment dries out and forms a concrete-hard brown scum in the bottle.
If you desire an easy life after you pour your beer, before you even take a sip, rinse the bottle several times with warm water. This is the ideal start.
There are several methods of cleaning, you have mechanical, chemical and thermal which are the ideal three to clean beer bottles. Even if they are completely filthy this method will get them clean and brand new.
Essential Tools For Bottle Cleaning
Bottle Brush: This is the mechanical means of cleaning. A simple bristled brush that can be inserted into the neck of the bottle rotated and jiggled around to remove and loosen any organic material in the bottle.
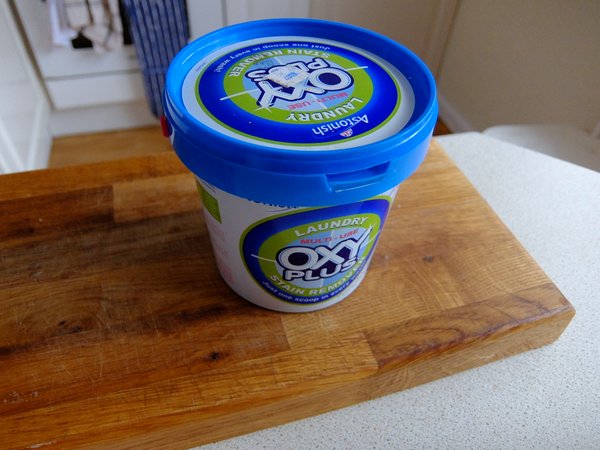
Oxy-Clean / PBW (Powdered Brewery Wash): These are the best cleaners to use bar none. They work at low temperature and are designed to break down organic soils and proteins. All that is required is patience whilst the bottles soak.
Bottling Tree: An item so simple but seems irreplaceable after you use one. Whilst not strictly necessary it allows you to drain multiple bottles in a small amount of space. You could always drain on any rack you have but I do like my bottling tree.

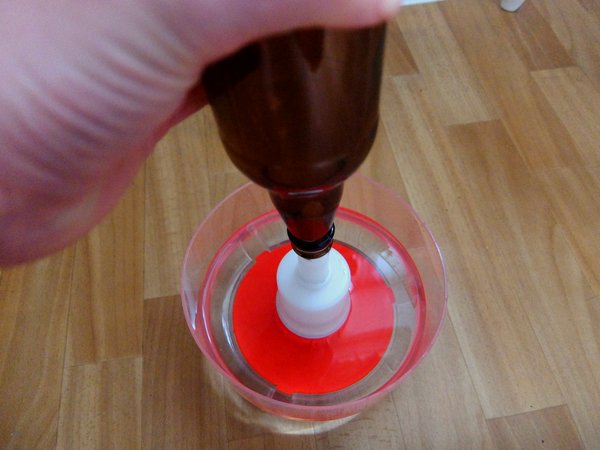
Bottle Rinser: I have a Vinator Bottle Rinser which is great for both rinsing cleaned bottles or sanitising bottles ready to fill simply fill the basin with water to rinse or sanitising solution to sanitise.
The Best Bottle Cleaning Method
My method is simple and takes only a small amount of time. I do this way ahead of filling bottles and store them ready to use whenever I have a batch of beer ready for bottling.
Unless you buy brand new bottles then you are best advised to clean all your bottles before sanitising and filling. You may rinse out your beer bottles after pouring a beer and they look “clean” but I still advise a cleaning procedure as well.
Here is the process:
-
Fill an old bucket or builders tub with warm water and cleaning chemical. I use an Oxy-Clean type powder. PBW or Powdered Brewery Wash is an ideal option as well. The best cleaner to use is one that breaks down organic material.
-
Put as many bottles in as possible submerge and fill. Allow them to sit for a while. I usually make a cup of tea and come back later.
-
Remove and empty the bottles one by one, take a bottle cleaning brush and scrub the insides of each one.
-
Inject with fresh water using the bottle rinser and have an inspection. Repeat soak if necessary or place on bottle tree to dry.
-
Once the bottles are dry store upside down in boxes. This prevent any dust or debris falling into the bottles.
That is all there is to it. I clean all my bottles in batches every once in awhile. Store them in boxes and then they are ready to be sanitised when I have a batch that need bottling.
This method works for heavily soiled bottles as well but the soaking time needs to be increased. If you are cleaning old, really dirty bottles soak them overnight, then scrub with the bottle brush.
Removing Bottle Labels
Fortunately the above method of cleaning bottles also is one of the best methods of removing the labels. A long soak in Oxy-Clean or PBW will see most labels float right off the bottles. A simple wipe over is all that is required.
Some of the more stubborn labels or plastic one require a bit of scraping or peeling and can sometime leave a glue residue that looks terrible. The best way to get rid of the adhesive residue is a “Magic Sponge”. Believe me this works a treat. If you can’t find one Surgical Spirit on a cloth will do the trick.
Bottling Time
When the time comes to bottle a batch of homebrew everything should be ready to go. All you need to do is get out your already clean bottles and squirt in a bit of no-rinse sanitiser. Allow to drain and fill.
You’ll have a whole batch bottled in 15-20 minutes because the bottles are already prepared. You only need a little sanitise and you can then concentrate on filling and capping.
Of course it still may not be your favourite part about brewing but it will make sure you consistently produce great beer without too much hassle.


Leave a Reply
Want to join the discussion?Feel free to contribute!