Complete Guide To All Grain Brewing (Little Equipment or Experience Needed)
Before we begin I want to make a few things clear about what will be covered in this post just so you know what you’re getting into here:
- This is a post aimed primarily at beginners and people that have never brewed before.
- It is also good for people that may have brewed with beer kits and want to progress to using all-grains and hops.
- This post is quite long. Bookmark it and take your time.
- The main objective of this post is to get people brewing with the minimum expenditure. Therefore I focus on how to make small batches of high quality beer so that we can make do with the minimum in equipment.
- The level of detail in this post only skims the surface. I know most people just want to make a good, tasty beer and would rather do further reading (should they wish) after.
Now you have these points in mind, let’s begin.
There is nothing more satisfying than taking the cap off and pouring a pint of one of your own home brewed beers. There is something extremely gratifying about it, especially the very first bottle of your first ever batch of beer. In this article I hope to instil this feeling in you after you have made your first beer.
This post has been created to enable you to brew simple all grain beers, bypassing the need to buy a beer kit, that should hopefully set you off on a home brewing journey.After all when you cook a meal following the recipe you go and get each individual ingredient and maybe if you are feeling creative you put your own spin on it. This same principle of finding the best ingredients and taking your time applies to lovingly crafting your own beer.
With this premise in mind let’s take a look at what you are going to need to begin brewing. If you have never brewed before the last thing you are going to want to do is go out and buy a lot of equipment that you may use infrequently.
What I have tried to do with these recipes and instructions is utilise as much of the stuff you already have at home without the need to go and buy a lot of expensive stuff right off the bat.
If you find that after you’ve made a beer using this post as a reference and like it then by all means go out and build your home brewery!
Table of Contents
What Is Beer?
Well of course you already know what beer is, right? Even if you do I will go over the basics here. Beer is a simple drink and the more you understand the basic ingredients the better your home brew is going to be.
Malt
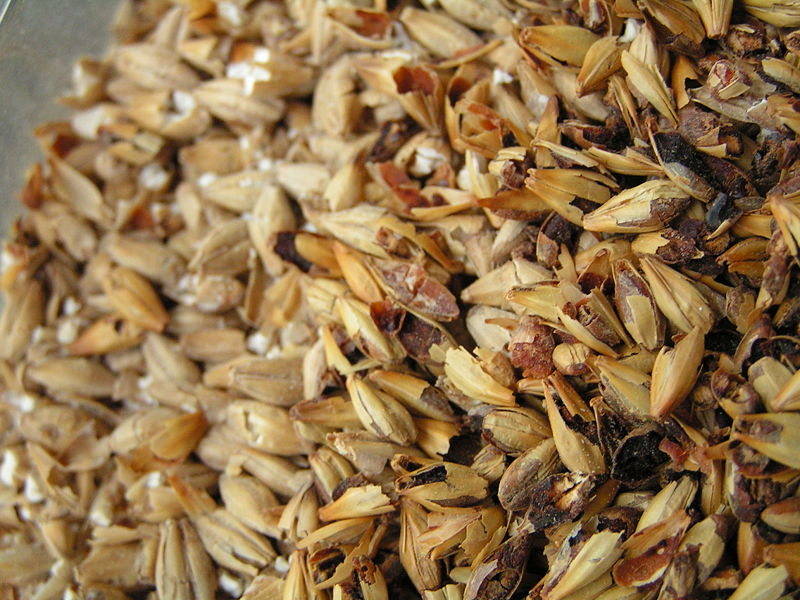
Malt is the foundation or soul of the beer. As you can see in the picture malt is a cereal grain, most often it’s barley but can be wheat or rye amongst others (for now though, let’s concentrate on barley).
Barley on its own is pretty much tasteless; malted barley on the other hand is brimming with flavour and is sweet to the taste. This is because the barley is malted which creates natural sugars.
What happens is, the barley grains are steeped in water until they begin to sprout new shoots, once these shoots are just forming the barley is dried and the shoots knocked off. The barley is then kilned to various degrees from very light to very dark.
The different kilning process is what creates such a difference in colour and flavour between beers, such as Pilsners and Stouts. It’s at this point the brewer then makes use of the malted barley to make different beers. More on malt here
Hops
Hops are the seasoning for the beer and really balance out the malty sweetness that would dominate without them.
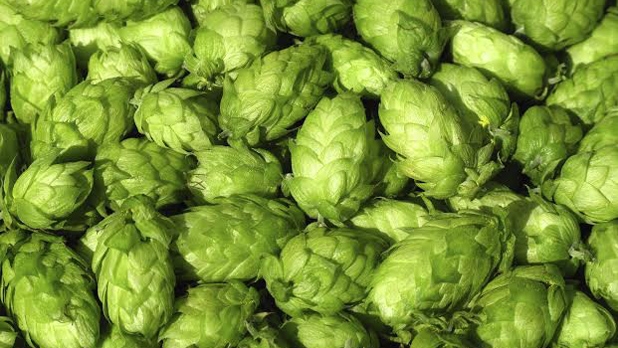
Hops used in brewing are the flowering parts of hop vines and look very much like green papery pine cones. Within these hops are oils and compounds that provide bitterness and flavours that can balance the malt character, or burst with flavour in their own right.
There are many varieties of hops and some are better to add bitterness whereas others are full of aroma and flavour. Read more about hops here.
Yeast
Without yeast there is no beer. No alcohol at all.
Ok so here it is the thing that turns sweet malty wort into infinitely differing flavours and types of beer.
First of yeast is a living organism. It is a fungus and that is why you have infinite varieties, so many in fact that every brewery will have their own strain of yeast that is usually a closely guarded secret. Like all living organisms it adapts to conditions that is why some yeast perform differently in certain beers than others. English Ale yeasts for example are top fermenting, lager yeasts are bottom fermenting and favour cooler temperatures.
Water
You can use water straight from the tap if it tastes good. If you don’t usually drink it yourself though it won’t make great beer so I would recommend buying water to brew with.
If it tastes fine though then go ahead and use it, read this primer on water here. You will want to remove the chlorine which is a really simple process other than that though you should be good to go.
You will of course need some things that you might not already have before you start brewing and that’s what I’m going to cover below.
Equipment
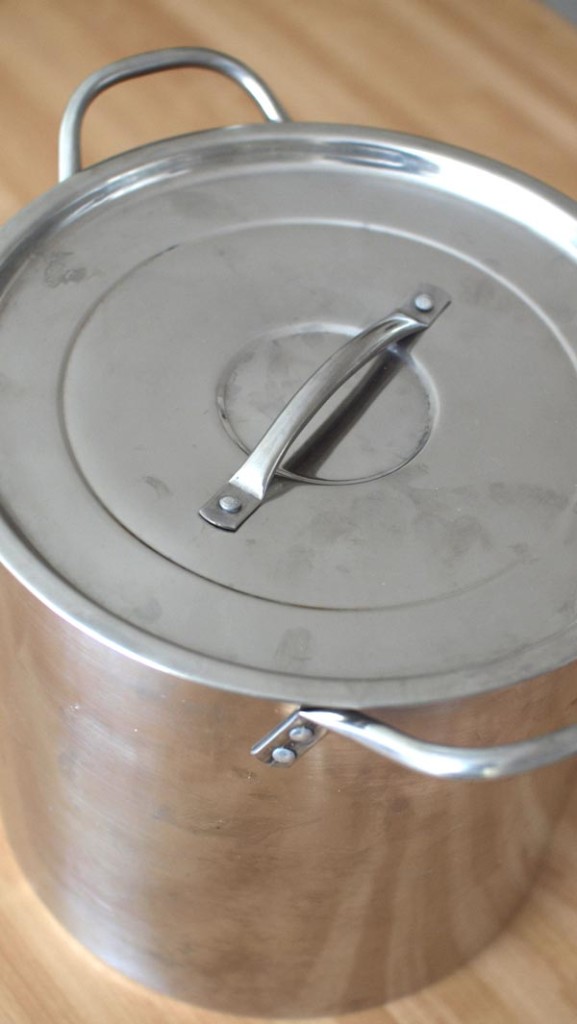
Large Stock Pot
The main thing you are going to need is what brewers would call a kettle. This “kettle” can be any large pot you have around or can get hold of. Keeping in mind that not everyone has a catering size pot, in this post I have formulated the recipes and brewing instructions to suit a stock pot of around 12 litres or more.
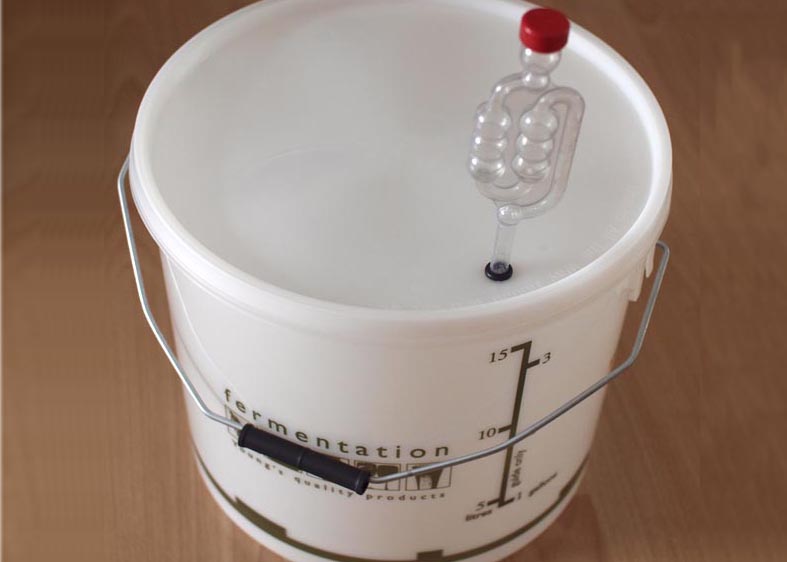
Fermenting Vessel
I’ve called it a fermenting vessel but all you really need is a food grade bucket. Your home brew shop will sell these fairly cheaply and the processes in this post require a 15+ litre one. You will need to make sure there is a small hole in the lid with a rubber grommet on.
Airlock
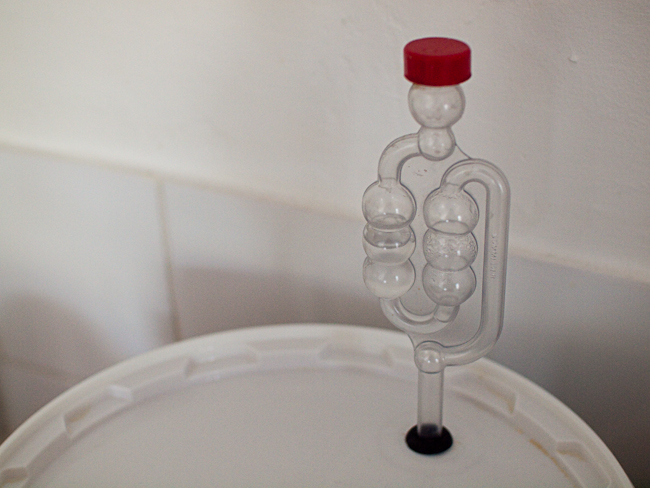
An airlock is used when your beer is fermenting and creating alcohol. It’s fitted to the lid of your fermenting bucket and stops air getting into the beer but allows the CO2 produced by fermentation to escape.
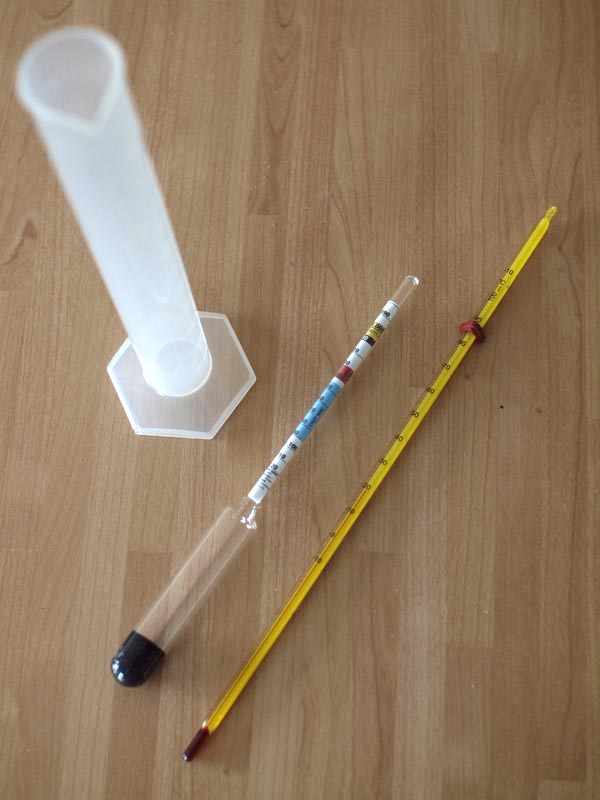
Thermometer
You will most definitely need a thermometer, there is no getting around it, brewing requires precise temperature measurement. A spirit or digital thermometer is fine as long as it’s accurate
Hydrometer and Trial Jar
You may not have heard of a hydrometer before. It’s used to measure the amount of sugar in your beer and to help calculate how much alcohol has been produced. There will be more on the Hydrometer later in the post.
Bottles
You’re going to need to package your home brew right. The good news is that you can use the bottles that your favourite beer comes in so start saving them today.
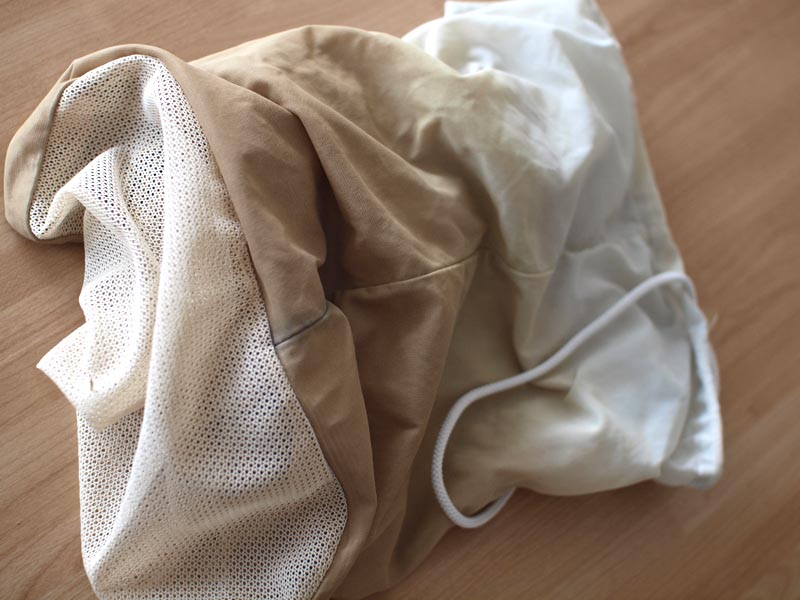
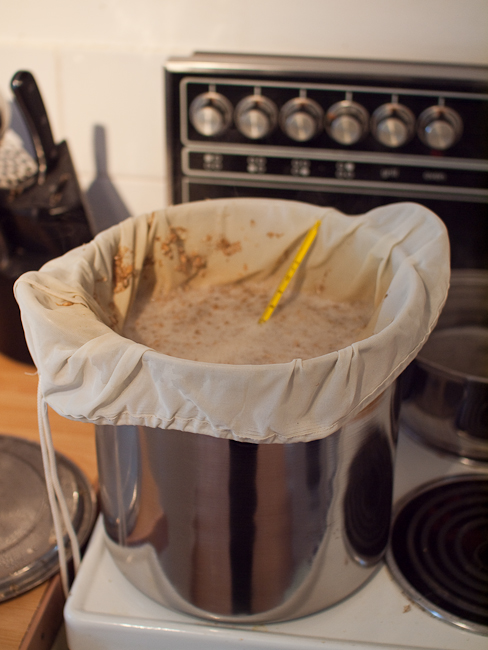
Mashing & Sparging Bag
This is one of the most important pieces of equipment you need to get. This will enable you to extract the sugars and flavours from the grains needed to make beer. I will explain more about this later in the brewing directions.
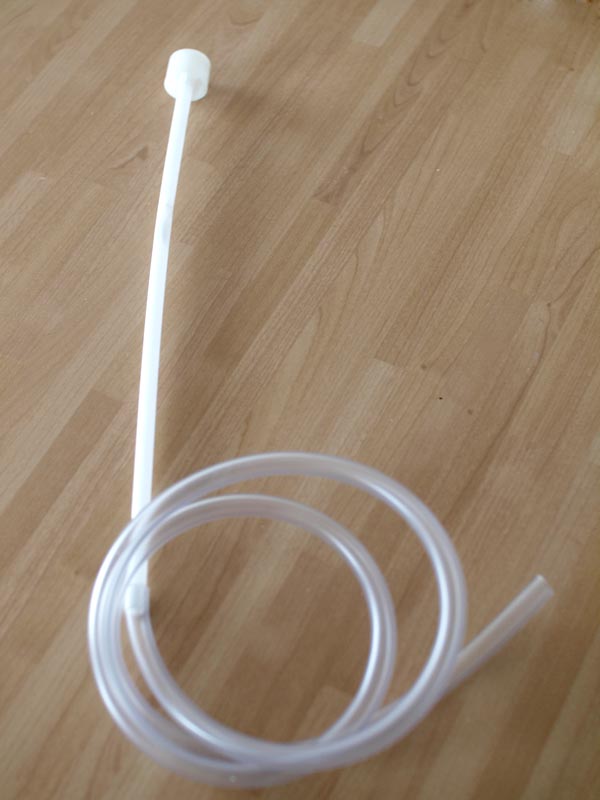
Siphon Tube & Cane
If you need to move beer from one place to another then you’ll need to siphon not pour it. Siphoning is easy, don’t worry I’ll explain.
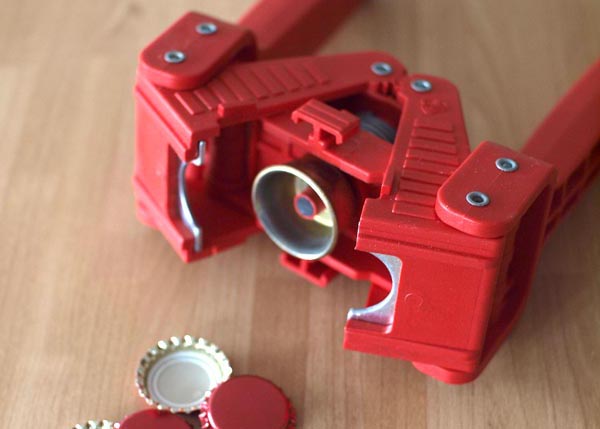
Caps and Capper
Unless you have swing top bottles you will need to seal your beers with a cap. The caps go on easy with a capper like the one in the picture
These are the basic things you will need. Now I know this may look like a lot of stuff but really it doesn’t add up to much and once you’ve got everything, every batch of beer you make will compensate you for the outlay.
Less of the Boring Stuff More of the Brewing
I really want to just dive in here because nobody wants to read page after page of instructions before you even do anything.
So what I’m going to do is give you three recipe options, these options will help you decide what you brew and what you need to pick up from your home brew shop.
So for your first beer, made from just the grains, hops and yeast plus a little bit of love and patience you can brew one of the following:
- A Crisp and Refreshing English Pale Ale
- A Spicy, Complex Belgian Golden Ale
- A Dark and Toasty Porter
These recipes are all simple so pick one and let’s take a look at the recipes to find out exactly what’s needed. They all make 10 litres ( 2.6 US gallons) that’s 17 pints and the alcohol level is next to the beer name.
Now if you have never brewed before some of the names of the ingredients may throw you off and I know from experience that going into a shop and asking for something you’re not familiar with can be awkward, so I’m going to do my best to explain what they are as we go along.
Please note that all the recipes use whole leaf hops (not pellets). This is what you should ask for in your home brew shop.
English Pale Ale – 4.3% ABV
| Amount | Name | Notes |
|---|---|---|
| 1.71 kg (3.77lbs) | Maris Otter Pale Malt (crushed) | Pale malted grain |
| 0.15 kg (0.33lbs) | Crystal Malt (crushed) | Crystallised grain that’s chestnut brown |
| 7 g (0.25oz) | Northdown – Boil 60 min | Variety of hop added for whole boil |
| 7 g (0.25oz) | Goldings, East Kent – Boil 60 min | Variety of hop added for whole boil |
| 4 g (0.14oz) | Northdown – Boil 20 min | Hop added for last 20 minutes of boil |
| 4 g (0.14oz) | Challenger – Boil 5 min | Hop added for last 5 minutes of boil |
| 1 packet | Dry Nottingham Ale Yeast |
This recipe for English Pale ale uses a base malt (bulk of recipe) called Maris Otterwhich is a pale malted grain that’s available in most home brew shops. It can be substituted for another “pale ale malt” if it’s not available be sure to ask your home brew shop to crush the grain for you if it hasn’t been already.
Crystal malt is a grain that has been processed in a way that the sugars are already available within the husk. It has a crystalline texture and is kilned to a medium brown colour.
The hops for this Pale ale provide bitterness and aroma; they are boiled in the wort (unfermented beer) and depending on how long they are boiled for add bitterness and aroma.
As you can see the hops are added at different points in the boil, those added at the beginning provide bitterness and those added toward the end add less bitterness but more aroma (citrus, floral, spiciness)
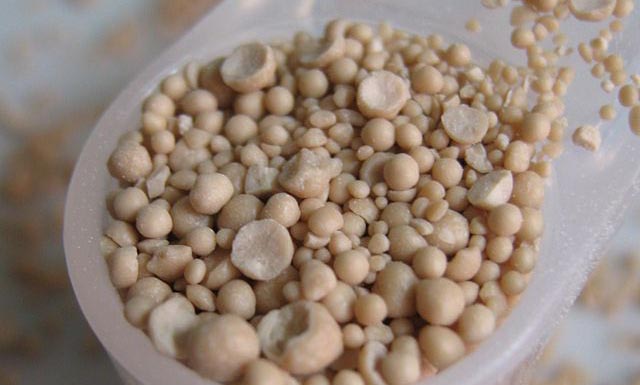
The yeast you use is fairly important. I recommend dry yeast here because it’s easy to find and keeps well. Try and find the one listed in the recipe for the best results
Belgian Golden Ale – 7.4% ABV
| Amount | Name | Notes |
|---|---|---|
| 2.36 kg (5.2lbs) | Pilsner Malt (crushed) | Very pale grain |
| 0.14 kg (0.3lbs) | Munich Malt (crushed) | Slightly darker malt |
| 0.29 kg (0.64lbs) | Dememera Sugar | Sugar |
| 17 g (0.6oz) | Saaz– Boil 60 min | Variety of hop added for whole boil |
| 5 g (0.18oz) | Styrian Goldings – Boil 60 min | Variety of hop added for whole boil |
| 6 g (0.21oz) | Styrian Goldings – Boil 20 min | Hop added for last 20 minutes of boil |
| 1 packet | Fermentis Safbrew – T-58 | Yeast is important in this recipe. Try and find this one for best results |
This is a recipe for a Belgian Golden Ale and the bulk of the recipe/base malt is Pilsner malt. Pilsner (pils) malt is a very light malted barley that has a delicate flavour. Munich malt gives this beer a golden colour and adds a more caramel and biscuit like flavour to the finished beer.
Just like the pale ale the hops are added at various intervals during the boil to provide bitterness and aroma. There is more bitterness derived from the hops in this recipe as they are boiled for longer, with no late additions.
Brown Porter – 4.6% ABV
| Amount | Name | Notes |
|---|---|---|
| 1.74 kg (3.84lbs) | Maris Otter Pale Malt | Pale malted grain |
| 0.10 kg (0.22lbs) | Chocolate Malt | Very dark malted grain |
| 0.06 kg (0.13lbs) | Roasted Barley | Very dark grain |
| 0.12 kg (0.25lbs) | Crystal Malt | Chestnut brown crystallised grain |
| 13 g (0.46oz) | Goldings, East Kent – Boil 60 min | Hop added for whole boil |
| 13 g (0.46oz) | Goldings, East Kent – Boil 30 min | Hop added for last 30 minutes |
| 13 g (0.46oz) | Goldings, East Kent – End of boil | Hop added immediately after boil |
| 1 packet | SafAle English Ale –S-04 |
This recipe for a brown porter uses a wider variety of malt and is naturally a maltier tasting beer.
As well as Maris Otter pale malt it uses chocolate malt which has been toasted to a high level making it dark and full of flavour, roasted barley which again is very dark and crystal malt to add a bit of sweetness.
This recipe calls for only one type of hop added at intervals to balance out the malt in this recipe.
Cleaning and Sanitation
Cleaning and sanitation is one of THE most important things to get right to brew good beer. The thing about beer is, in its unfermented state (wort) it’s highly susceptible to bacteria that would like to get at the sweet sugary “wort”.
Now there aren’t any bacteria that can make you ill that are associated with beer so don’t worry. There are some though that will make it sour and not entirely pleasant to drink. As long as we sanitise all the equipment that come into contact with the wort then there will be no chance to have a bad batch of home brew.
As a general rule you clean all your equipment used in the brewing process before the wort is boiled and sanitise everything used after the wort has cooled.
What Is Involved In Sanitising?
Cleaning involves removing all traces of visible dirt and grime, just like washing your dishes for instance.
Sanitising involves killing any bacteria or wild yeast to levels where they won’t be able to interfere with you beer.
There are a variety of chemicals available from your home brew shop that you can buy but one of the most effective ways to sanitise your equipment is ordinary thin household bleach, that’s all you need.
Here’s what you need to do:
Mix 1 tablespoon of thin unscented bleach per gallon of water and leave your equipment in this solution to sanitise for around 10 minutes.
When you are ready to use the equipment rinse very thoroughly and allow to drain
I usually fill a bucket or fermenter with the diluted bleach and then throw all the equipment in to sanitise.
More on Cleaning and Sanitising can be found here.
The Brewing Process
What I’m about to tell you here isn’t what the ordinary home brewer does. Most home brewers in the UK at least, brew either by malt extracts and kits or brew “All Grain” using extra equipment like a mash tun and boiler.
The process you’re about to do is all grain but without so much of the extra equipment. It’s for this reason we are brewing a smaller amount of beer than most regular home brewers do. The good things about these small batches are:
- They allow you to experiment more often
- It’s generally quicker
- It requires less equipment and therefore less expense
- It allows you to get to grips with brewing before buying bigger and better equipment
This is the bit where you finally get to start brewing, combining the ingredients and filling the house with the aroma of beer.
The brew day can be broken down into pretty simple chunks, a lot of time is spent waiting for the beer to do its thing and other times you need to be doing a bit of work like cleaning and sanitising your equipment (vitally important in brewing).
Your brew day is going to be structured something like this.
- Preparation of Your Ingredients and Equipment
- Heating Water
- Mashing (Steeping) Malted Grains
- Rinsing Malted Grains
- Boiling With Hops
- Cooling Down
- Sanitising Everything That’s Going to Touch The Beer
- Pitching The Yeast
That’s the brew day in a nutshell. Some of these steps take a few minutes some take an hour. All in all it’s going to take around 3-4 hours, so you need to set aside some time when you are going to be able to get everything done.
Trust me, the time you invest in making your beer is definitely worth it.
- Let’s Get Started
1. Begin by getting or your equipment out and ready. At this point everything should be clean but it doesn’t have to be sanitised just yet, I will let you know what needs sanitising and when. Add 6.5 litres (6.8 US quarts) of water to your stock pot and begin heating it to 72°C. We need to be pretty accurate here so use your thermometer.
2. Whilst the water is heating we need to prepare all our ingredients.
Refer to the recipe for your chosen beer and begin weighing out the malted grains for the necessary quantities needed. The first thing we are preparing to do is to mash them. This doesn’t mean squash or smush them, it involves steeping them at a certain temperature. Mashing enables enzymes to convert the starches in the malted grains to sugars which will feed the yeast and create alcohol.
3. Once you are up to temperature turn off the heat. Get your mashing bag ready and immerse it in your pot folding the edges over the outside of the pot to secure it in place.
4. Once again ensure the temperature is 72°C and then you can add all the malt required for your chosen recipe. Stir this thoroughly to ensure there are no dry spots clumped together and take the temperature once again. We are looking to hit around the 64-68°C mark. If it’s too hot add a little cold water and stir.
5. Put the lid on and let it do its thing. The more you interfere with it the quicker you will lose temperature. Check the mash every 20 minutes or so and if the temperature has dropped below 63°C very slowly apply heat and stir. You don’t want to scorch the grains.
6. After an hour the mashing should be done. You will now have a sugary, malty wort that you need to separate the grains from. Lift out the mashing bag with the grain and allow as much of the wort to drain out. Once you’re happy or your arms aching too much set the bag in a bowl to one side.
7. You should now have a stock pot with just the wort in it. We need to transfer this into the clean fermenter to free up the stock pot again to heat more water. Go ahead and pour the wort in carefully. Now in your empty stock pot add 7 litres (7.4 US quarts) of water and begin heating to 78°C
8. Once you are up to temperature turn off the heat and grab the bag of grain you set aside earlier and dunk it in the pot. Secure the bag around the pot like before and give the grain a good stir. Cover and leave this for a further 15 minutes.
9. After 15 minutes once again lift the bag out and allow to drain as much as possible. We are done with the grain now so you can do with it as you will. Compost? spent grain bread? bin? It’s up to you. I wouldn’t leave it around too long though as it does acidify and go off quickly.
10. Now it’s time to combine the 2 lots of wort in the stock pot so pour the original lot that’s in the fermenter in and bring the whole lot up to boiling.
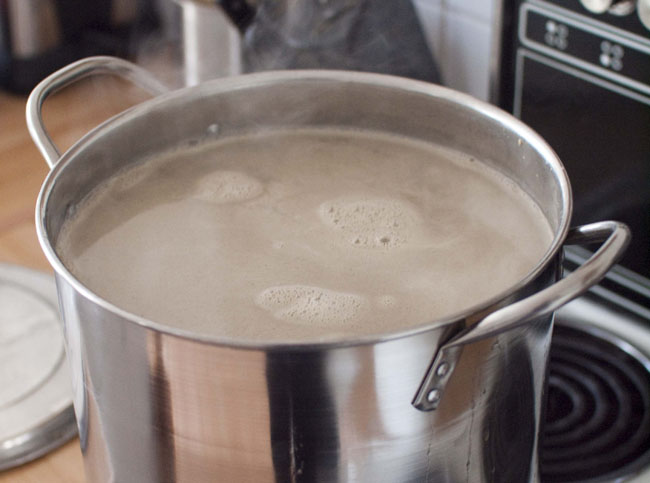
11. You’ll have to keep an eye on it as it reaches boiling as quite a lot of foam will build up, you don’t want a boil over because it’s a real pain to clean up afterward.
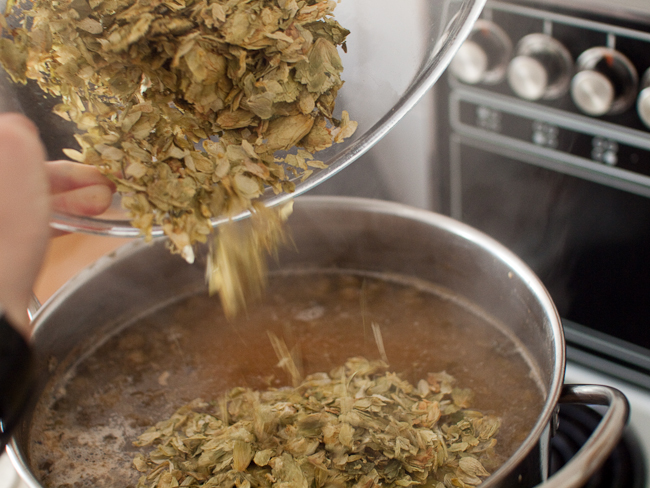
12. So by now you should have achieved a constant rolling boil it’s time to add the first lot of hops stated in the recipe you are brewing. These are the hops that will add bitterness to the beer and balance out the malt character.
13. All that is needed now is to keep an eye on the boil until the next addition of hops is required. It’s important to keep a steady rolling boil but apart from that relax.
14. Add the next hop additions as required in the recipe. In this period you can start sanitising some equipment that you will be using after the boil. You’ll need to sanitise your fermenting vessel; spoon/paddle, strainer, thermometer, jug and an bung/airlock also a funnel may be useful.
15. After 60 minutes on the boil it’s time to turn the heat off. We’re nearly done but first of all we need to cool the wort down as quickly as possible. This is important to precipitate out a lot of debris and to avoid any wild yeast or bacteria that might want to get into your home brew.
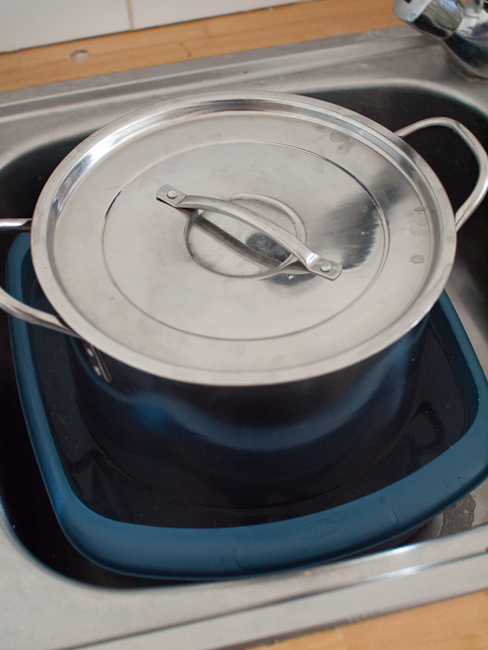
16. Fill a sink or tub up with cold water and, if you want, chuck some ice in. Sit the post in this ice water bath to cool it down quickly. You’ll need to replace the water in the bath as it warms up. Use your sanitised thermometer to check the temperature occasionally, we are aiming for a temperature of around 21-22°C
17. Once you’ve cooled the wort down enough we need to transfer the wort into the fermenter and get as much oxygen into the wort in the process. We need to pour the beer through the strainer to remove the hops and in the process splash the wort. If you are using a fermenting bin you can use the jug to lift up some wort and pour it back into the fermenting bin from a height a few times. If you have a carboy cover the top and give it a good shake to aerate it.
18. We’re coming up to the final part of the brew day all that’s left to do is pitch the yeast into the aerated wort. As we have made a relatively small batch go right ahead and sprinkle the sachet on top of the beer.
19. Get your sanitised airlock and add a little water to fill the u-bend, then fit to the fermenting bin lid or into the bung in your carboy.
20. Wait…..2 weeks
This is the point where you’ve got to have patience. Look after the beer and don’t let it get too hot or cold, keep it around room temperature.
I know that period of time waiting for your first ever beer to start and finish fermenting is tense, exciting and can seem unbearably long. Bear in mind though in a couple of weeks time you’ll be pouring your very own handcrafted pint.
What’s Going On During Fermentation?
What’s this period called fermentation all about then. Well like in any brewing whether it is wine or beer the main concern in fermentation is to create alcohol in the final beverage.
To do this you need a few things, one is yeast and the other is something for the yeast to feed on. This is your sugary wort created earlier in the brewing process.
Yeast Love Wort
So, as I said, the yeast feed on the sugars present in the wort extracted from the grains in the mashing process. Remember yeast are living organisms so like all living things they need nourishment, this comes from the sugar, minerals and also oxygen that is present in the wort.
The yeast when added to your home brew will first use some of the oxygen and sugar to reproduce to a sufficient population to ferment the beer and then start feeding on the sugars present until there are none left. The by-product from the yeast creates carbon dioxide and that all important alcohol.
All this activity going on in the fermentation process comes to an end when the yeast has depleted all the food available to them and then begin to settle down to the bottom of the fermenting vessel. This is called flocculation.
Initially the beer will be bubbling furiously for a few days then gradually tail off and seemingly do nothing this first part is primary fermentation.
Whilst it looks dormant, the yeast are still working and cleaning up any off flavours produced during fermentation.
This period is called secondary fermentation and some brewers like to rack off (move to another fermentation vessel) for this period. This is not entirely necessary but can help to produce a purer, cleaner finished beer.
So next time you are waiting on a batch of home brew in the fermenter, have a little patience keep in mind that without this stage there is no beer at all.
Using a Hydrometer
One of the tools that are essential to a home brewer aside from a thermometer is a hydrometer. Knowing how to use a hydrometer and take readings is essential so we are going to have a look in this section.
There are a number of things that using a hydrometer will tell you about the wort. The whole purpose of it is to tell you the amount of dissolved sugar in the wort and from this you can work out a number of things.
You will need to take the first hydrometer reading before you pitch the yeast in the wort, the reason for taking it now is we want to see the amount of dissolved sugars present in the wort before any fermentation has occurred.
Taking A Hydrometer Reading
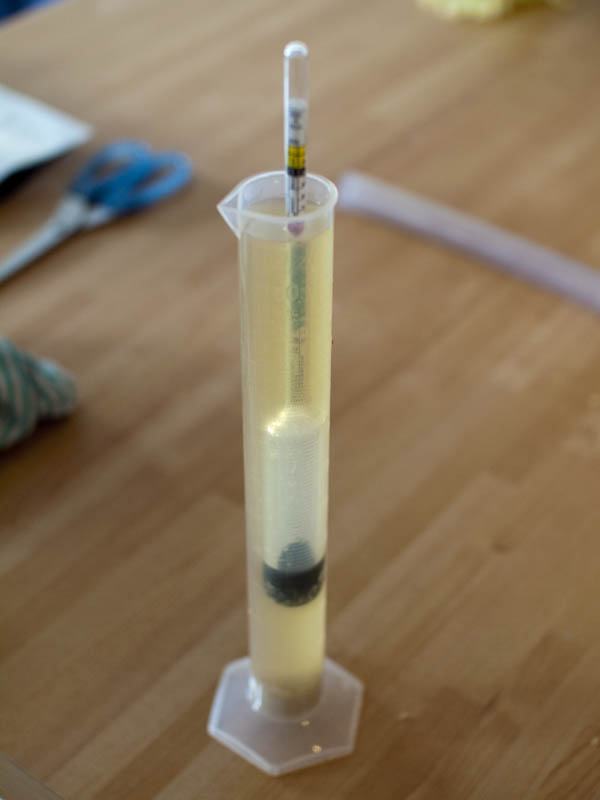
All you need to do is float the hydrometer in the beer. Usually the hydrometer will be supplied with a test tube for this so you won’t have to draw off a large amount of your precious beer or float it in the fermenter. Again make sure everything is sanitised.
The hydrometer will float at a certain depth according to the density of the wort and you should be able to see a series of number along the stem of the hydrometer. This density is called the gravity and because it is measured before fermentation the reading is the Original Gravity or OG (it is also referred to as SG for Starting Gravity).
Throughout the fermentation the amount of sugar in the wort will decrease as the yeast consumes all they can ferment and make CO2 and Alcohol.
This means when you measure the gravity again the hydrometer will sink lower into the beer. Using the gauge on the stem of the hydrometer you will be able to see just how far along fermentation is, usually if you are following a recipe the starting and final gravities are provided.
Calculating Alcohol Content – ABV %
The density of water is 1.000 on a hydrometer, so when sugar is added the gravity reading will increase to say 1.040.
When beer ferments there will be sugars in the wort that are non-fermentable this means your gravity will not finish exactly at 1.000 but say 1.010 for example.
Using these readings however we can work out the Alcohol by Volume% (ABV) with a simple calculation. What you want to do is work out the difference between the 2 readings so 1.040-1.010 = 0.030 then multiply this by 131 so 0.030 x 131 = 3.93% ABV.
Bottling Your Home Brew
You will want to know fermentation has stopped so first of all check that there’s no activity from the airlock. If you have a hydrometer use it, check the hydrometer reading on consecutive days it should be low, between 1.010 – 1.018 and not of changed at all between those 2 readings.
Now this is the part of brewing that most people agree is a chore. You are going to obviously need some bottles to put your beer in, all these bottles need to be sanitised.
You can get various equipment like drying racks for your bottles and brushes. If you find this makes it easier then go for it, either way they all need doing.
Another thing is, sanitise more bottles than you think you need. It’s always a pain to have to stop because you have run out of bottles.
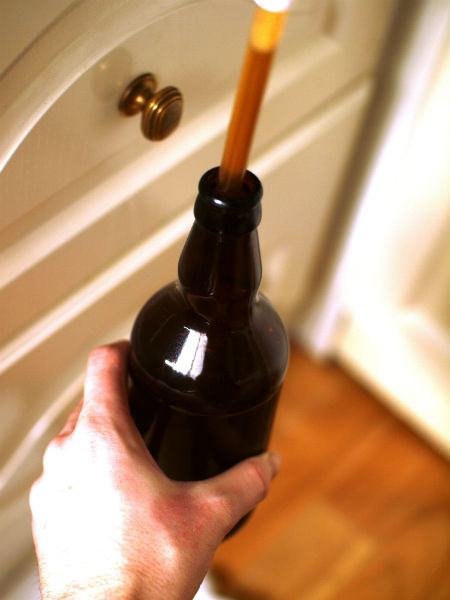
The best bottles are brown glass ones as this stops light from affecting the beer. Just save the ones from the beer you buy from the shops.
Carbonation with Priming Sugar
At this point the beer is flat we want to give it some fizz. To do this we need to prepare some priming sugar.
All that is needed is to boil 45 grams of sugar in 2 cups of water (for a 10 litre brew) for 10 minutes or so to sanitise then allow to cool to room temperature.
If possible, it’s always a good idea to rack the beer into another vessel before bottling because this will decrease the chances of sediment making it into the bottle (you can use your stock pot if you wish, sanitise it first though).
If you are racking put the priming sugar in the new vessel and siphon the beer on top of this without splashing it. If you can’t do this don’t worry just take it easy and try not to disturb the sediment too much and, if you haven’t already, gently stir in the priming sugar, avoiding splashing, with a sanitised spoon.
Bottling
Right, now we now need to get the beer from the fermentation vessel into the bottles. You will need a siphon tube for this (sterilised of course).
Usually you will have a length of tube with a sediment trap on and a cane so you can push the tube to the bottom of the vessel. On the other end you can have a clamp type device to control the flow.
One thing I would recommend is something called a bottling wand, instead of the clamp type thing you have a rod that when you push against the bottom of the bottle allows the siphon to work and when pulled away shuts the siphon off. This device will make the whole process so much easier and smoother.
If you haven’t siphoned before then check out this article on how to siphon, then have a practice with some water.
Capping
Finally we need to seal the bottles. You will need a device called a crown capper (these come in various shapes and sizes so ask at your home brew store) and of course some caps.
Soak the caps in a sanitising solution before beginning. Make sure the beer is roughly an inch and a half from the top of the bottle we don’t want to much head space at the top and not full to the brim.
Now seal the bottles using your capper and store for one to two weeks for carbonation to take effect.
Your First Home Brew Beer
So a couple of weeks have passed, by now you’ll be dying to see what your beer is like. There is nothing quite like the anticipation of opening the first beer of a batch of home brew.
I wouldn’t be surprised if some of you have had a sneak peek before now, in which case you may find it’s not fully carbonated. Give it time to allow the carbonation to take effect and the flavours to mellow out and round off, around the 2-3 week mark and your beer will be in tip top condition.
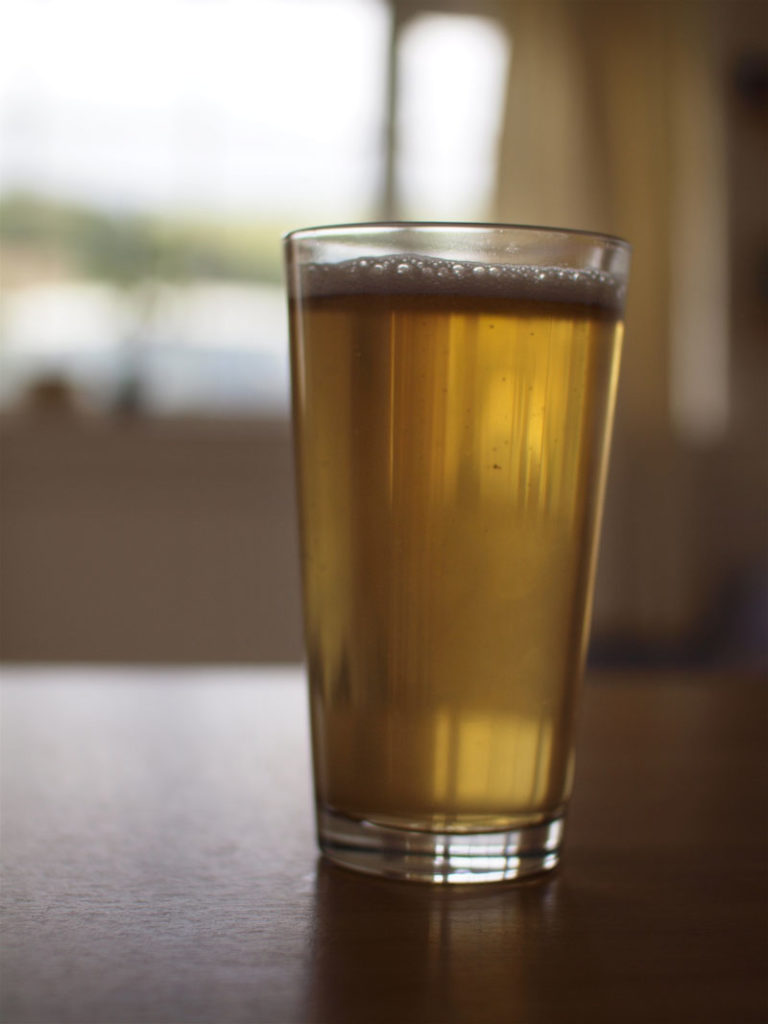
Drinking Your Beer…. you don’t need me to tell you how to do this right?
Conclusion
Hopefully you’ll have taken the plunge and made your first beer, like the first time you do anything it might not be perfect but don’t worry, stick at it and you’ll see your results improve in no time. Make sure you check out Home Brew Answers and keep updated plus look through the past articles to build your knowledge even further.
Happy brewing.




Could you please send me some more recipes please, say a few for American very hoppy ones, i love um, am really looking forward to trying some of your stuff. Just right size for me as I no way have got the room or money to go total all grain. Have been brewing for forty years now mostly partial mash and country wine making. Cheers fella, Alan 🍻👍
Excellent instructions and really helpful. You mention a strainer – what type / size are you using?
I use a fine mesh bag. Most homebrew retailers will stock these and they can be reused again and again. They are sized according to the size of your fermenting vessel usually so mine holds about 15 liters.
Hi Neil,
Not sure about this but I am going to do the Belgian Golden Ale recipe in a Brewzilla. I am assuming that because of the small volume required I do not need to do the extra dunking and sparging as I will have enough room in the brewing vessel to complete the process. I am going to use 13.5 litres and set recirculating for and hour at 72°C. Take out the grain after an hour then boil for a further hour inserting hops as per your timings. Remove liquid after an hour drain into fermenting bucket. Then process as per above method. Would you consider doing a brew using this brewing vessel.
That sounds great. I have heard of the Brewzilla and sounds like the adaption you made will work great.