
15 Tips For The New Home Brewer
There is a lot of information here on Home Brew Answers that should hopefully enable you to brew better beers or understand some of the processes behind home brewing high quality beer.
Making the very best beer, every time is so simple it can be boiled down to a few things; use the best ingredients you can get, develop your technique, expand your brewing knowledge and look after your equipment. Its pretty simple follow these things and you will consistently improve your home brew with each and every batch.
Like any pursuit and especially with home brewing, the more you do it the better you will get. Take a look at any of the online communities and forums and you will see even very experienced home brewers asking questions, looking for information and sharing recipes. You never stop learning or improving your techniques.
When I first started making beer I came online and tried to glean whatever information I could to get little tips or tricks to make a better beer. The idea behind this article is to share a few of the things I have picked up along the way, by all means add your own tips at the bottom of the post.
15 Tips For The New Home Brewer
1. Let’s start off simple. Keep everything clean and sanitised. This is always a part of brewing that isn’t fun but is probably the most important thing you get right. All you need to worry about is keeping all you equipment that comes into contact with the wort or beer clean and sanitised. Having to pour a whole batch of home brew down the drain because it’s sour is the the last thing you want to do when you put so much time and effort into brewing it to begin with.
2. When I made my first batch of beer (that wasn’t a beer kit) it was with malt extract and I’m pretty sure the vast majority of new home brewers do the same too. This next tip I can give you is to take your brew pot off the heat when you add the malt extract, whether it’s syrup or dried extract. It can take a few minutes to get the extract in and leaving the heat on will more than likely scorch the bottom of your pot. You will naturally get caramelization on your brew pot but you don’t want a burnt sugar taste in your finished beer.
3. It’s happened to me and I’m sure it’s happened to you, be careful when bringing the wort to the boil. If it hasn’t happened to you then I’m sure you have read about boil overs. All I can say is they are not fun to clean up and dangerous too. Eliminate boil overs by keeping a spray bottle with water to hand so when the wort looks like it could boil over you can spray it and hopefully settle everything back down. Don’t be in a rush and moderate the heat to bring the wort to the boil slowly.
4. Get proper hop utilisation by boiling properly. It may seem like a long time but when a recipe or book says boil for 90 minutes or 60 minutes then do it. Make sure you have a good rolling boil, slightly more than simmering but not dangerously violent boiling. The reason you are boiling for this length of time is to achieve the correct bitterness. Take a look at this post on hop bitterness for a bit more information on this.
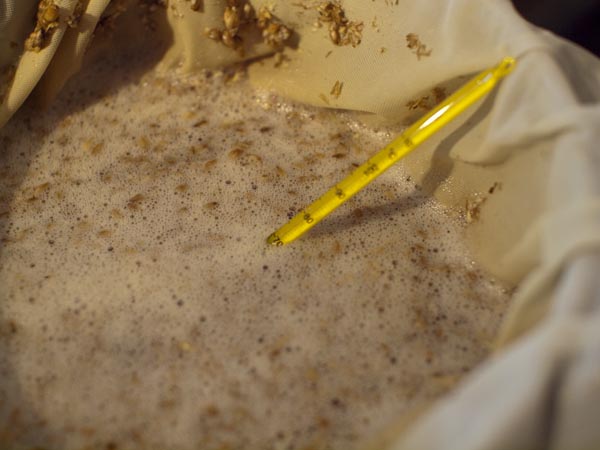
5. Control your fermentation temperature correctly. Your vial or sachet of yeast will almost always state an optimum fermentation temperature range. Try to stick to this as much as possible. The temperature of the wort during fermentation will not only affect the viability and behaviour of the yeast but also the taste and flavour of the finished beer. Big swings in temperature are also a bad idea, for example if the room gets cold at night then warm during the day. A simple way to regulate temperature if your house temperature varies a lot is to keep the fermentor in a small space like a cupboard because it doesn’t take a lot of energy to keep a smaller area at fermentation temperature. An important point to consider as well is that the temperature inside the fermenter is usually a couple of degrees warmer due to exothermic reactions of the yeast working than the ambient temperature. So 20°C ambient temperature may mean the beer in the fermenter is actually 22-23°C
6. Boil Full Size Batches whenever possible. I know this isn’t always possible when you start out, however brewing part of a beer then diluting to the desired final volume isn’t ideal. Smaller boil volumes followed by diluting down will slightly affect the hop utilisation, colour and character of the finished beer. You should try to switch to full batch boiling as soon as possible. When I started brewing I would boil only as much as my pot would fit then add around a quarter more tap water to get to the final brew volume. Switching to full boils as soon as I had the money was the best thing I did, both in terms of the taste of my home brew and being able to brew different styles of beer like really hoppy beers and darker beers, that weren’t really possible with smaller boil volumes
7. Practice Your Siphoning. Siphoning is a skill that takes time to master. You need to know how to siphon properly before you start siphoning your beer. If you let lots of air into the siphon and splash the beer around you can end up with oxidised beer. It might seem a trivial thing to do but practicing before hand without your hard crafted home brew is the best way.
8. Make a Yeast Starter. I have written about yeast starters before. They are particularly good for decreasing the lag time (the time it takes between pitching the yeast and fermentation). Having your wort sitting in the fermenter for a long time before fermentation starts increases the risks of bacteria gaining a foothold. A starter will mean this period is shortened and also means you are pitching healthier more viable yeast.
9. Experiment. There are so many different varieties of hops, malts and even fruits, vegetables and spices available to the home brewer. Use this diversity to the full and be creative actively seek out recipes that have vanilla in if you like vanilla. If you like a particular beer that uses a certain variety of hop substitute that hop into your beers instead of using something else. You can only improve as a home brewer by knowing your ingredients and testing them out.
10. Try Different Yeasts. When I started home brewing, I would say the first 6 or so batches of beer I made I used the same type of dry yeast. Then I found the fridge in the home brew shop with so many variates of yeast I didn’t know where to start. I picked up an information sheet that described the characteristics and have never looked back. Take a look at our yeast guide or the White Labs and Wyeast websites and you can see how many strains of yeast are available, each one will bring something different to the beer and improve your brewing no end.
11. Split Batches or Brew Double. Something that I am always experimenting like I said above is different ingredients like yeast. A way you can quickly build up an understanding of different ingredients is to split a brew length in half and pitch 2 different yeasts in each one. You can even split batches and hop them differently and compare results between different hop varieties. Understanding what each ingredient brings to the table helps you design better beers.
12. Read. Read. Read. This point is vitally important. Go out and get books like How To Brew by John Palmer, go on the forums and listen to the Brewing podcasts. You can pick something up and learn more about home brewing every day. People are always developing new techniques all the time and being able to learn these things will make you brew better beers.
13. Have Patience. I know it’s difficult but brewing takes time. Not only the length of time to brew and ferment your wort but also to carbonate and mature your home brew. I have often opened a bottle of beer too early because I was wasn’t patient enough to wait for it to mature. Brewing big beers like Barley Wines and Old Ales need patience. The only thing you can do to stop this habit is to brew more, that way you have always got something to be drinking.
14. Develop Your Own Recipes. Making a beer to a recipe is great, brewing a beer recipes you have spent time working in and researching is awesome. To begin with you might want to take a recipe and make modifications, put something you like in there. Eventually though I suggest you make a recipe from scratch because it’s quite possible nobody has done anything like it before. It’s truly unique. Get a book like Designing Great Beers by Ray Daniels and go from there.
15. Go off Style. This is another one about experimentation. Just because a style dictates that a Mild has to have a maximum of 25 IBU’s and top out at 1.038 OG. Make an imperial Mild, don’t be constrained by styles, you’re a home brewer and one of the things that makes home brewing great is you can do what you want. Push the limits.
So there we have 15 tips to help you on your way. Really though if you want to be a better home brew then just make something you like drinking and have fun. If you can make something that you completely love drinking yourself regardless of whether anyone else likes it, you will be the best brewer in the world.


A few more…
You need a wort chiller if you’re doing 5gl boils outside.
Brew-in-a-bag is the easiest and cheapest way to move to full-grain brewing and works just fantastic.
A dash of irish moss at 15min before flame-out will help everything settle out of your wort/bear, both in the kettle as well as the fermenter. Firms up trub when fermenting is over.
Liquid yeast from Wyeast or White Labs precludes the yeast starter process. Clip and pour to pitch.
Get a 8gl boil pot for 5gl batches, start with 6.5gl to boil. 6 or 6.5gl carboys for fermenting and you can get by without a blow-off tube – an airlock is fine. Gives enough headspace for fermenting.
You can double your production by adding an additional pot and burner. It’s a little more work, but you’re doing all the steps anyway, just do them twice. It’s still a 4 hour brew day.
Ales are much quicker to make ready than lagers, and you don’t need so much refrigeration.
An upright freezer with a temp controller makes a perfect fermenting chamber – cheap to buy and run, your beers come out perfect every time, and you can cold-crash your ales before packaging to keg or bottle.
22oz bottles reduce the hassle of bottling vs. a lot of 12’s. You open one and it pours for 2 people, or two beers. A 5gl batch will make 25-26 ‘bombers’, or about 50 beers (not pints).
Boil overs happen – brew out doors and clean up is done with a garden hose. LOL
Great tips. I do like Brew in a bag as a way to get into all grain.